


(Note: This guide will soon be updated to include new boundary type, for now you can read about Auto Boundaries which fire every x frames; based on your set wait time)
Automatic Boundaries Setup!
Automatic Boundaries takes what was once a complicated task which required you to learn a lot of parameters in script calls and place them inside common events or whatever method you went for and spam the script call with a wait timer. That method is history! (But still works)
Setting up Boundaries, getting them to run, and setting up the events to be spawned on boundaries has been simplified!
Follow the instructions below for quick setup! See the Help Section below this section for further information on plugin commands.
First lets set up an odd-ball boundary. We'll go for a 3x3 Spawn Boundary around the player with a 5x5 Unspawn Boundary around the player. This will make it so as the player moves from tile to tile the player will always be surrounded by events which unspawn as the player moves away from them. Combining boundaries like these with saved boundary events would allow you to do a lot of different things as you can theoretically have an event on every/any valid passable tile, no matter the size of your map.
Lets take a look at the new method of setting up boundaries!
First we Create a Boundary and Add an AutoHandler to it.
Lets start with the 3x3 'FillIn' Boundary:
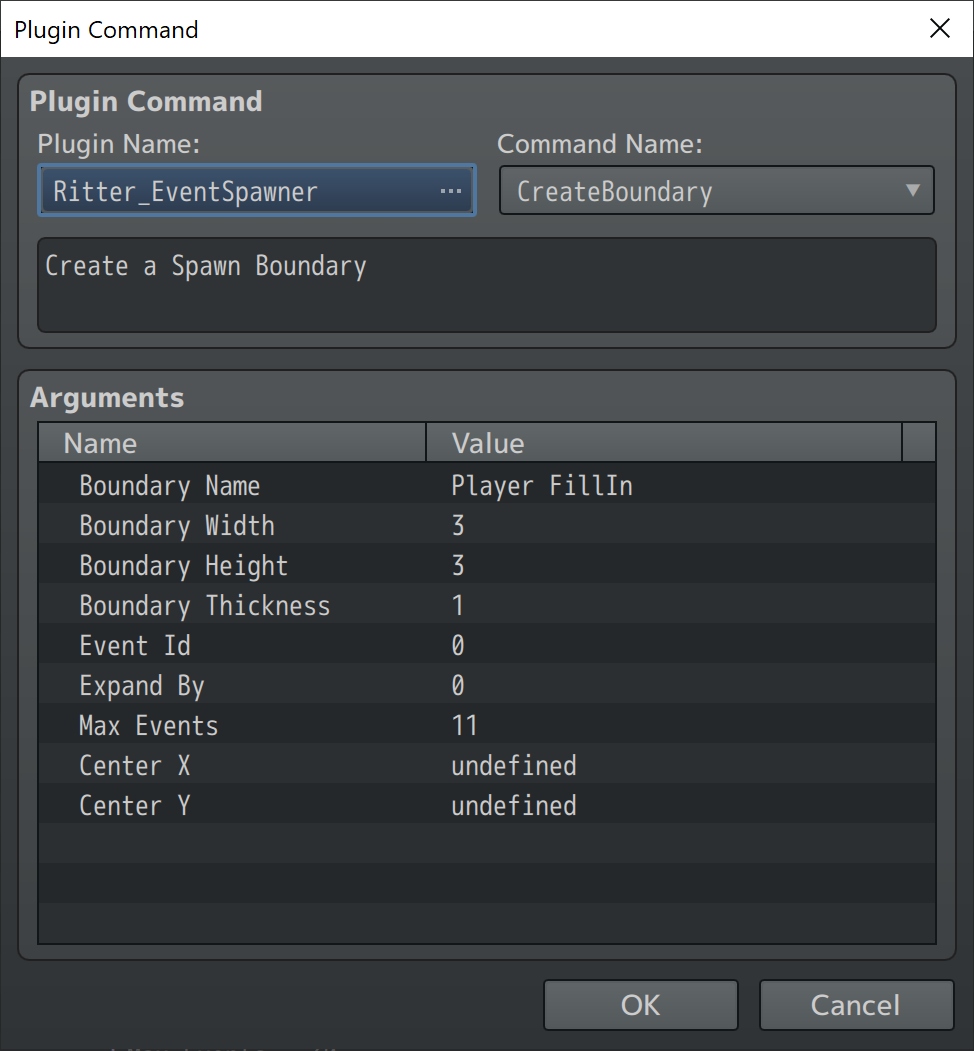
Now we have a Boundary Named "Player FillIn" that is 3x3 around the player (Event Id 0) which can spawn 11 events. I like to give a little extra room here than a 3x3 requires to ensure proper wiggle room.
Now that we have our Boundary Created lets add an Auto Handler to it! We'll use the Boundary Name we just created above for this plugin command as shown below.
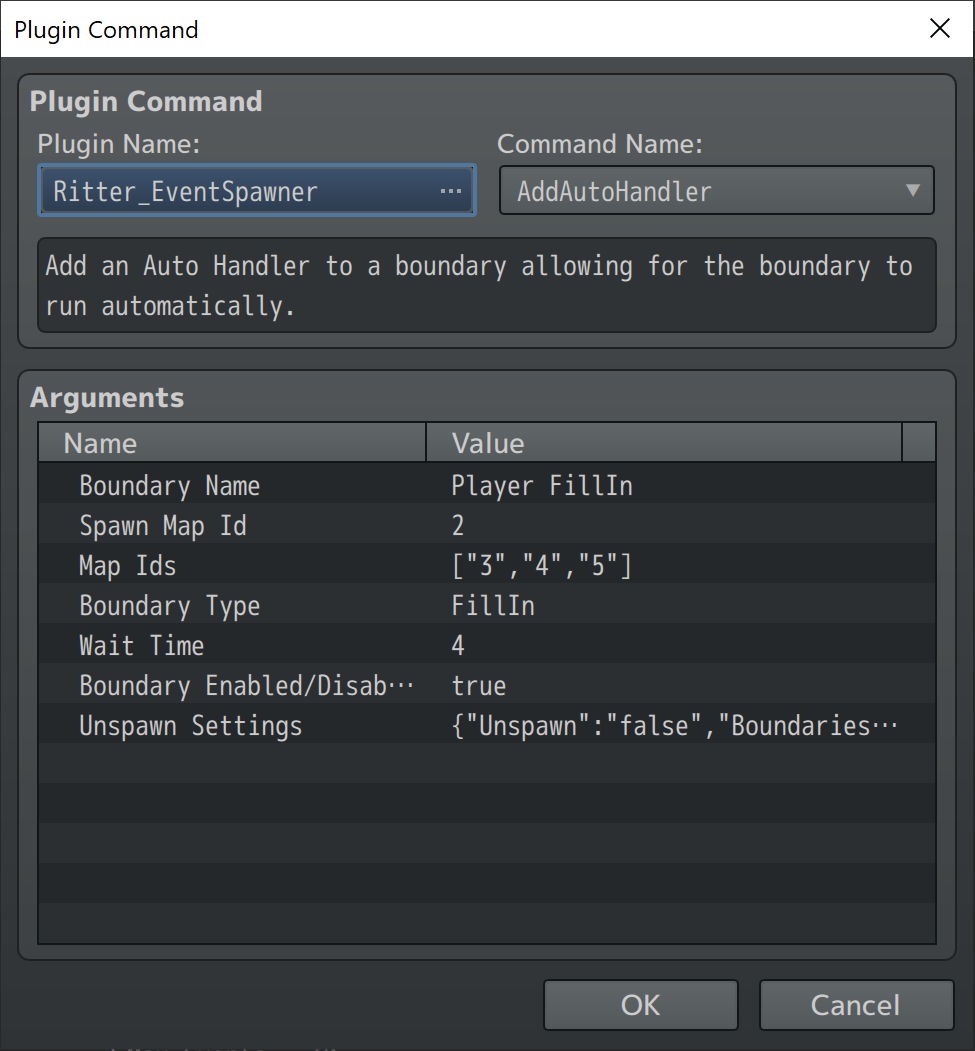
Now our Boundary will run automatically when on maps 3, 4, and 5. The boundary will attempt to spawn an event on every open tile within the 3x3 Boundary every 4 frames and it's enabled by default.
Next lets set up an Unspawn Boundary which can unspawn events on a boundary 1 tile outside of our spawn boundary. So as the player walks the events he/she walks away from will unspawn.
For this we'll go with a 5x5 "UnspawnOn" Boundary around the player.
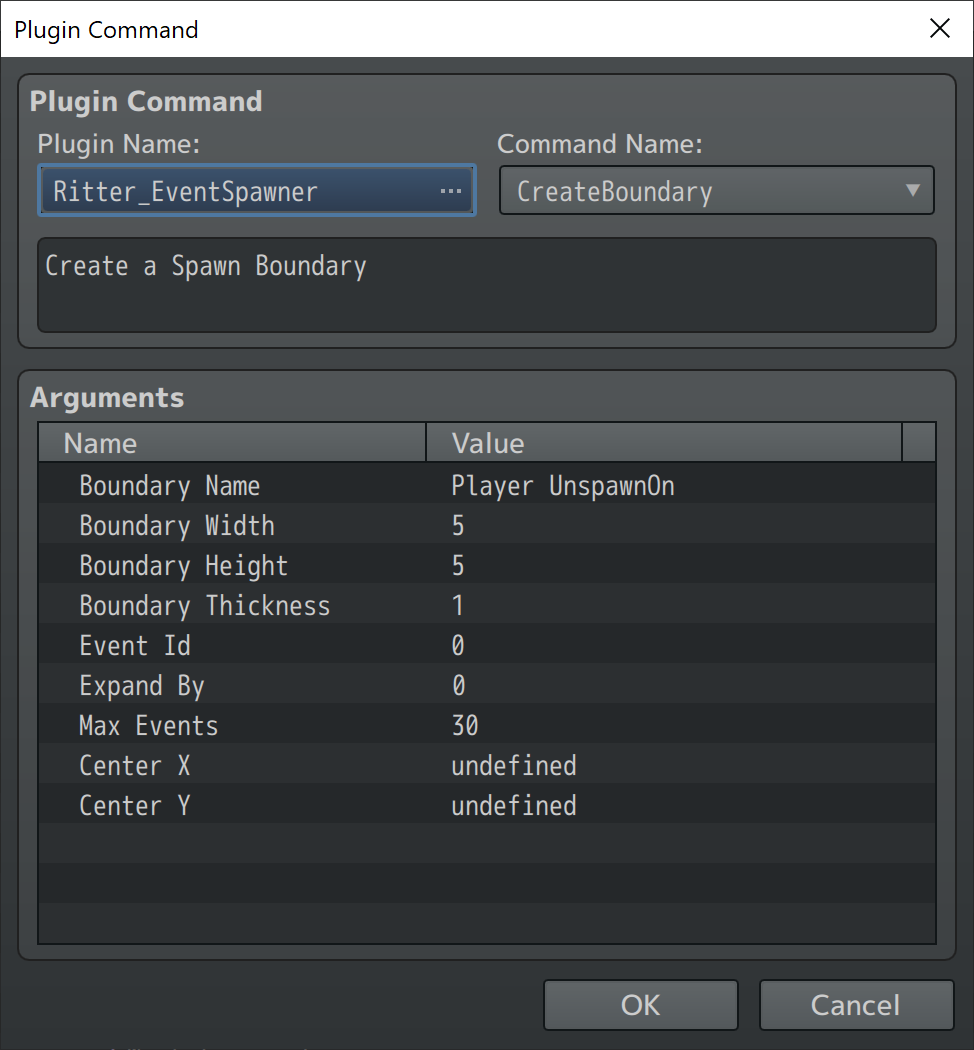
You may notice Max Events 30 is set, 30 is the default and max events is not used by unspawn boundaries so any value there is fine.
Now lets add our Auto Handler for the 'Player UnspawnOn' Boundary.
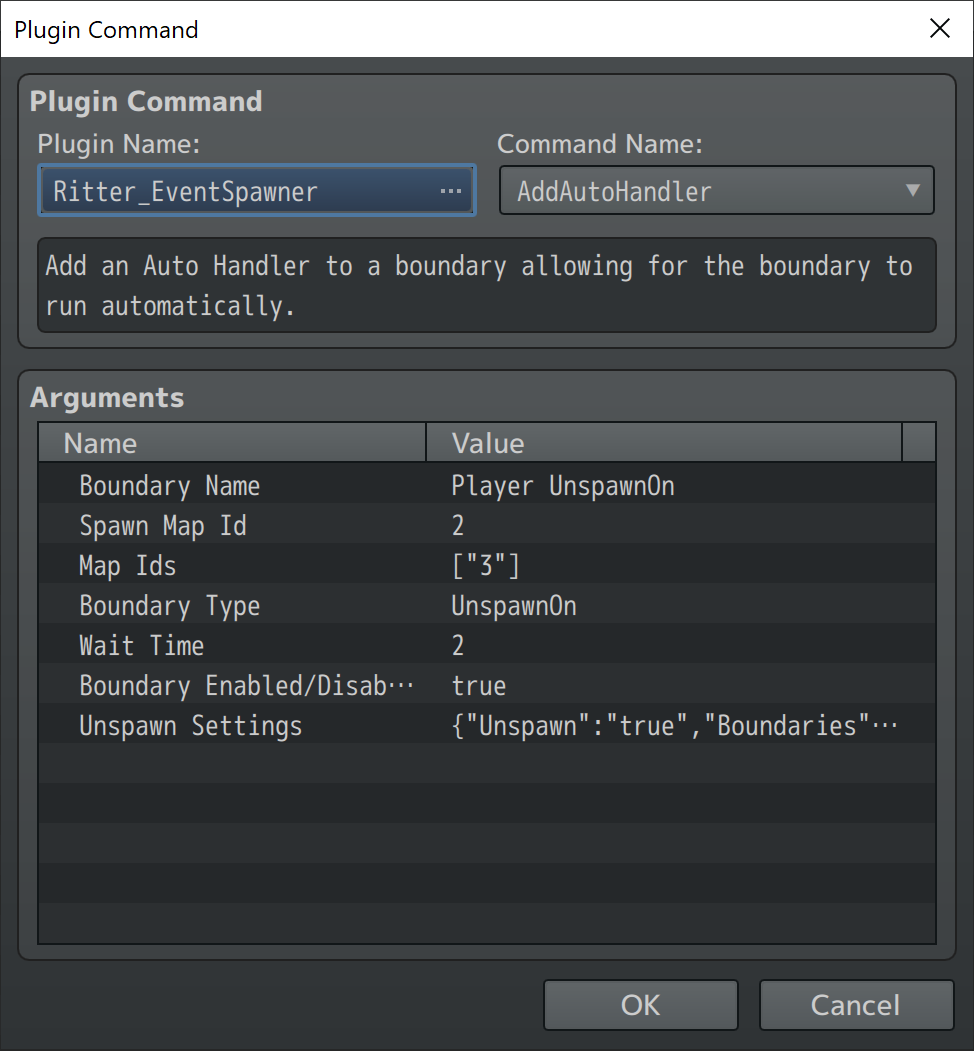
Spawn Map Id is not needed here but I typically provide any preloaded spawn map just to be proper.
Before we get into a summary of what we did there's the Unspawn Settings to look into for Auto Handler.
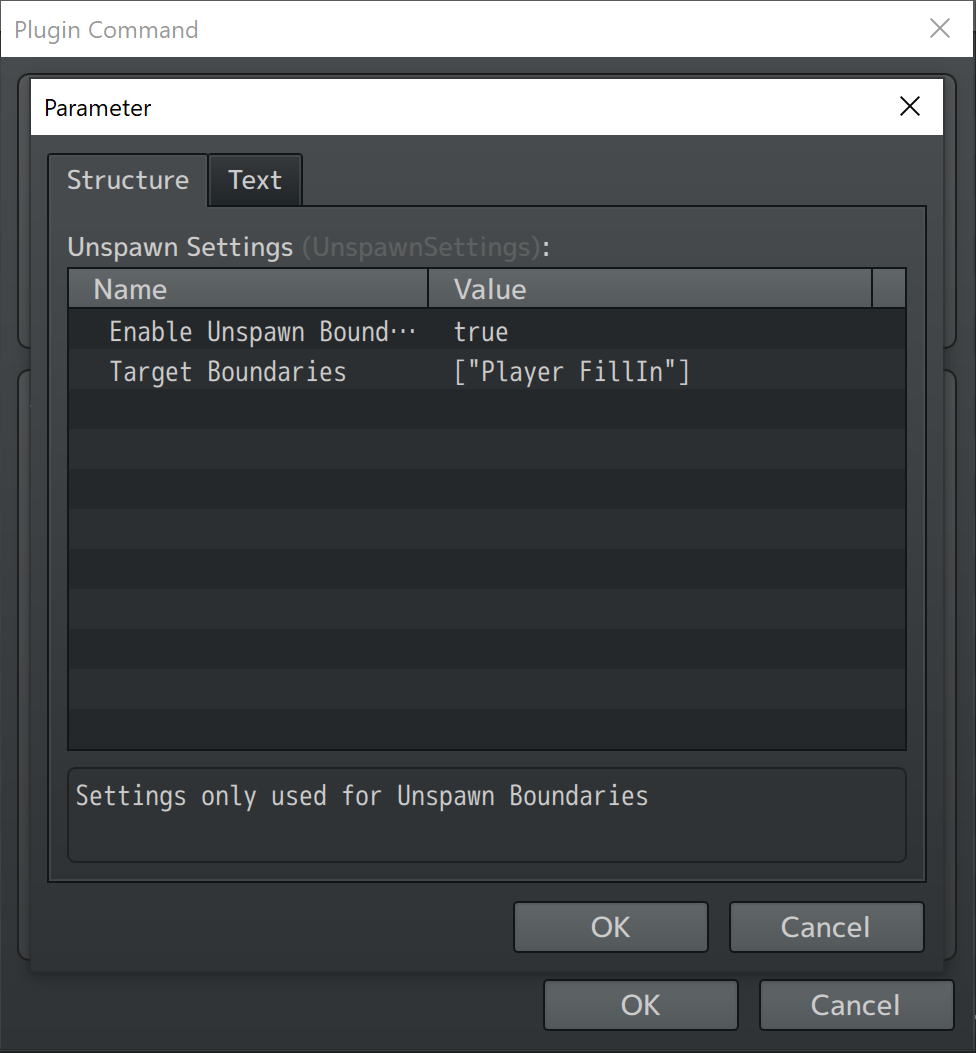
In unspawn settings if the boundary is to be enabled as an Unspawn Boundary just Enable it in the settings then specify target boundaries this unspawn boundary is allowed to unspawn events from. If you spawn events on a boundary named "Player FillIn" then you must include "Player FillIn" on this list for unspawns if you want the boundary to unspawn events from that boundary.
Now we have a boundary which spawns events in a 3x3 boundary around the player named "Player FillIn" and a 5x5 Unspawn Boundary around the player which unspawns any event which was spawned by boundary "Player FillIn" that passes into a tile on the boundary.
Now that we have our boundaries set up it's time to set up events to spawn on the boundary!
Lets go to our spawn map and create an event with the Plugin Command 'BoundaryEventSetup' on its first page.
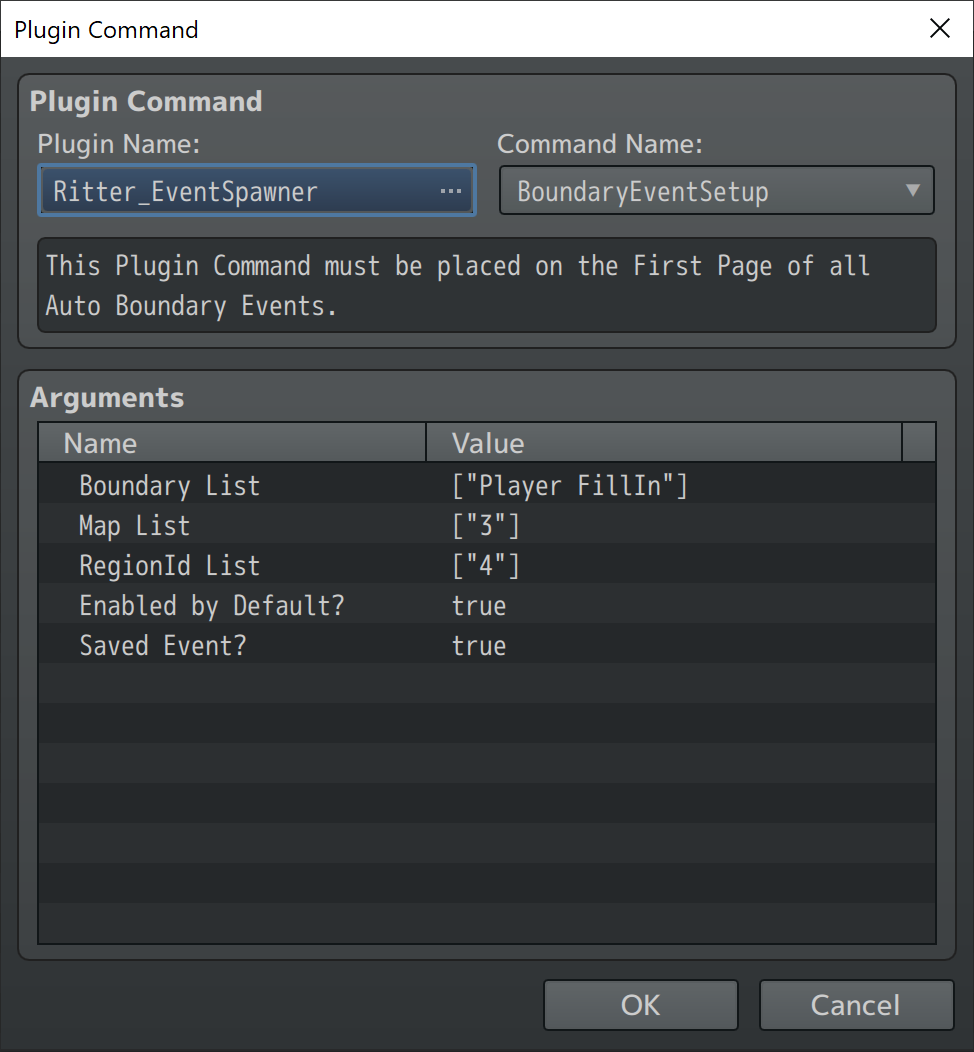
Now that we have this plugin command on the first page of an event on Spawn Map 2 (The Spawn Map we specified when we created our spawn boundary). Our boundary will be able to see it and spawn it if it's enabled and a valid tile is found.
For more information on this plugin command see the Help Section below.
*Note: This plugin command does not run any code so it will not interfere with your event. This plugin command is parsed by the spawners boundary system code for data. It functions about the same as a Comment*
After you set up your Boundary Events on the Spawn Map you should be good to go.
Simply test your game and run the event which creates the boundaries and adds the auto handlers. If your boundaries are enabled by default, you are on a valid mapId, you have valid RegionIds nearby, and if your events you created are enabled by default, then you should see your events spawning around the player and unspawning as you walk away from them.
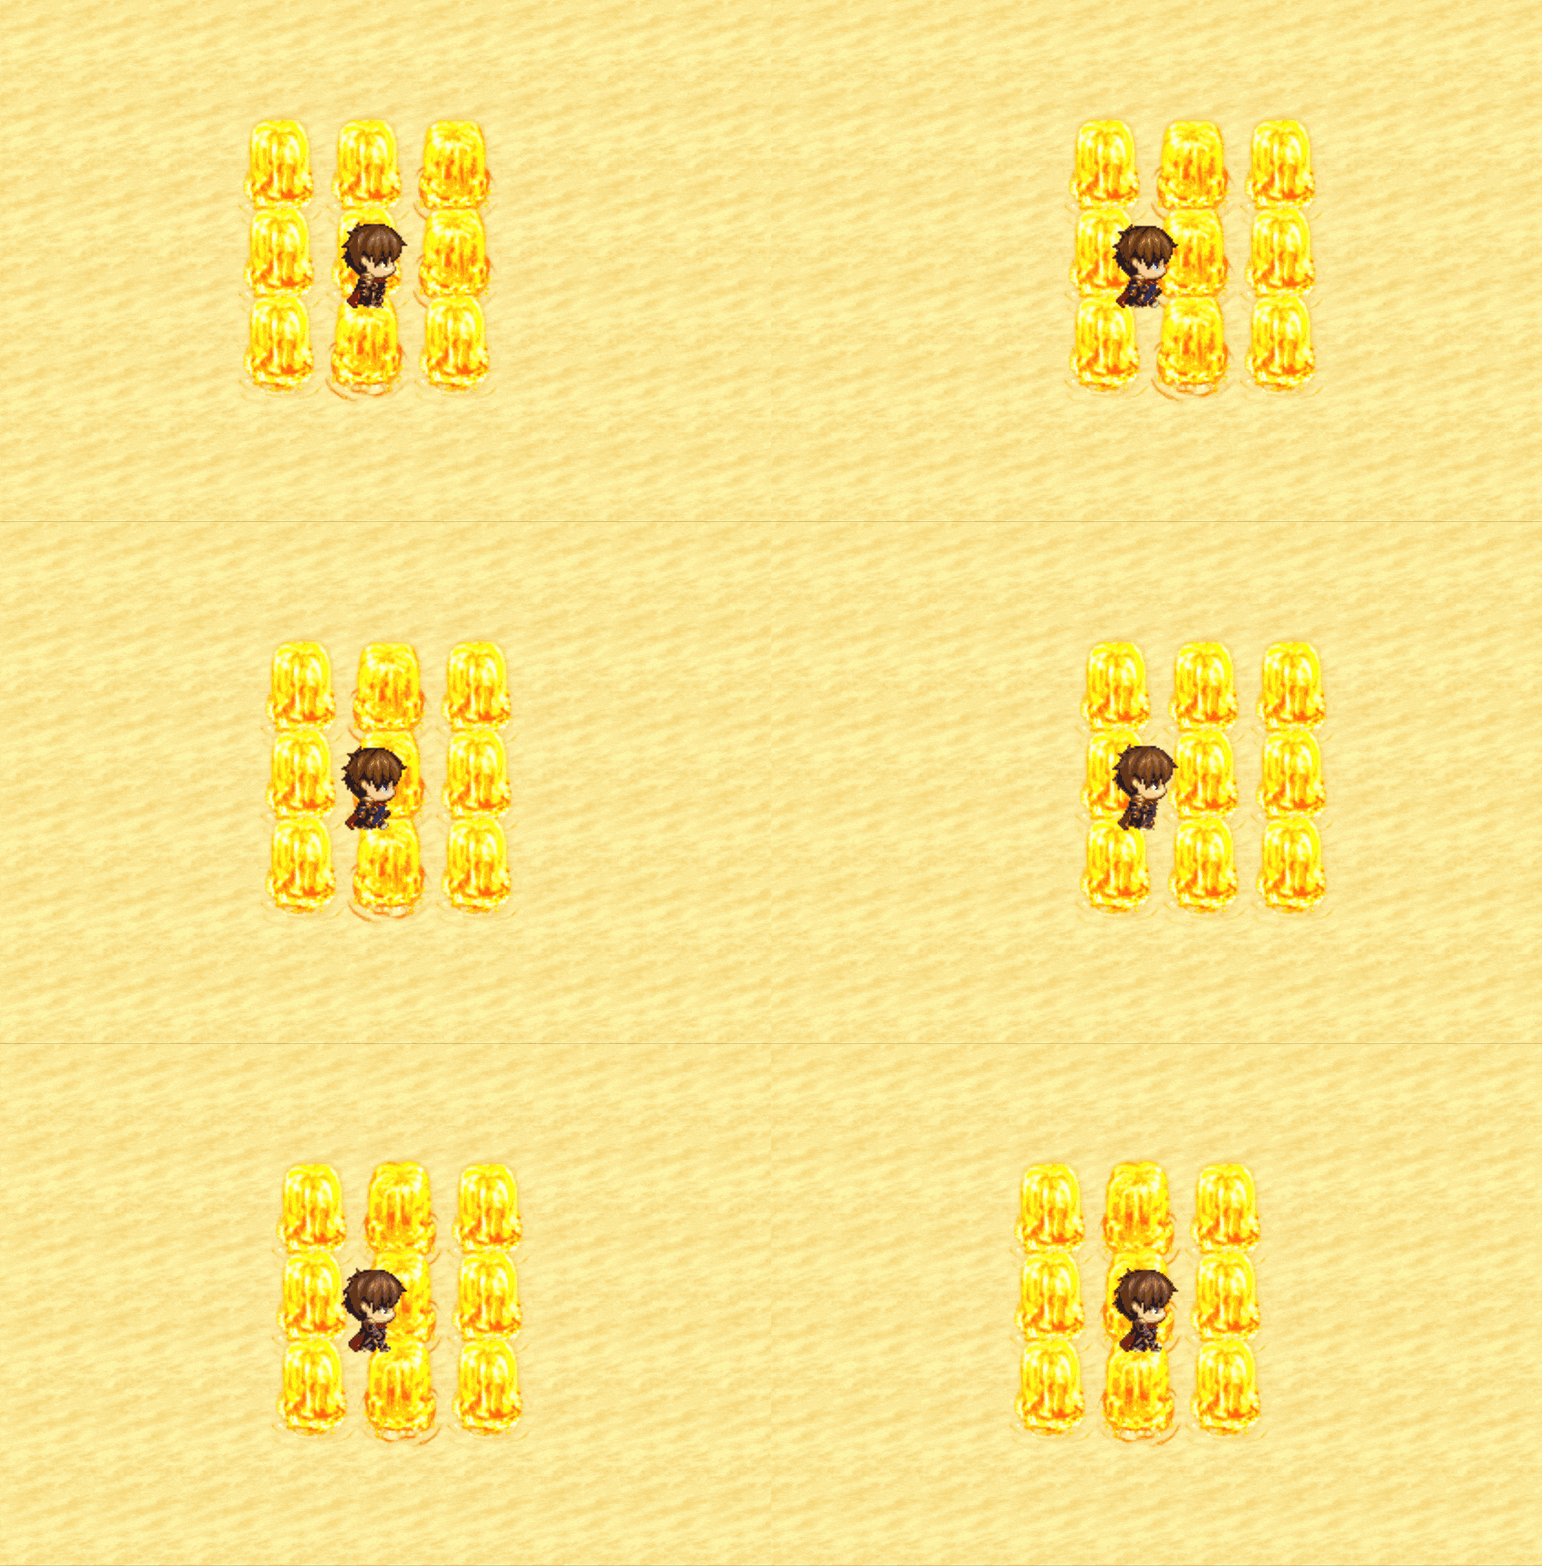
Events are visible so you can see what's happening. For a boundary like this you may want them invisible but allow player to interact in some way with them. The sky's the limit!