Indie game storeFree gamesFun gamesHorror games
Game developmentAssetsComics
SalesBundles
Jobs
TagsGame Engines

MaryAnneEtte Definitive 2.5D simulated graphics with shaders!

A topic by silvercricket created 62 days ago Views: 310 Replies: 18
Viewing posts 1 to 19
(1 edit)

I've become determined to do something I haven't been able to find a guide for or a free plugin for myself, in an attempt to make my game pop. I'll be posting my progress here both to chronicle my developments, as well as possibly help anyone else who maybe wants to achieve a similar effect to really boost the production quality of their game maker game without demanding a lot of processing power. Shader powered graphics through normal maps generated by drawing solid objects onto a surface that surface then manipulated, drawn into a shader that creates a normal map to pull from the object's texture to make it appear as though its bending out from the background... 

I will post pictures shortly.
(1 edit)

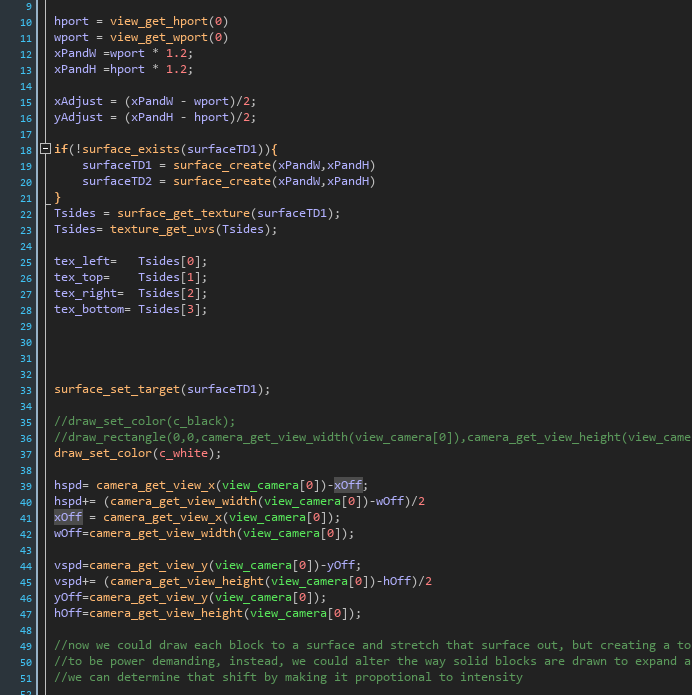
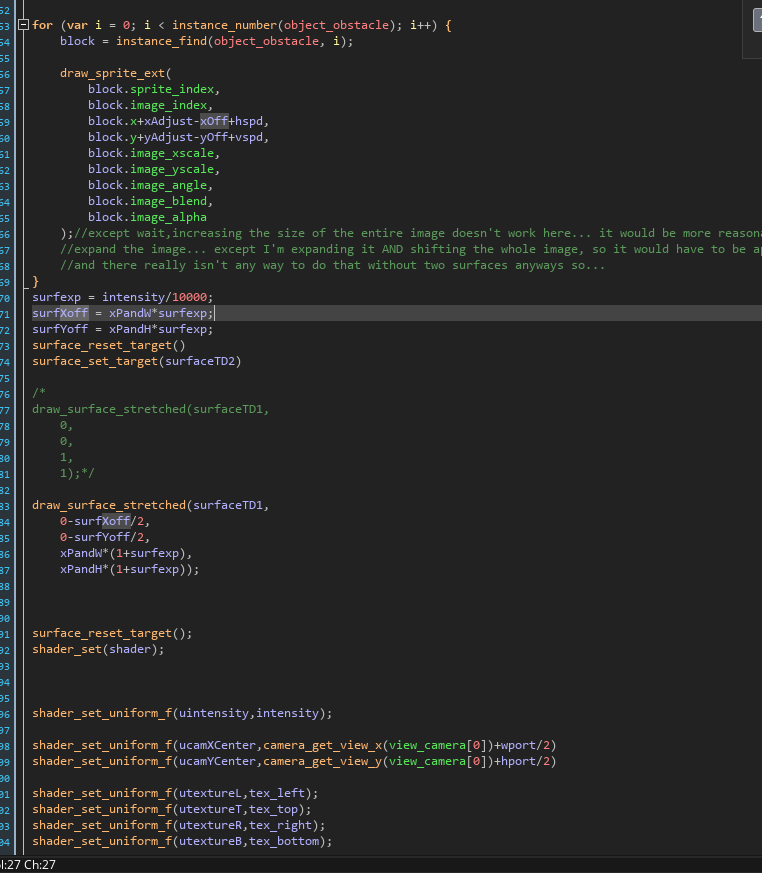
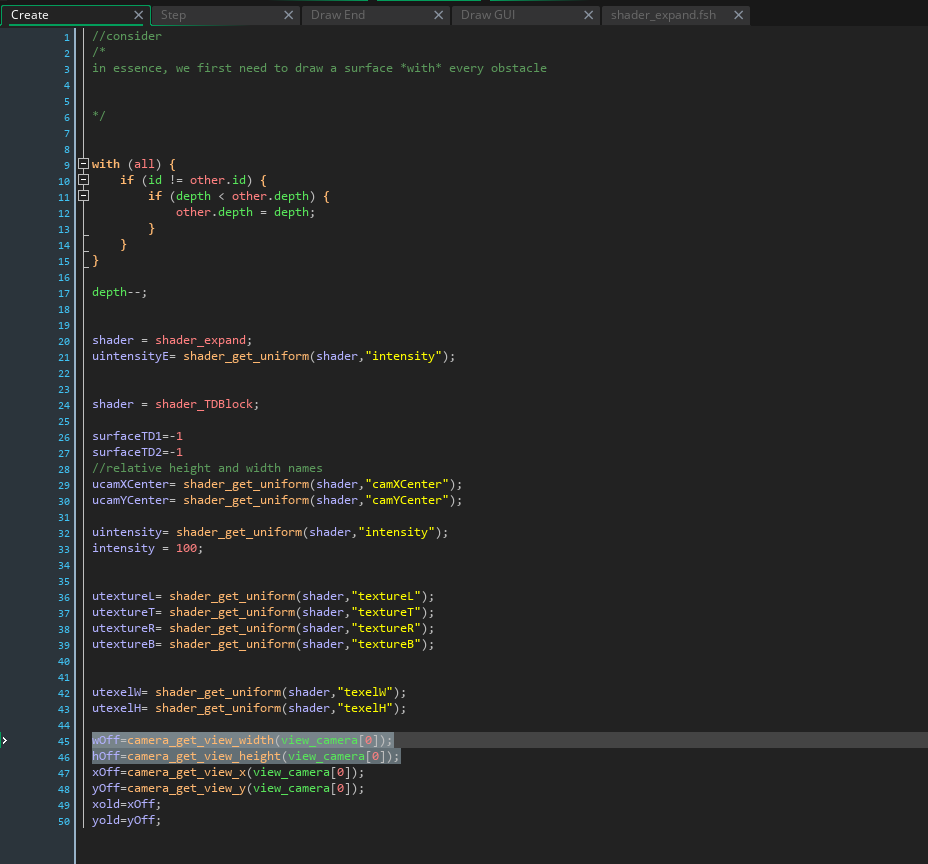
below are each of the events as well as a short step by step explanation of the process so far.

whenever a room with a solid surface is loaded, a global object creates this object_TDS (three dimensional system). It sets itself above every other object in the room and then calls for a lot of different values but the most important ones right now are shader_TDBlock, the surfaces, and intensity. 

beneath that wOff and everything beneath it is also important for the processing, image shifting and such.


two surfaces are drawn, the size of the camera, then explaned by 20%

values are collected and used to create values that adjust based on the location, speed, and size of the camera, as it shifts.


a specific type of object meant to act as a hard surface is drawn across the surface,  adjusted to align with where the camera is.

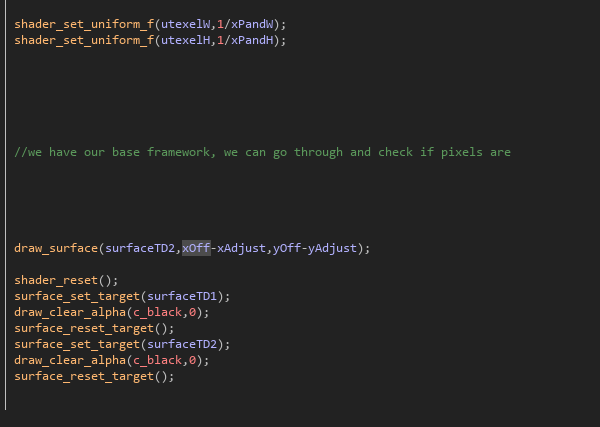
the surface is then expanded on the second surface and run through a shader, with several values being loaded.

the last value loaded into the shader is important, it determines what the texel size is (that's a texture pixel, since shaders don't know what pixel size is, and operate on decimal values.) 

(1 edit)

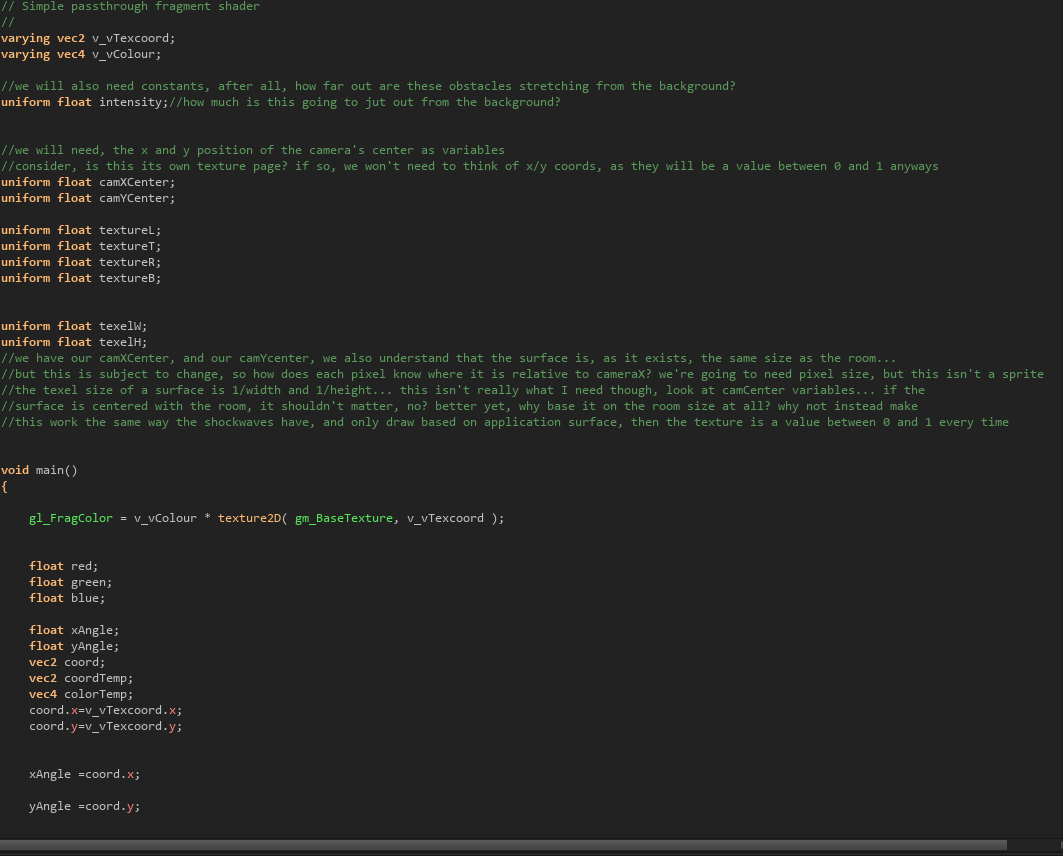
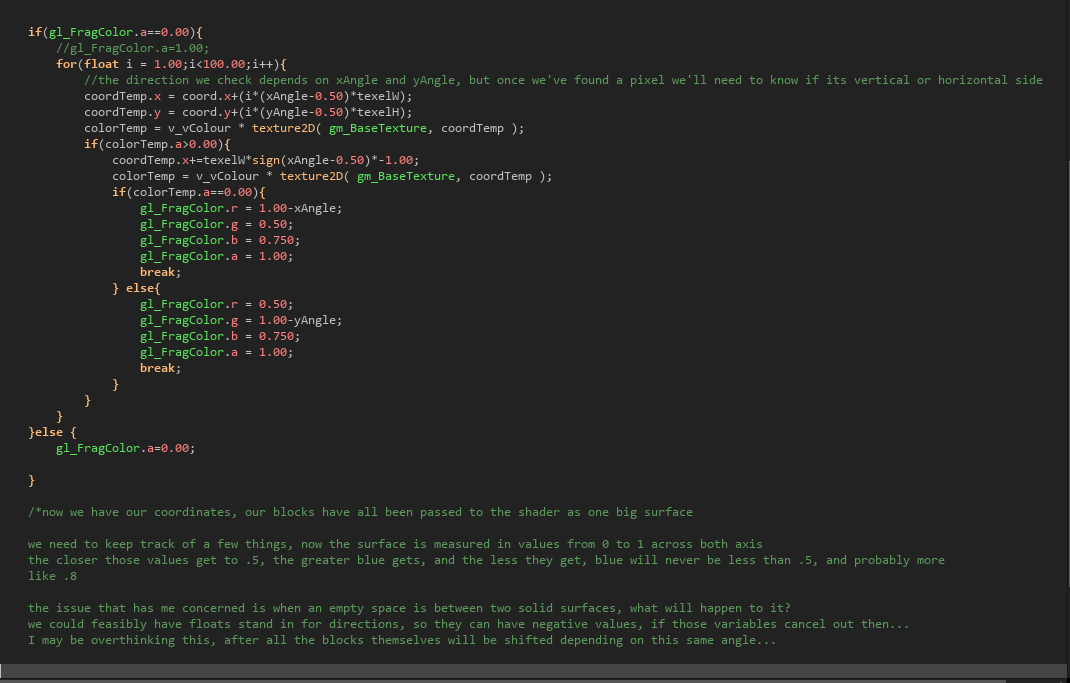
first part of the shader, a lot of values loaded in, but just texelH, texelW, and intensity do anything right now. the values are passed into

coord.x and coord.y, initially xAngle and yAngle were modified , now they just feel redundant... 

And here is where the magic happens, so far: 


pixels check if, based on their location relative to the center of the surface, if they're on the right, they're facing left, or vice versa, same as up and down, and creating a slant of normal map values to color the surrounding pixels relative to the camera's view to create the illusion of true depth!

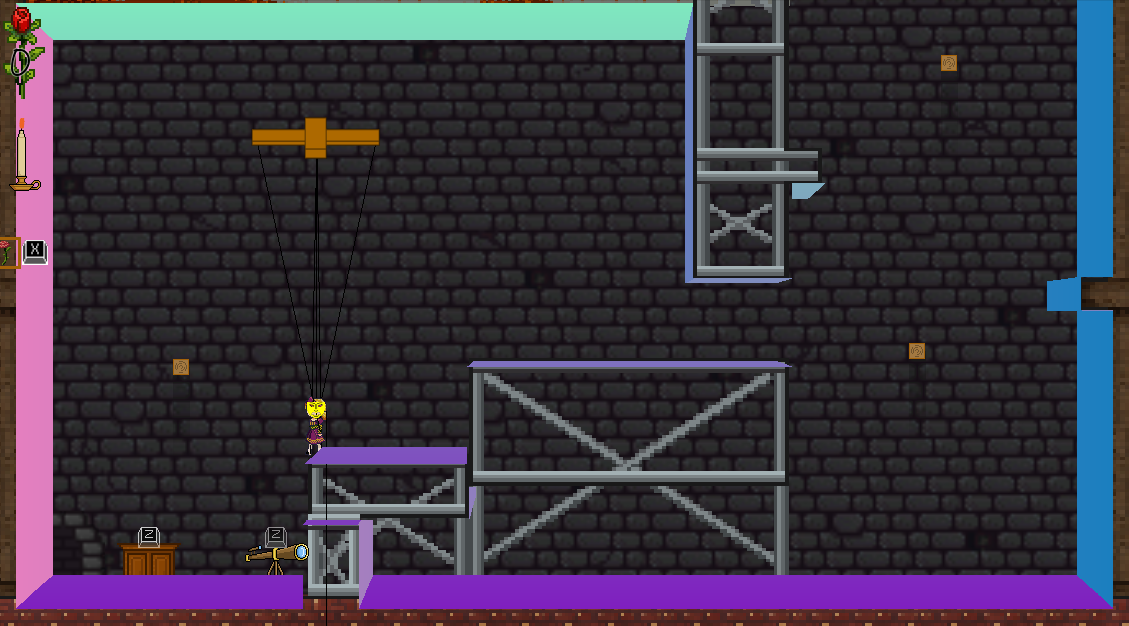
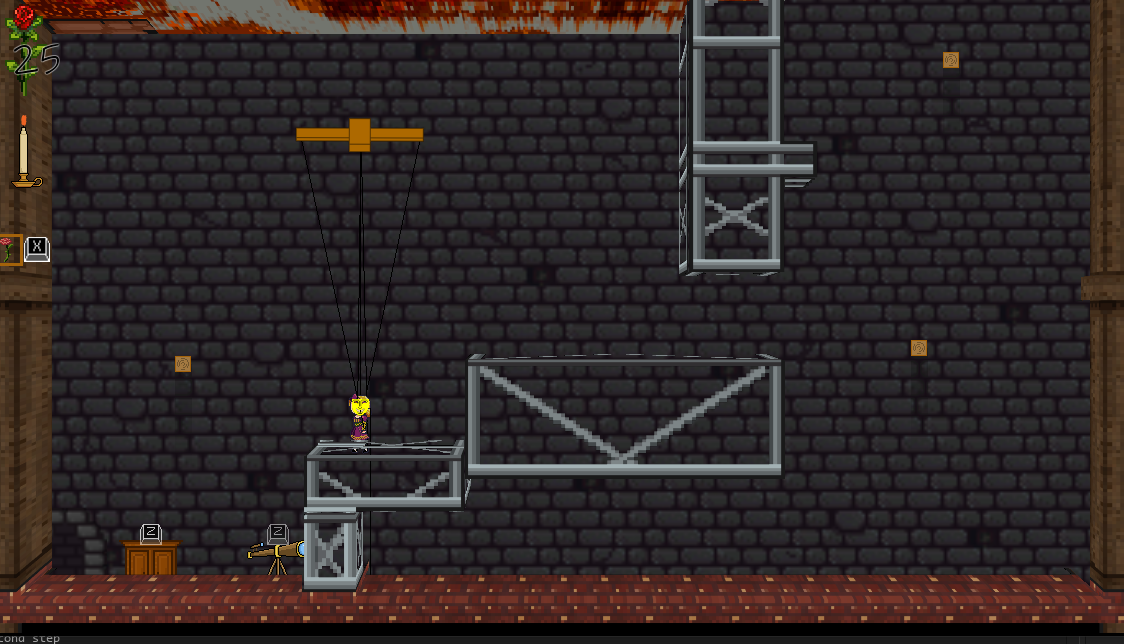
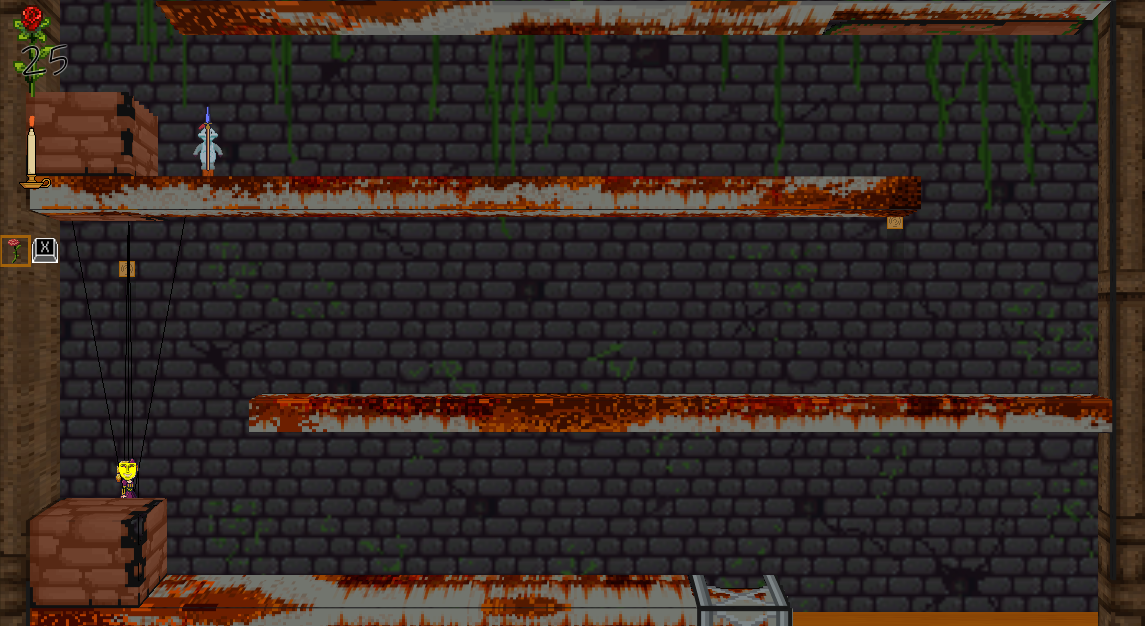
This is where it ends for now, but before I go I'll leave you guys with some images of how it currently looks:


Update, made some major progress, still have things looking a bit rough, but I also ironed out a lot of the "fluff"

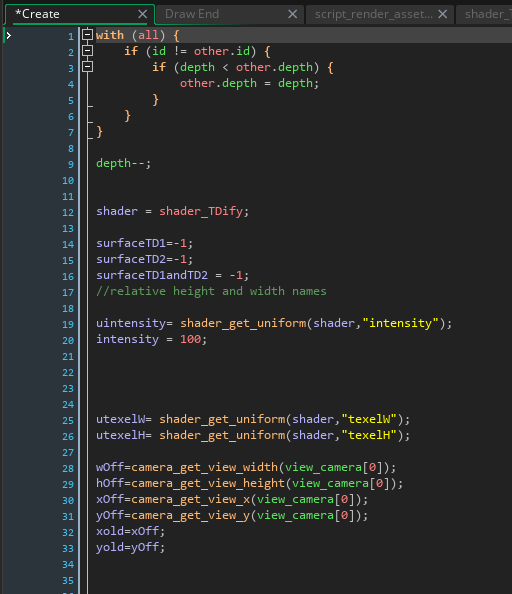
first, going over the create event as it exists now: 

a new shader based on the last one acts as the entire process for converting 2D graphics into 3D, currently only relying on 3 simple values, texelwidth/height and intensity, (which represents the level of depth an object has).

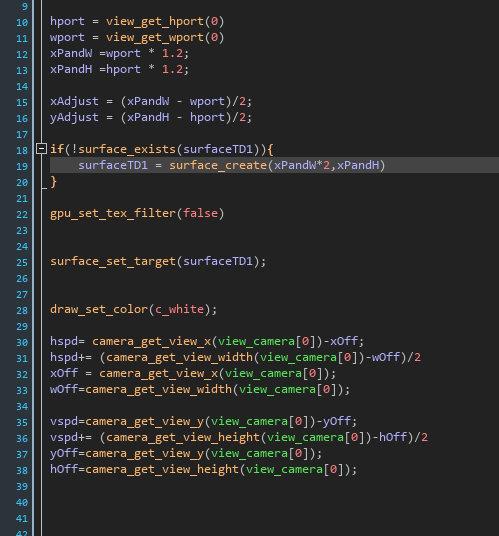
the first major change is how the draw event works, a single surface is loaded which has all of the textures and assets drawn onto it, these act in large part as the resources the shader will actually use:


here I've set up the values for our camera position, as well as primed the surface for the first portion of our texture map.

(1 edit)

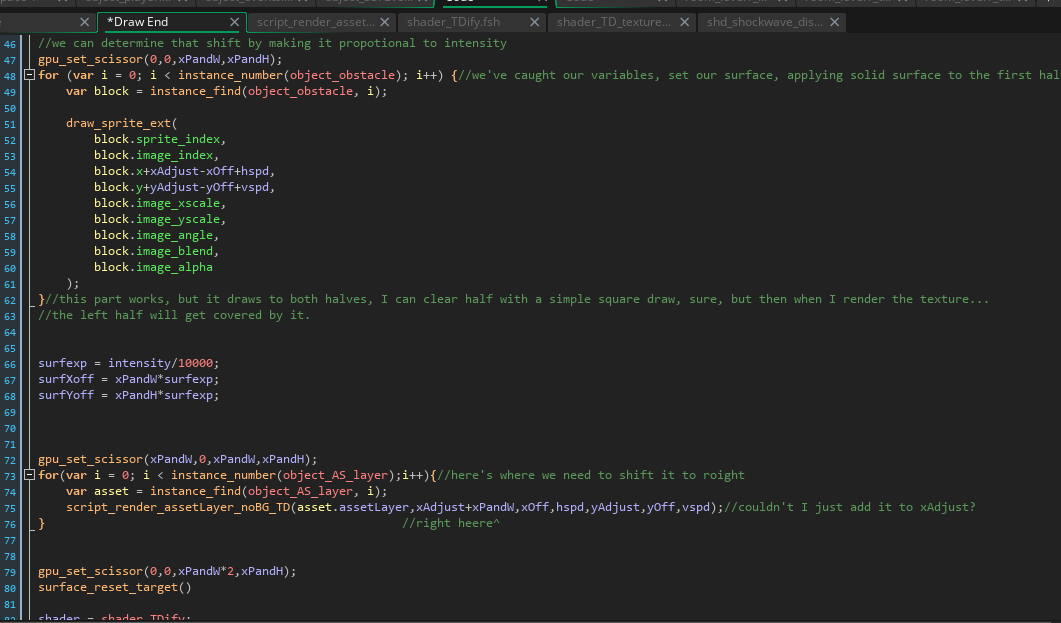
next we make use of a built in function to limit the range that textures can be drawn to, before drawing our solid surfaces, just like last time: 


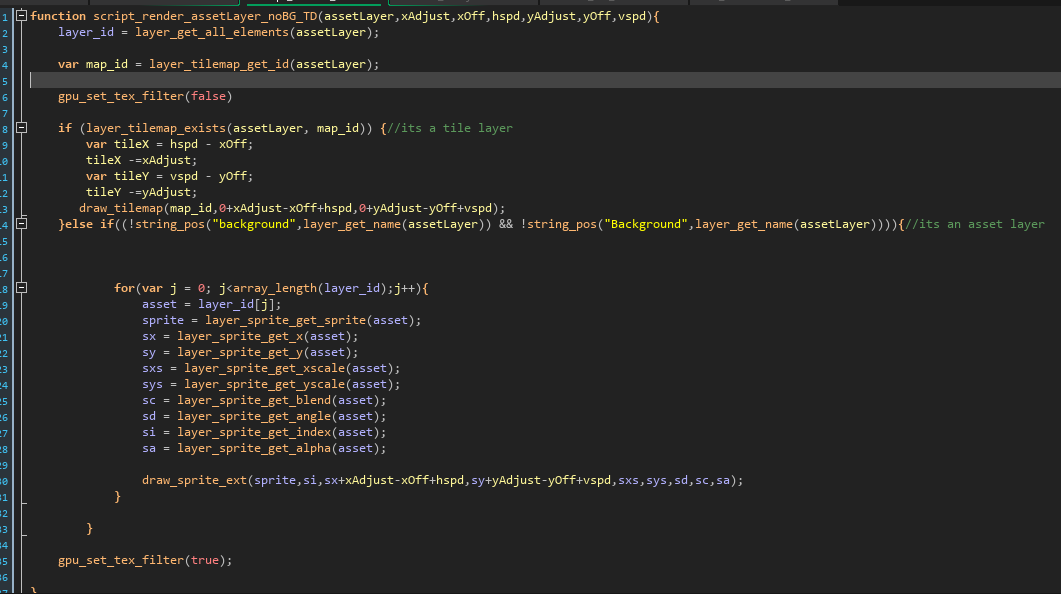
the second for loop is new however it runs a custom function which renders textures from all the sprite/tile layers in the currently loaded room onto the second half of the texture page. 

here's that function in full form, every one of these asset layers is stored inside an object object_AS_layer, one for each sprite/tile layer currently loaded in the room. 


back to the draw_end event, 


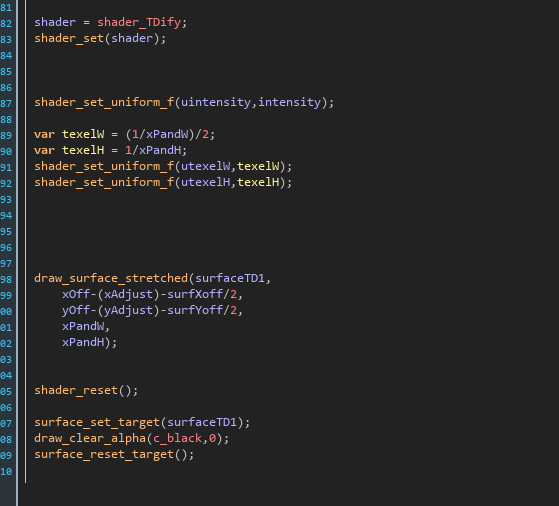
our surface target is now reset, our values loaded into our shader, and then that surface is drawn onto the application surface before being cleared.

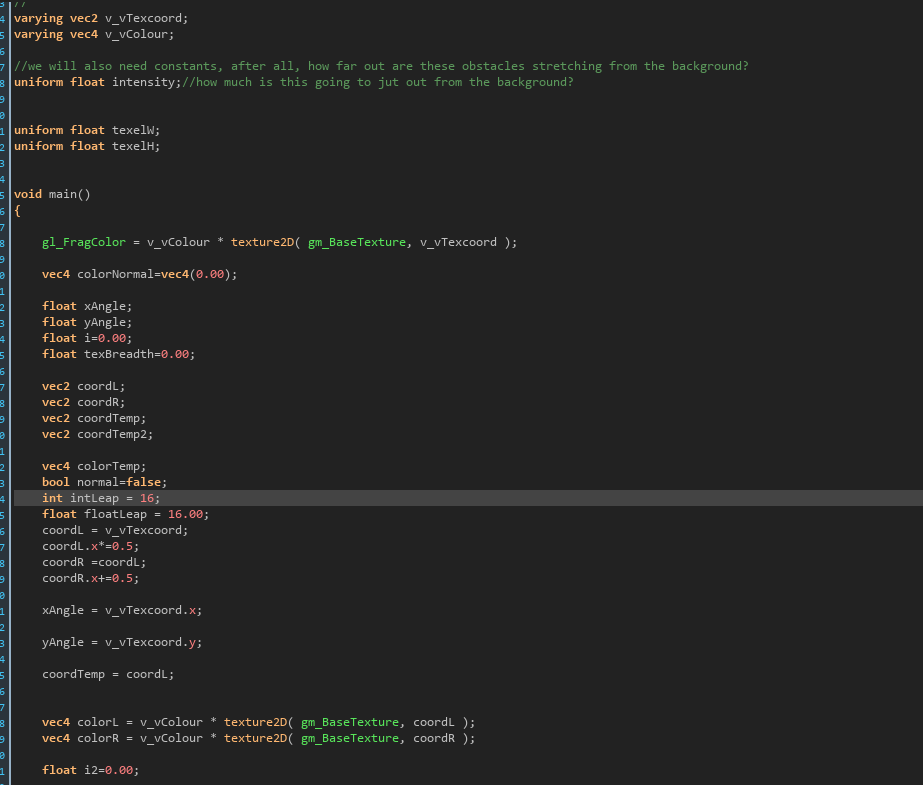
The shader itself is where the bulk of the change has gone, and I will try my best to explain every step of the process... 

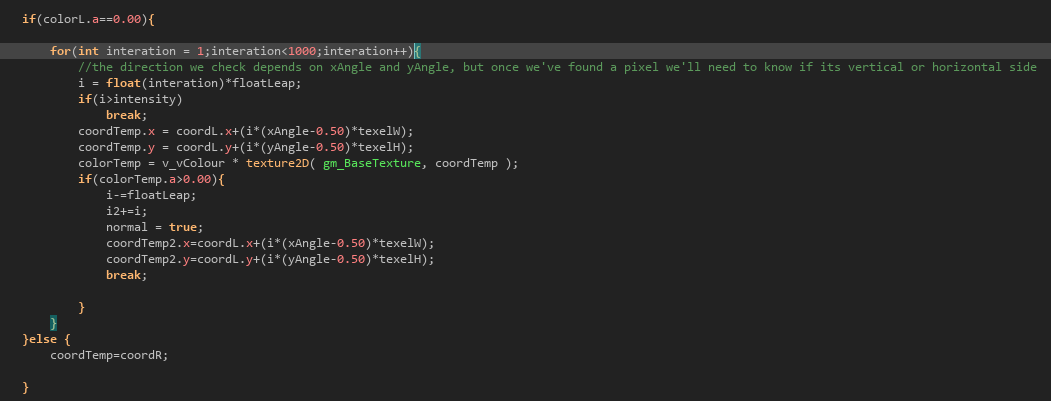
our constants and variables are set, most significant this time around are coordL coordR (since the different texture resources are loaded onto different fields of the texture page we're drawing from, coordL is the left half, and coordR is the right half). also important is intLeap and floatLeap, which will be used for traversing for loops later on when we do ray tracing. 

Our next step similar to last time checks if the current pixel is black, and if not, loads from the second half of the texture page, which would give us the textures we loaded in before, meaning that the solid surface is pulling directly from the texture to load the image outright. 

However this time around the check skips by 16 in the inverse direction the 3D images will be generated, when it finds a a solid surface in that direction, it steps back by 16 texels, records the point to coordTemp2, and sets normal to true, indicating that this pixel will be acting as part of a generated normal map. 

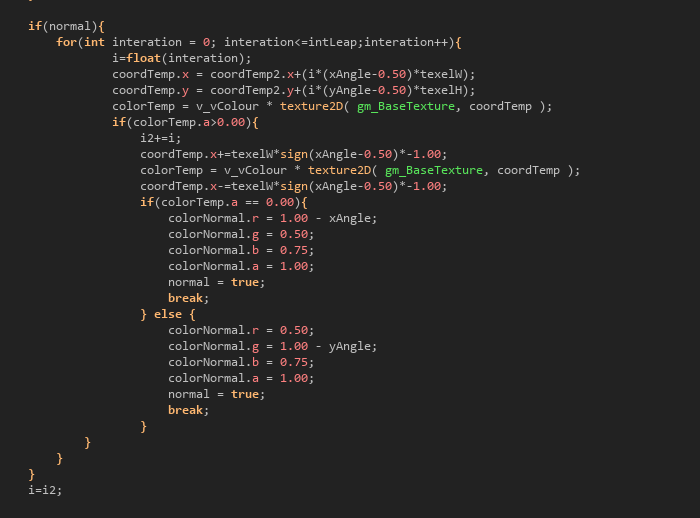
here there's something more similar to what we had last time, simply finding the first pixel along that ray that exists on a solid surface, and then storing those color values on a 4D vector. 

this next part is where a lot of the new complexity comes in. 

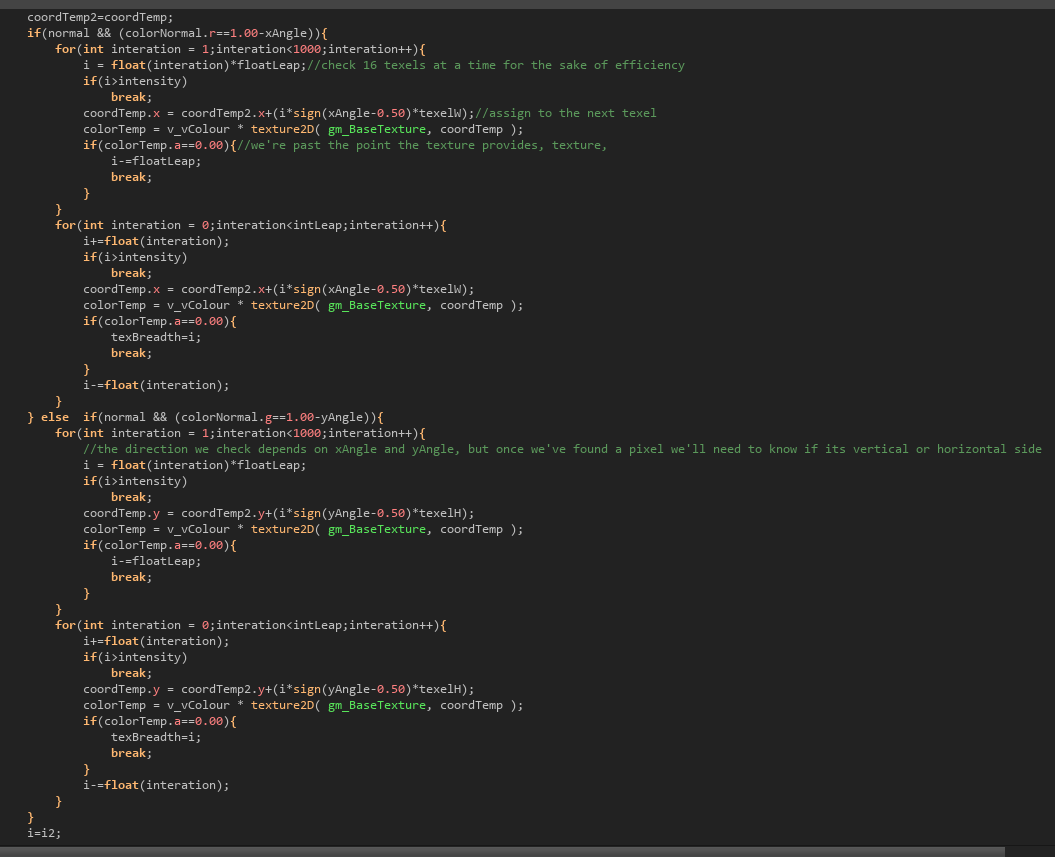
these for loops inside an if else statement measure either the width or height of the texture before it runs out, if there's plenty of texture it will simply copy until whatever number intensity was set to has been reached, otherwise, the number of texel distance is recorded on a float variable called texBreadth.

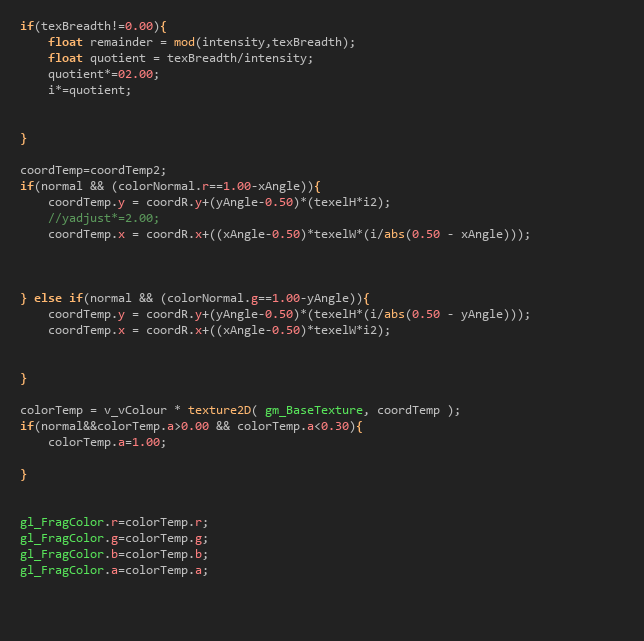
next the shader checks it texBreadth has been set to a value other than its default, and if so sets the reach for the texture to pull from a distance shorter, proportional to how short texBreadth is compared to intensity


then those values finally are used to pull from the right half of the texture page, exactly which pixel needs to be used to fill in the texture at that point.

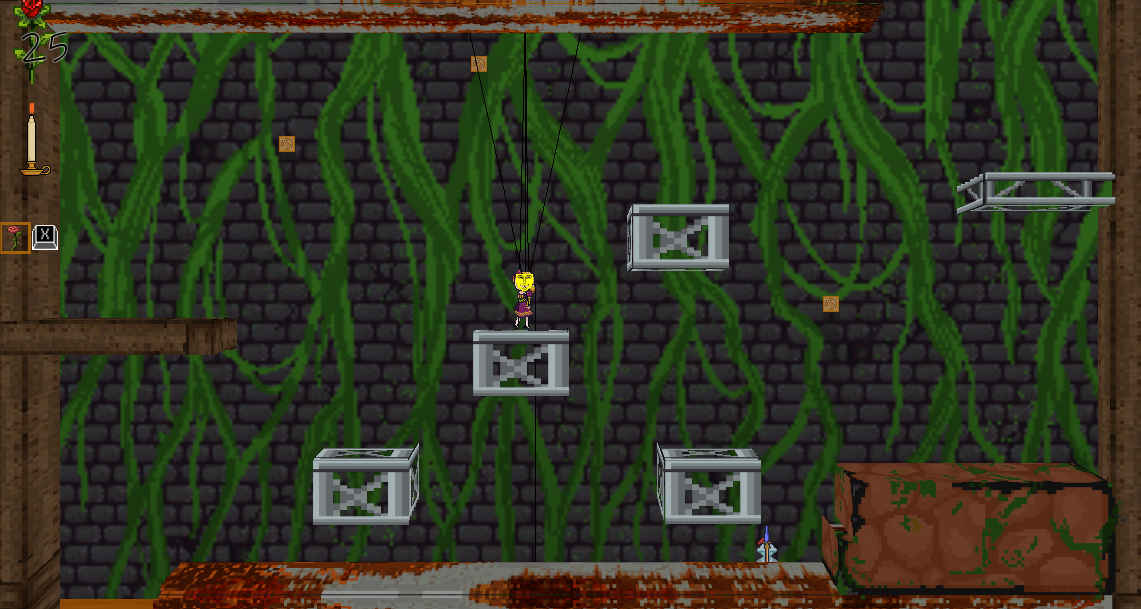
as for how it looks, well, its still very rough, and only accounts for rectangular surfaces but:


Every now and then a smaller surface will have a little "wing" or something similar:

this notably happens on smaller surfaces most often, it might be due to a bug in my shader, but I also suspect its an issue with smaller surfaces interacting with that rule for depth, and as this shader exists currently, it can't account for objects of differing depth. Still, I'll keep posting and developing. That's all for now!