

Hello and welcome to my first Aseprite tutorial! Aseprite is a popular pixel art software that I and many other pixel artists use. It comes with various features!
Aseprite Features:
- Pixel Art (Characters, Scenes, Assets, Tilesets, etc.) ✔
- Animations ✔
- Sprite sheets ✔
- Variety of image file formats (PNG, GIF, etc.) ✔
So I want to make a series of tutorials for pixel artist of all skill levels and pass my knowledge down of what I have learned over many years of using it, but starting with the basics first and working our way up.
This tutorial is just about setting up Aseprite, but not so much about drawing anything important just yet. At least it should help you get familiar with basics of Aseprite.
Starting Aseprite
If you haven't done so already and can afford it, purchase and download Aseprite from their website or here on Itch. Once purchased, you should have lifetime access to it so if you somehow lose it, you can always redownload it and its latest versions. Download it and the file(s) should appear in your Downloads folder.
I suggest you take some time to think about where you want to keep all your Aseprite files so you don't forget where they are (maybe on your desktop screen or in your "program files" directory on your PC). Also consider pinning it to your taskbar or start menu if you plan on using it a lot.
Once you have that figured out, run the installer for Aseprite. Once installed and running, you should see a blank interface with nothing but a menu bar in the top left.
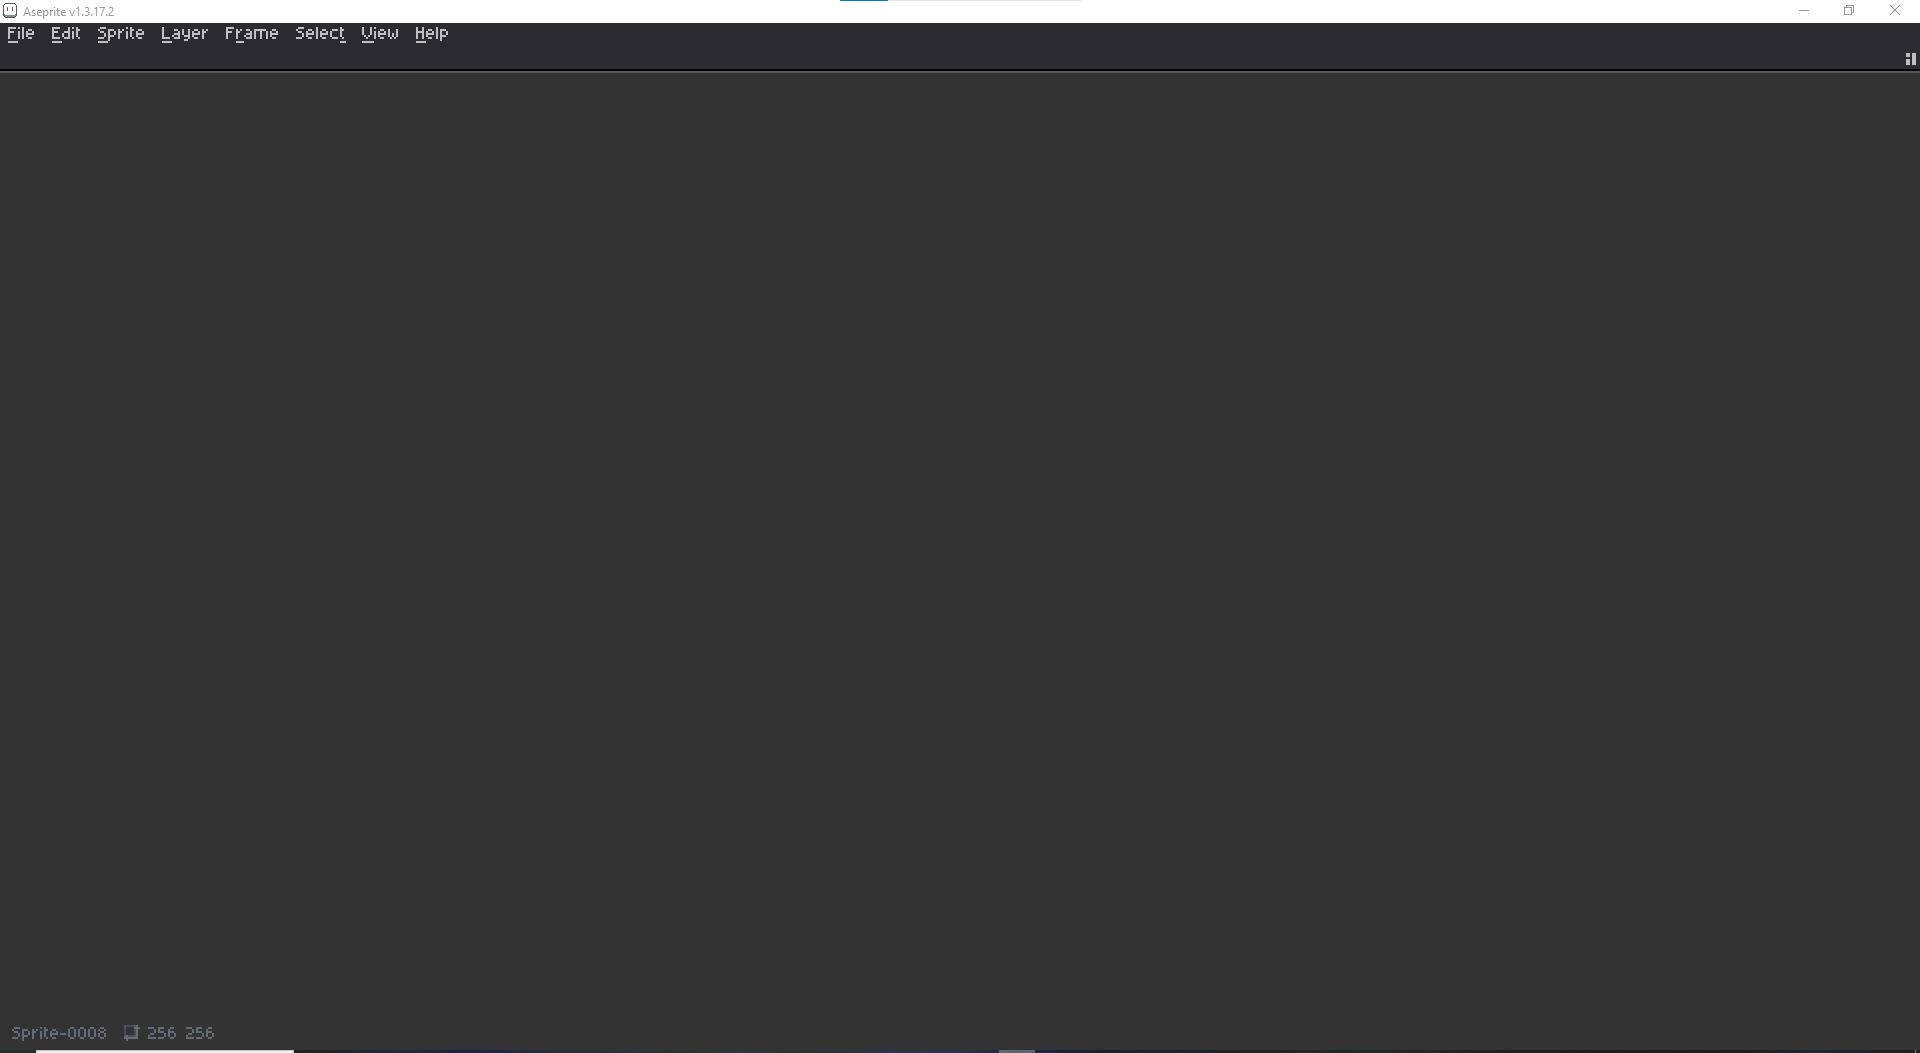
To draw anything with Aseprite, you need a canvas. You can create a blank canvas with specified dimensions by clicking on File-New in the menu bar.

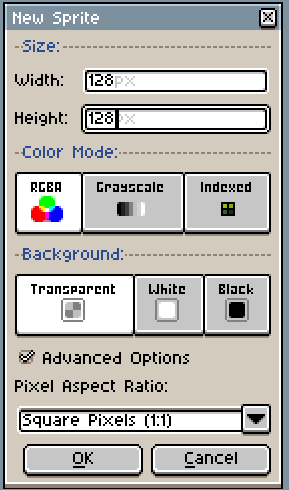
In the "New Sprite" window, you can specify your new canvas preferences.
Preferences:
- Size: The width and height of your new canvas in pixels.
- 3 Color Modes:
- RGBA (Full Color + an Alpha channel)
Note: "Alpha" determines how opaque/solid a color is, using a number ranging from 0 to 255.
- 0 = completely transparent (invisible)
- 255 = completely opaque (solid)
- Grayscale (Black, White, Greys)
- Indexed (Restrict to Color Palette)
- Background: Transparent (No background), White, or Black
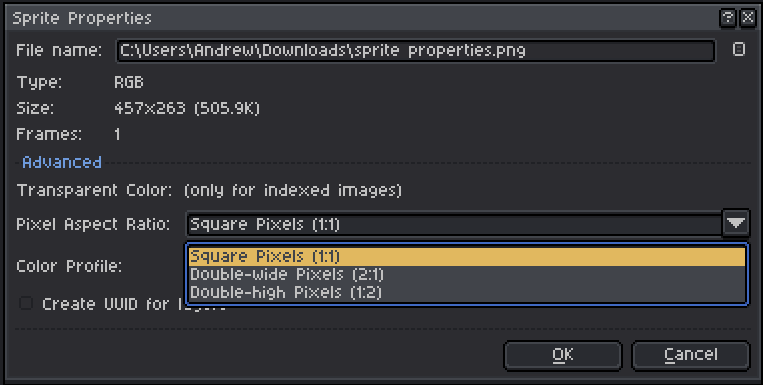
- Pixel Aspect Ratio: Determines if your pixels will be square or rectangular.
Things You Can Ignore
Me personally, I almost never use the Grayscale or Indexed color modes. You can achieve both with just RGBA. The initial background set up doesn't matter because we can always easily "bucket fill" our entire background with any specific color. Pixel Aspect Ratio I always set to 1:1, otherwise we get elongated pixels.
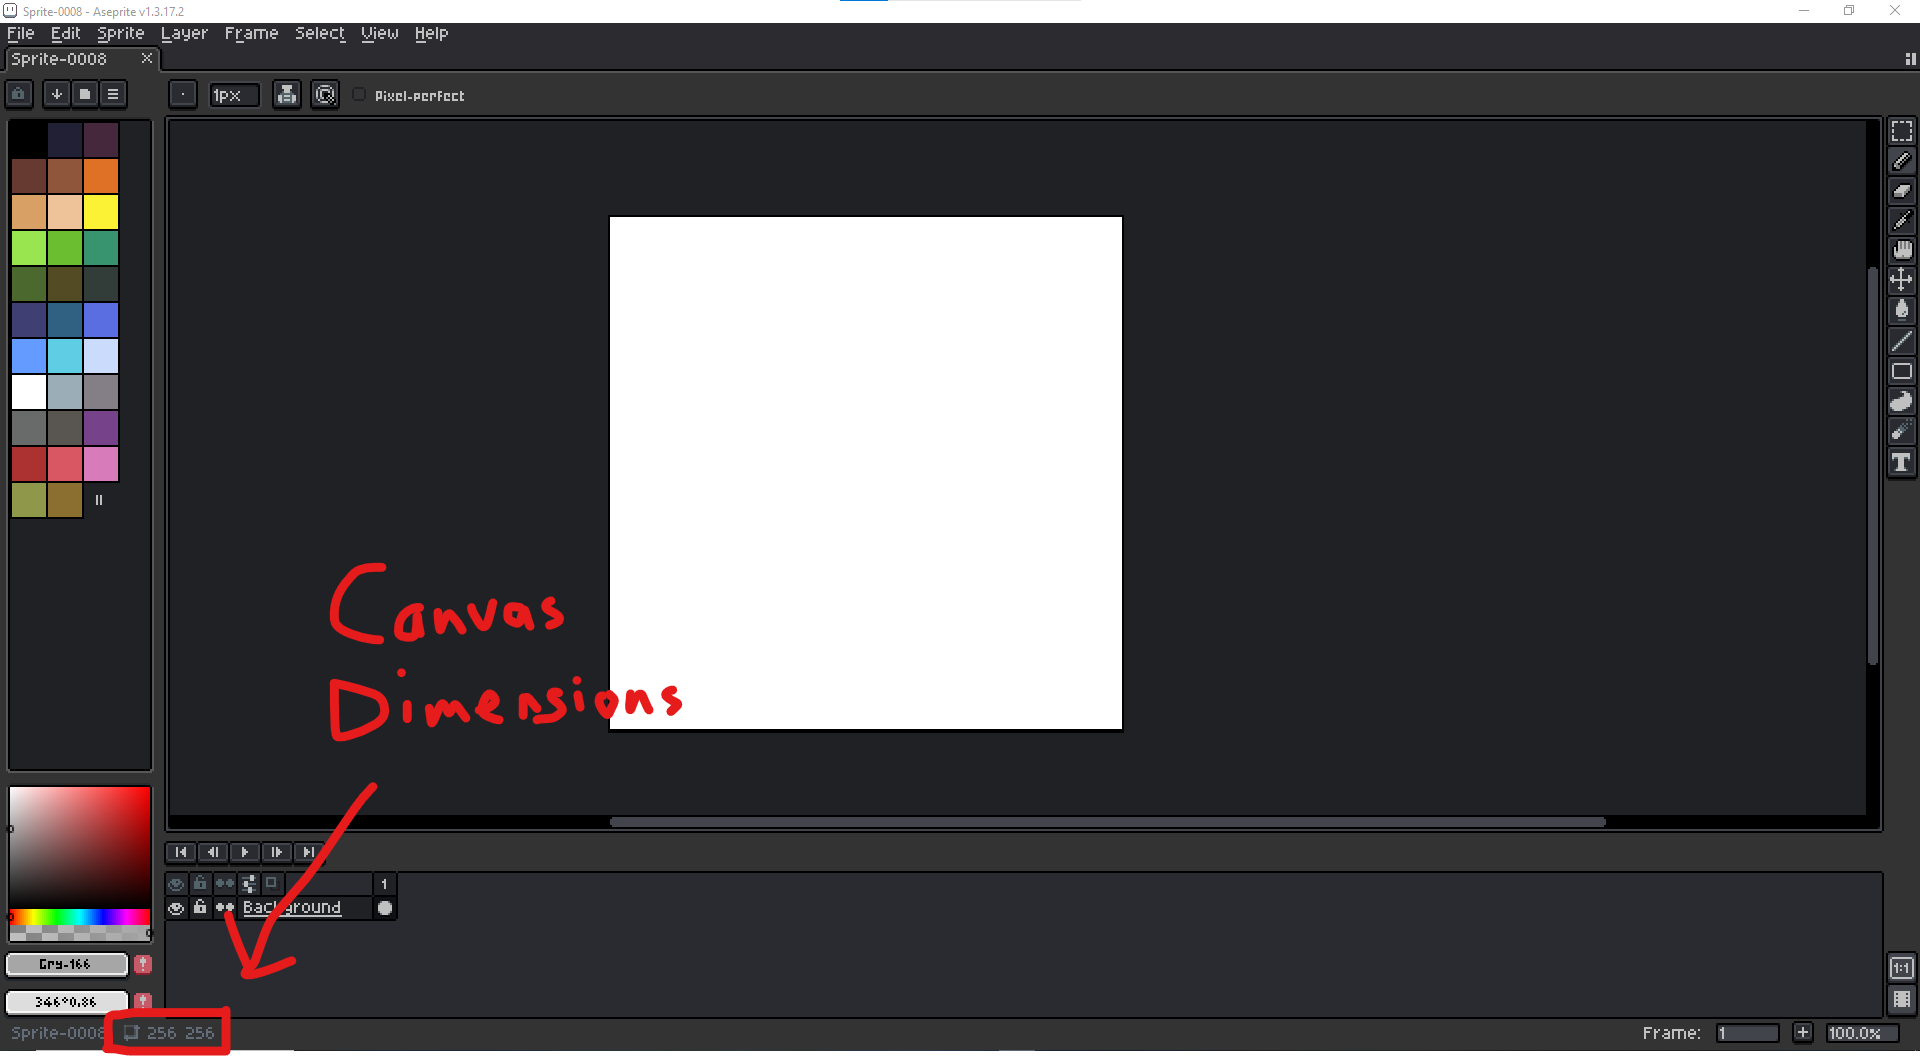
For now, don't stress over the canvas preferences because we're not drawing in this part of the series yet. I'm just showing you around. But once you click "ok" your new canvas will appear. In the bottom left you can see your canvas dimensions (width by height) along with a specific icon associated to the left of it.
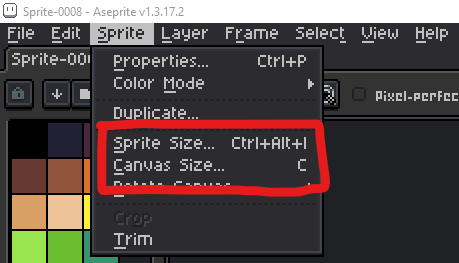
After it's created, you can always edit your canvas dimensions under the Sprite dropdown from the menu bar. These options are found in the Sprite Size or Canvas Size options.
They will pop up a window prompt. You can enter the new width and height there (you may have to unlock the width-height ratio to modify them freely). Most of the options there can be ignored for now. The arrows in the Canvas Size modifier just represent a sort of "anchor" or "pivot" when you resize the canvas. For pixel art, the interpolation method is generally best set to Nearest Neighbor or RotSprite in most cases.
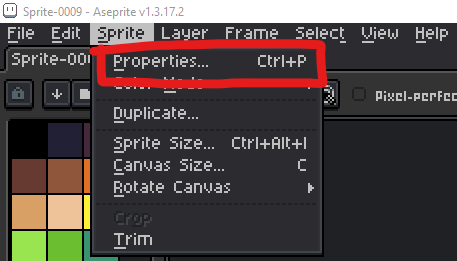
For whatever reason, if you happen to get rectangular pixels showing up when you're drawing, you can access the Pixel Aspect Ratio option found in Sprite-Properties from the menu bar.
Setting Up Your Workspace
Aseprite uses a modular layout, so you can click and drag the edges of any window panel (such as the palette window on the left, the layer window at the bottom, and toolbox on the right) to resize or rearrange them.
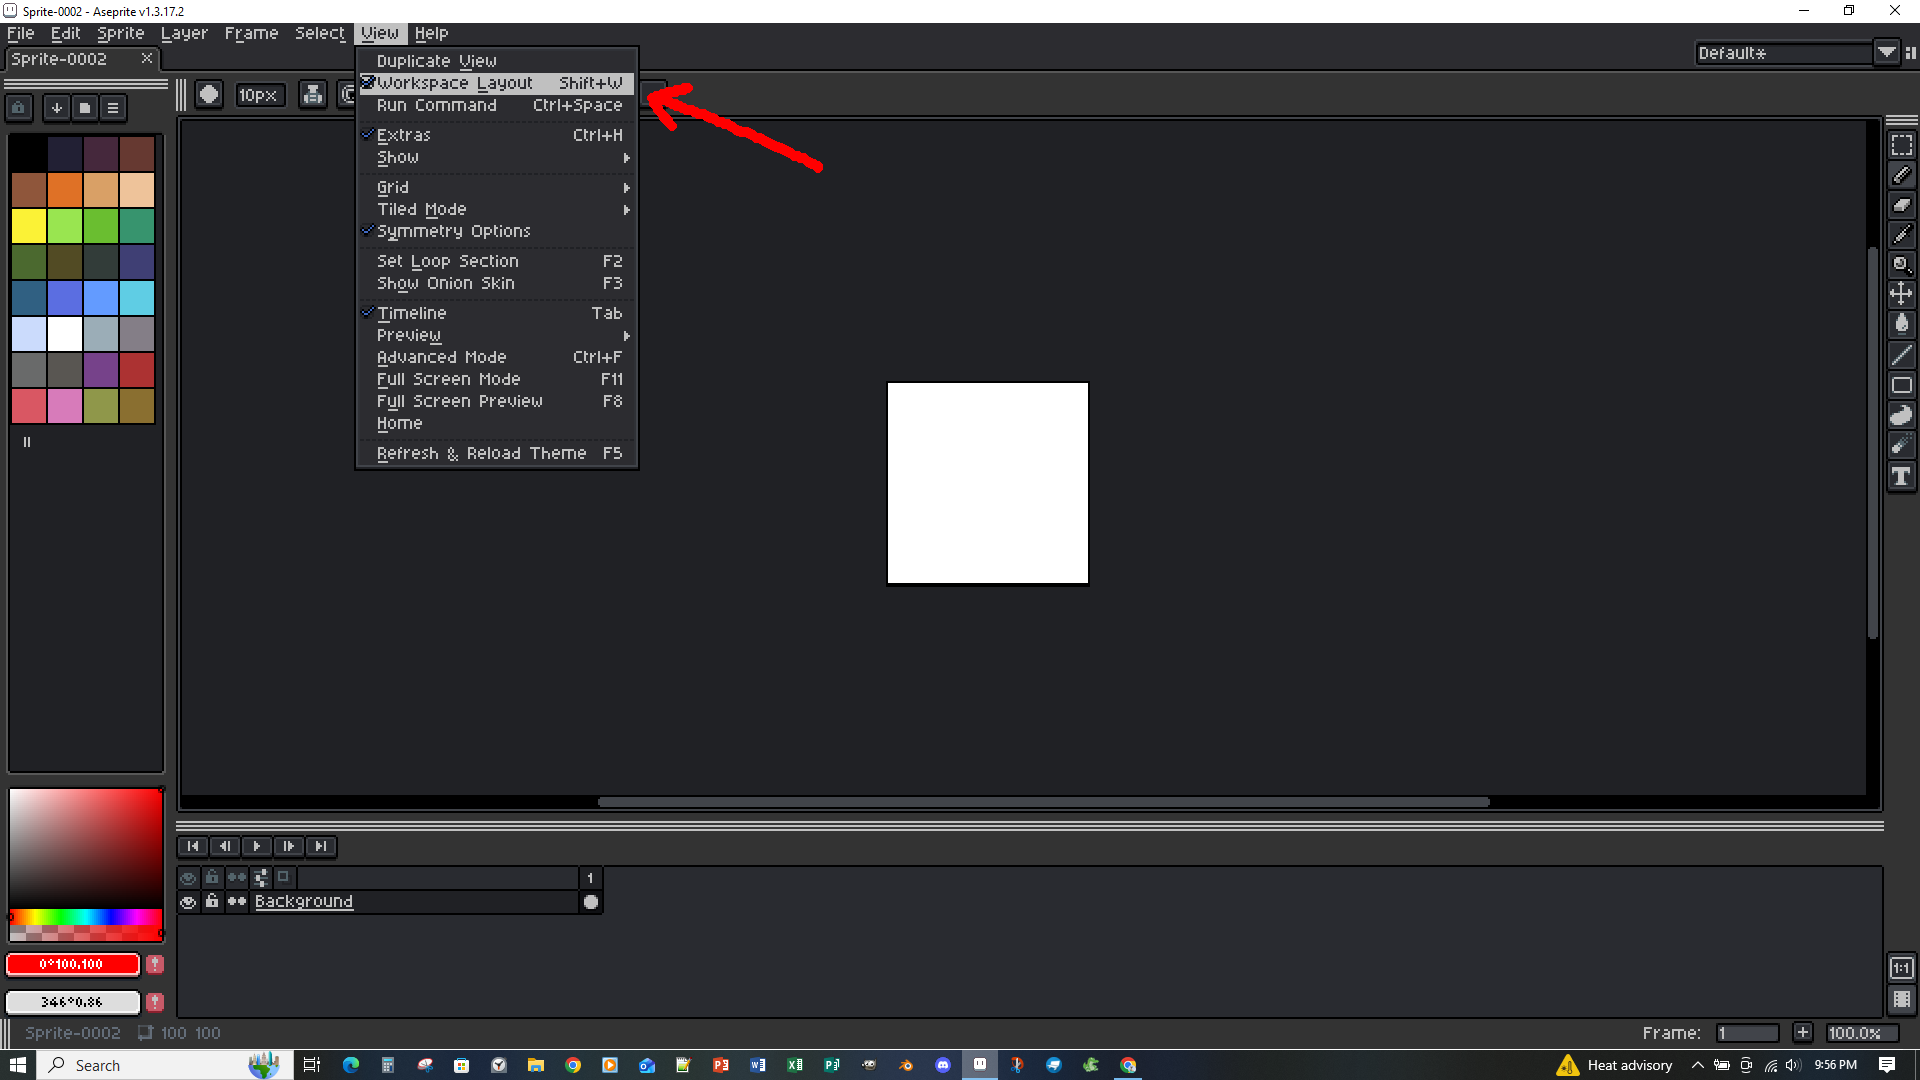
Note: If you are unable to rearrange/dock the window panels, select View - Workspace Layout from the main menu and make sure there is a checkmark next to the list item.
For example, you could arrange this workspace layout:
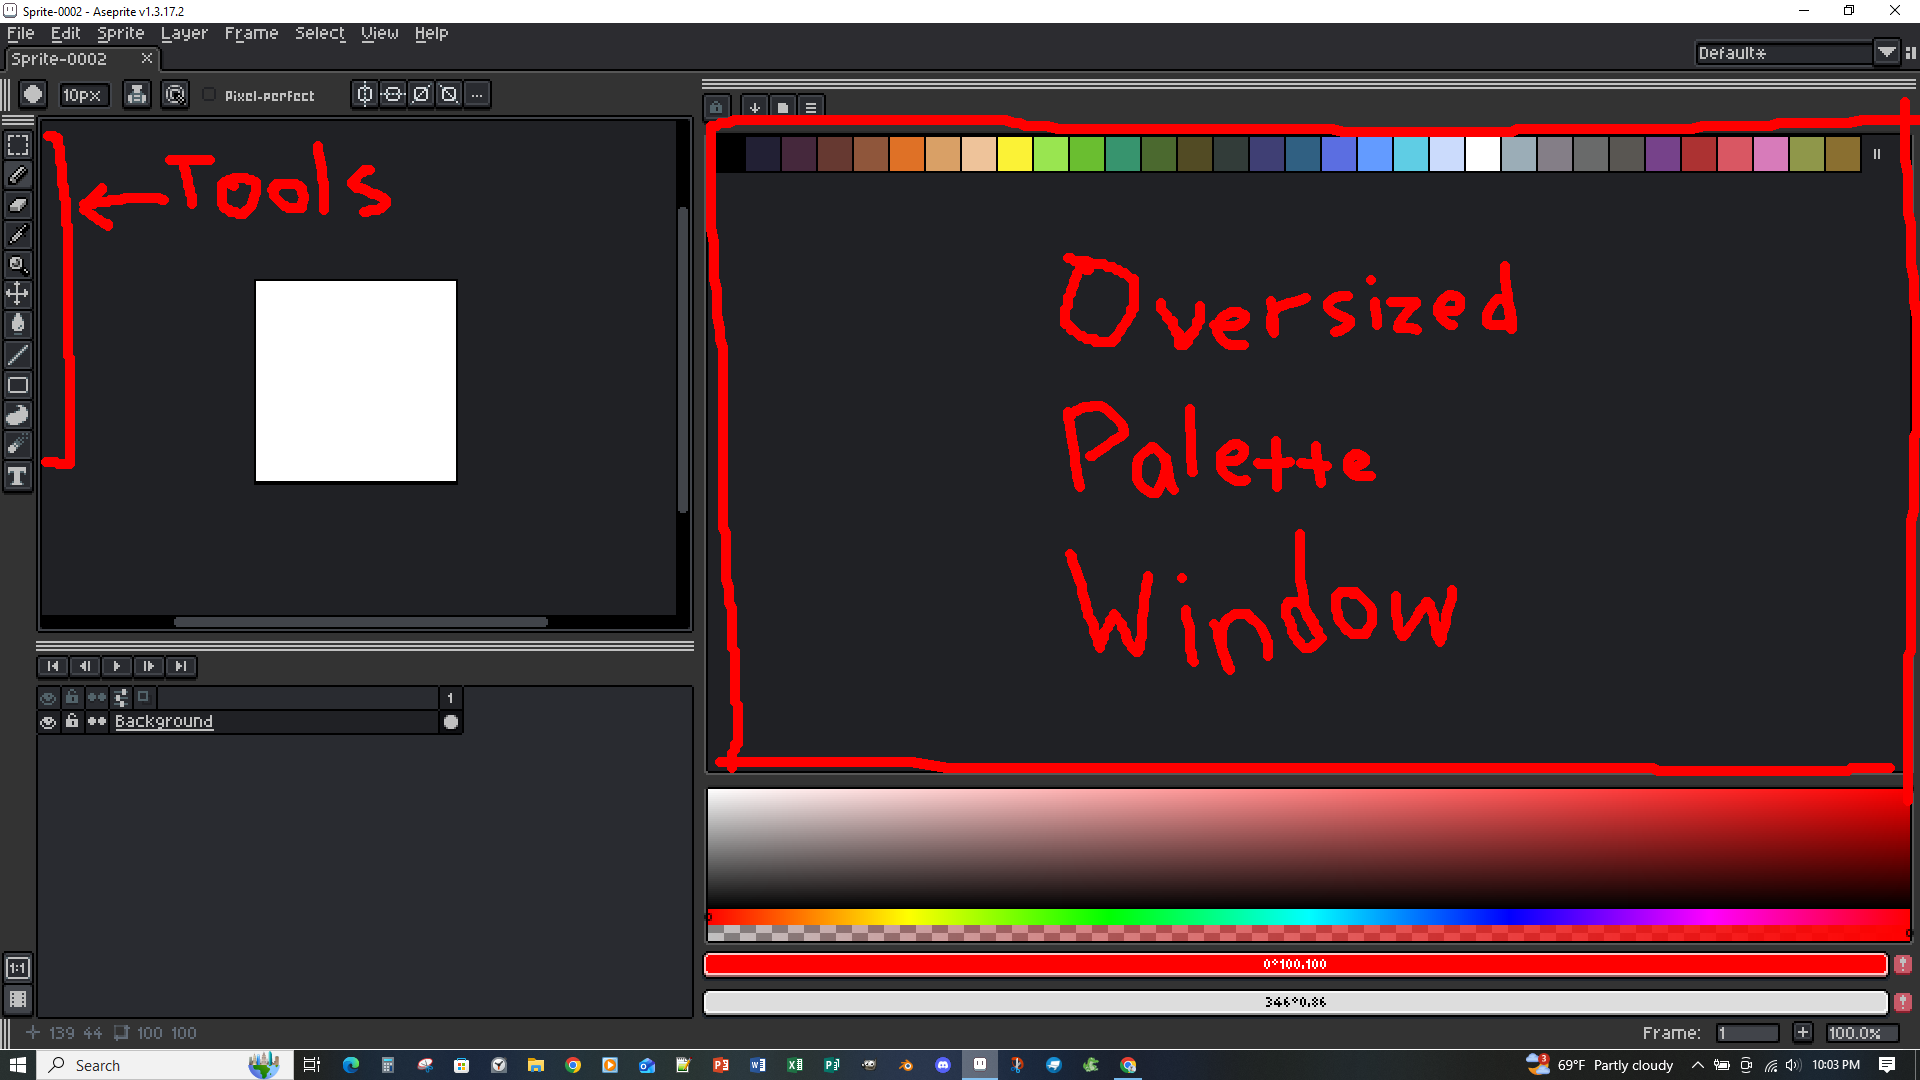
But I just wouldn't recommend it because this would be terrible for me to work with.
Shortcuts and Preferences
You can set up keybinds and Aseprite preferences from Edit in the menu bar.
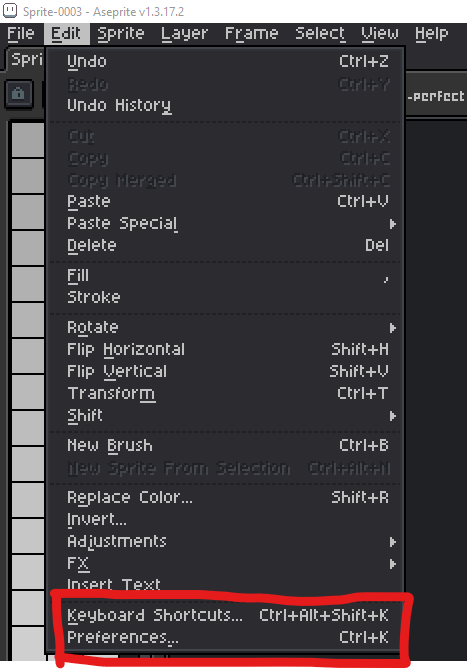
It's great to know this early on so you can make Aseprite convenient for you to work with.
Shortcuts
Looking at the Keyboard Shortcuts window, on the left are some categories of shortcuts you can edit. Listed on the right are the actions, keybinds associated with those actions, and a few provide some context of what they do but many are self-explanatory.
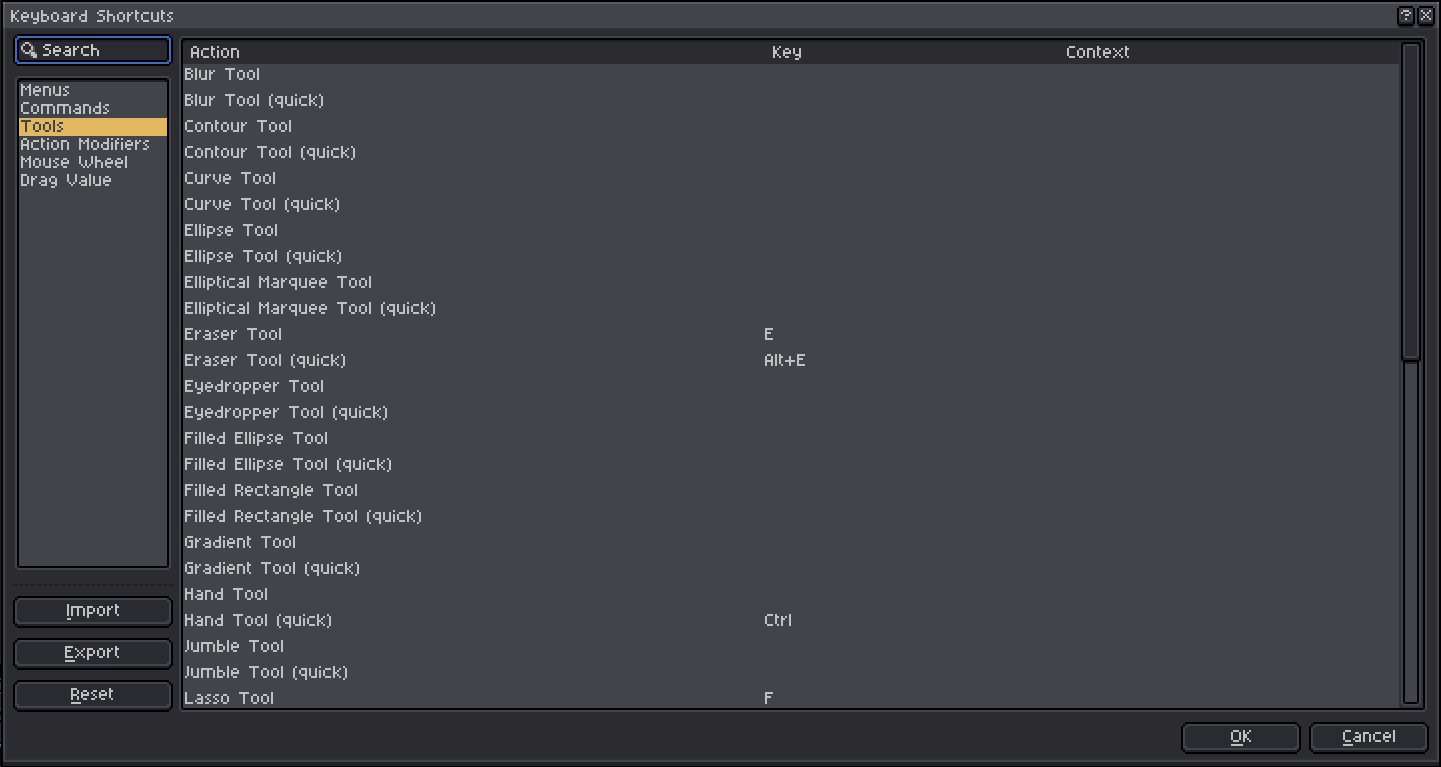
If you see "(quick)" listed next to an action, it means that the action is only active while you hold the keybind. For example, if I set the eraser tool (quick) to 'Alt', the eraser tool will only be selected/active while I hold down Alt, not permanently.
Browse through the shortcuts and just become aware of the actions availabe so that in the future you can come back these and assign keybinds if you prefer.
Preferences
Also become aware of the preferences. You have total freedom here, up to you.
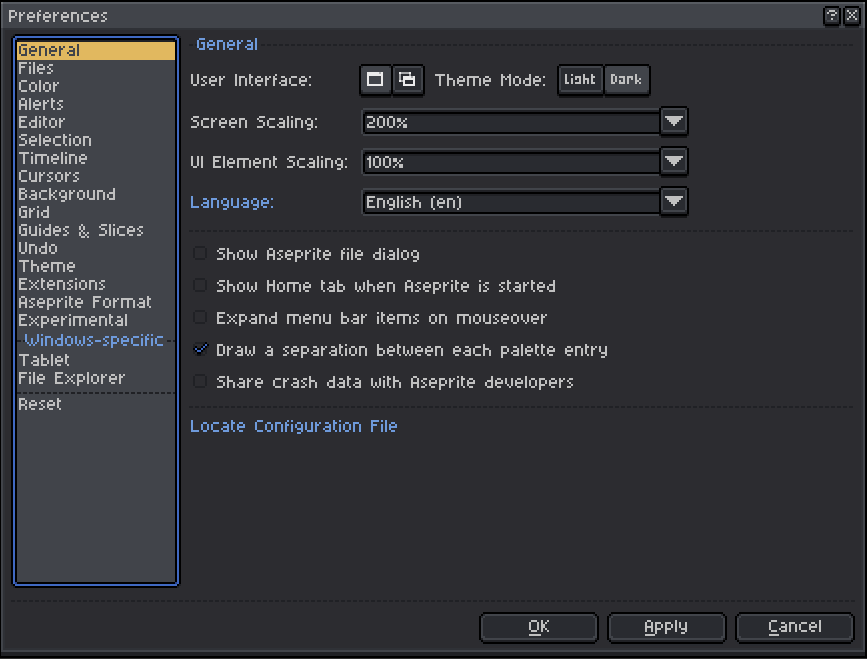
I don't understand all these options yet and most are probably better to just leave as-is, but some are very useful to set up.
The Editor category is particularly important because you can basically set your right-click to "eyedrop" and reuse existing pixel art colors already drawn onto your canvas, setting it to your current brush color. This completely bypasses the need for the color palette panel.
You can also change grid settings in the Grid and Background categories which are useful for measuring sprite sizes.
Preview Window
Last thing I want to bring up is the preview window. I have this set to 'Q' as a shortcut, but youcan toggle it on and off by pressing this 1:1 button in the bottom right corner of the Aseprite interface.
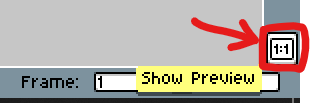
The window can also be resized and moved around anywhere in the Aseprite interface. The preview window is basically another window that displays whatever image you currently have on your main canvas. It can also play animations. For example if I draw a smiley face on my main canvas (left), it shows in my preview window in the bottom right corner:
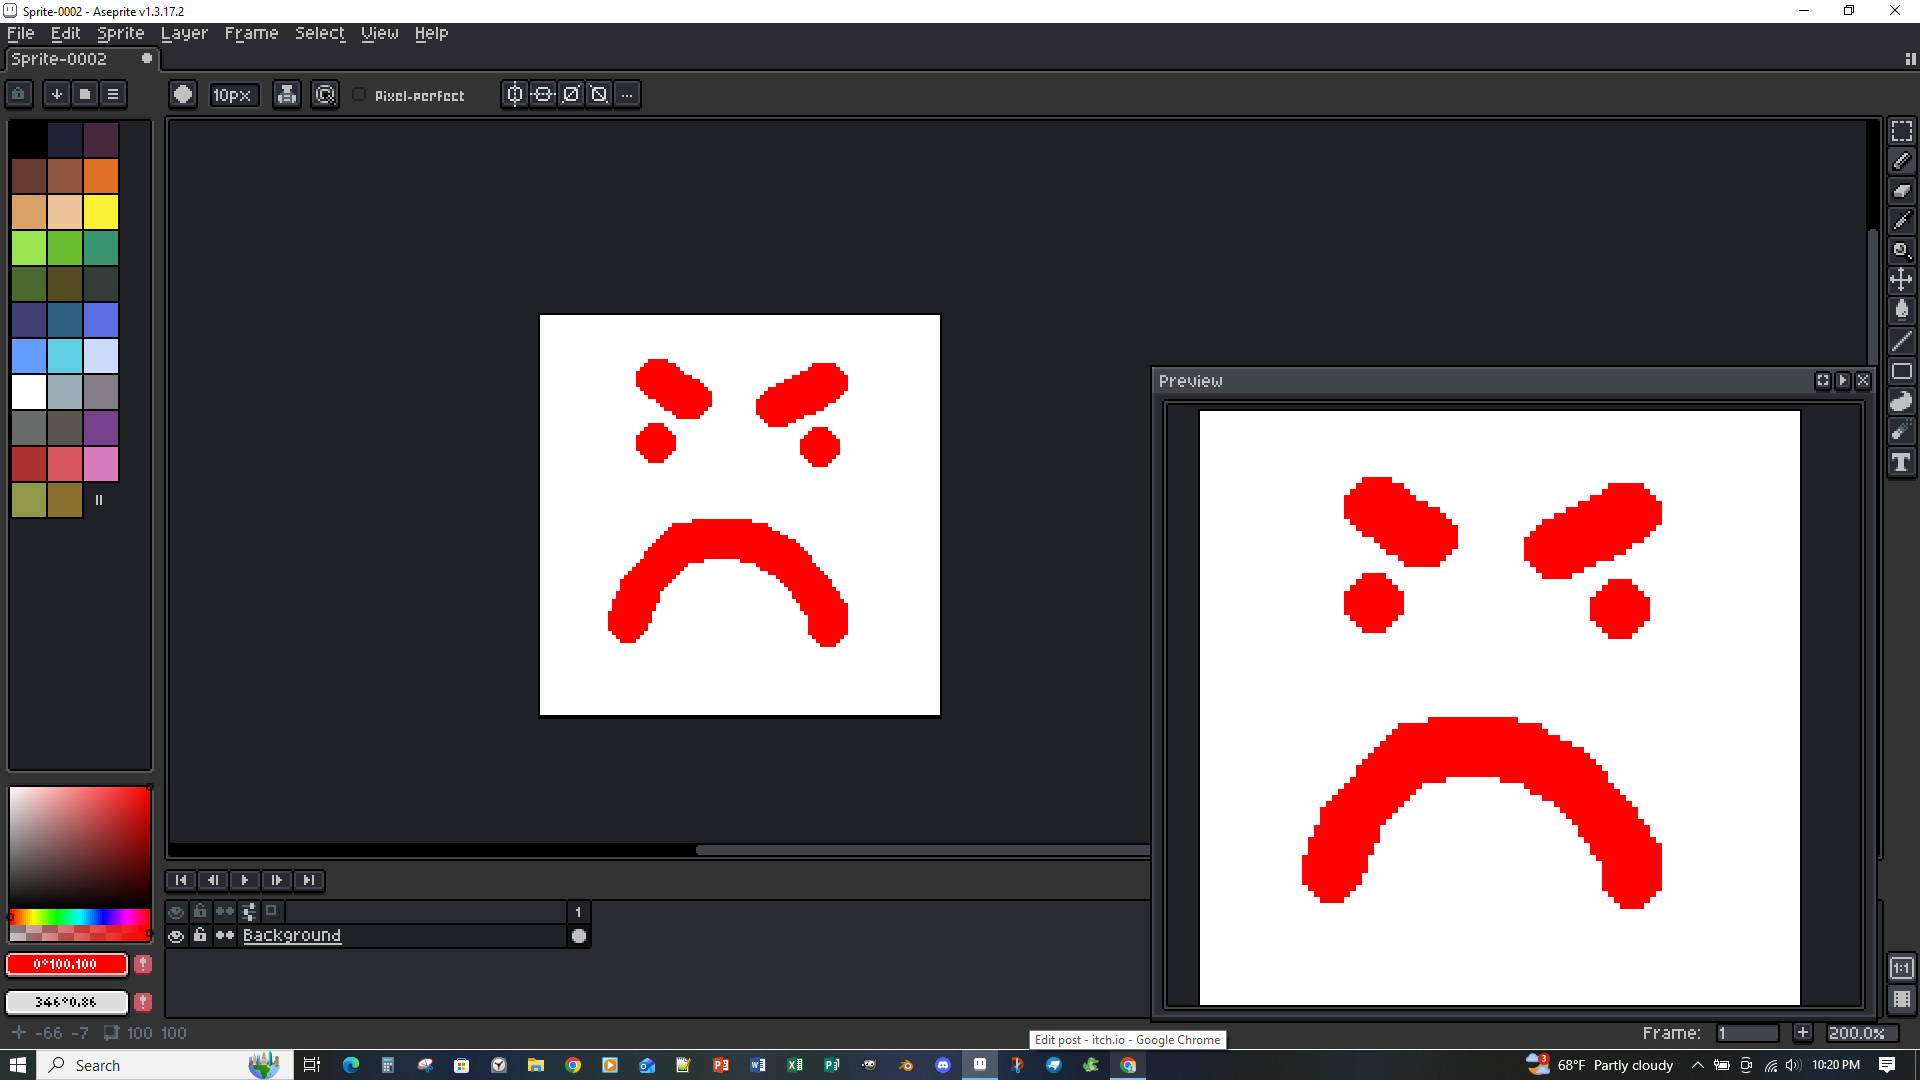
It's useful but I'll explain why later when we get to our first drawing tutorial.
You should now know how to:
- Set up a canvas
- Arrange a personal workspace
- Modify shortcuts and preferences
- Set up the preview window
That's enough for this tutorial. For now, thanks for reading my first Aseprite tutorial!