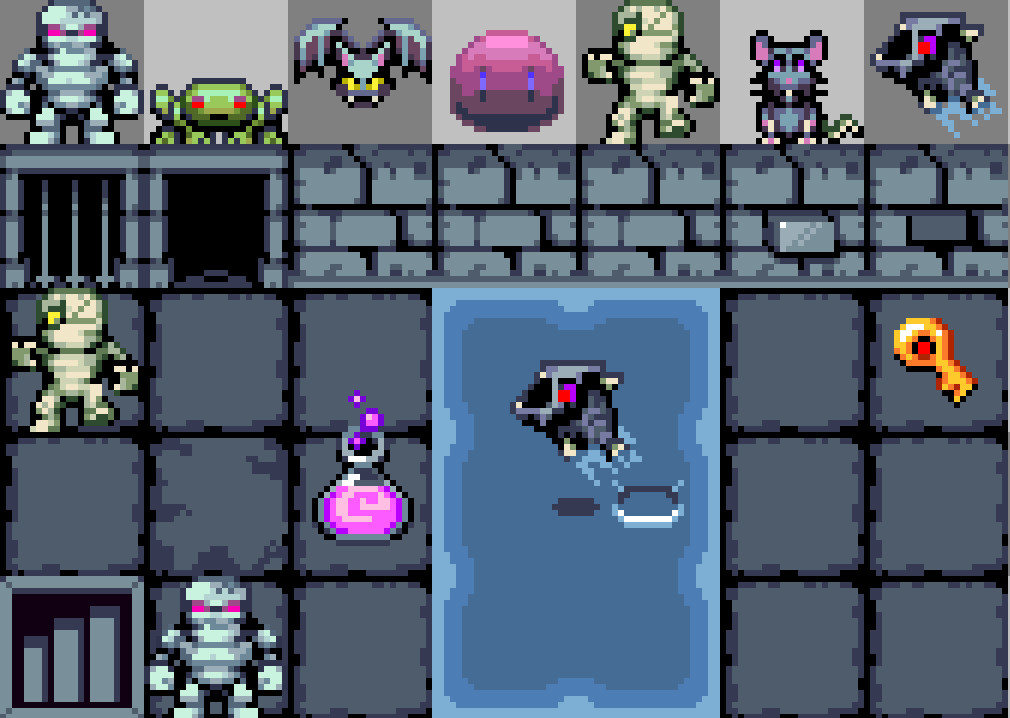
I'm a pixel artist and I'm kind of looking for a 3rd freelance client, but since it may take a while, I am also trying to just get a small game in my portfolio too. I have worked on a shmup jam a long time ago. (Game here: https://romeosierra13.itch.io/rip). Working on a shmup game is easy because the animations for space ships and projectiles aren't all that complicated, but we can try something else too. I like JRPGs and Metroidvanias, it's just harder animate because now we're dealing with humans and monsters with arms and legs and cool attacks and all that that need to be animated. You can also see my pixel art portfolio here. https://cara.app/imonk
A member registered Dec 30, 2017 · View creator page →
Creator of
Recent community posts
itch.io Community » Creativity & Art » 2D Art · Created a new topic My Tips For Getting Pixel Art Gigs (also don't quit your day job)
itch.io Community » Creativity & Art » 2D Art · Created a new topic Aseprite - Brainstorming Creature Ideas
Hey I'm back. Today I have a fun topicm and probably my most fun topic ever in my opinion: Brainstorming Creature and Monster Ideas! At this point of my pixel art journey, I have drawn a ton of pixel art monsters, starting with GIMP, then moving over to Graphicsgale, and today I use Aseprite for all this stuff.
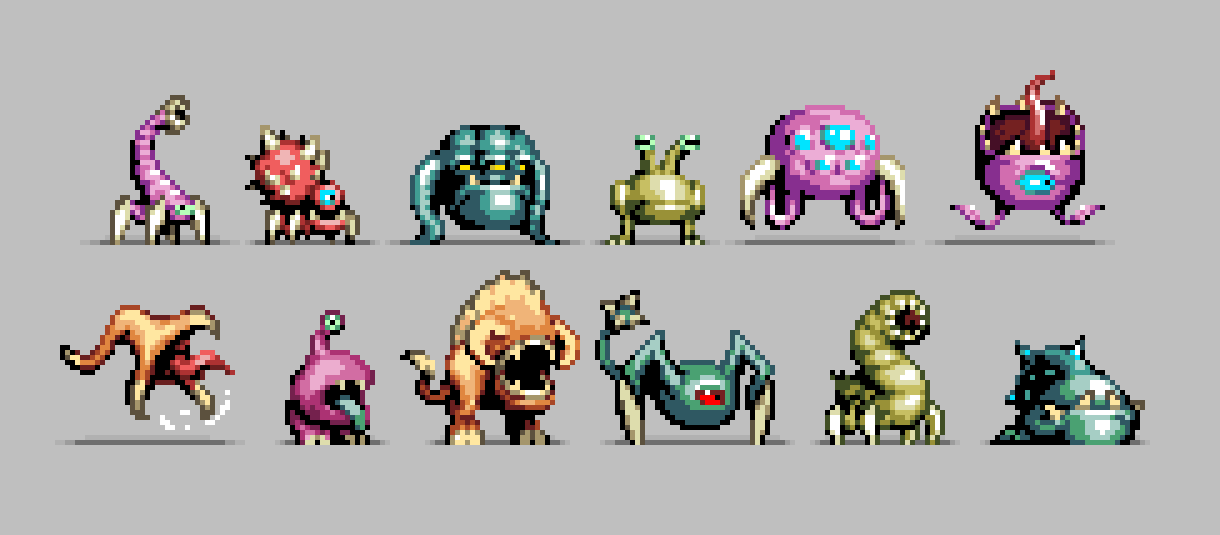
Some Aliens I Drew
I drew various small alien creature sprites years ago on Pixel Joint (back in my amateur days, yes). This was the original batch I sketched out, ripped directly from my abandoned Pixel Joint account:
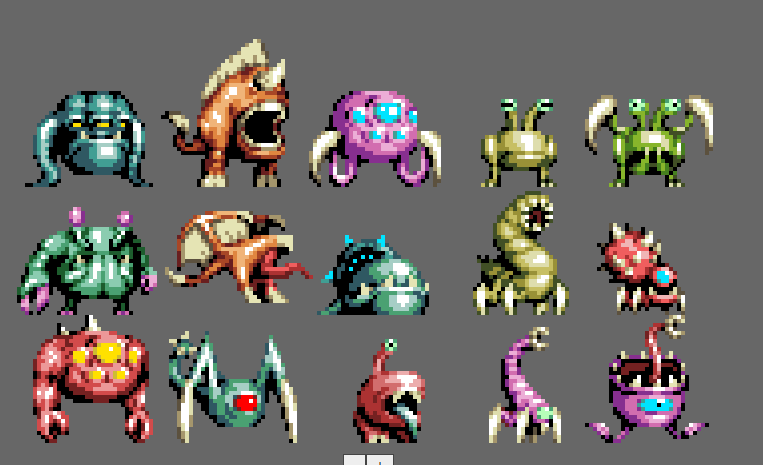
Then last night I was just passing some time by scrapping the ones I didn't like as much but also tweaking some of the better ones:
The Inspiration
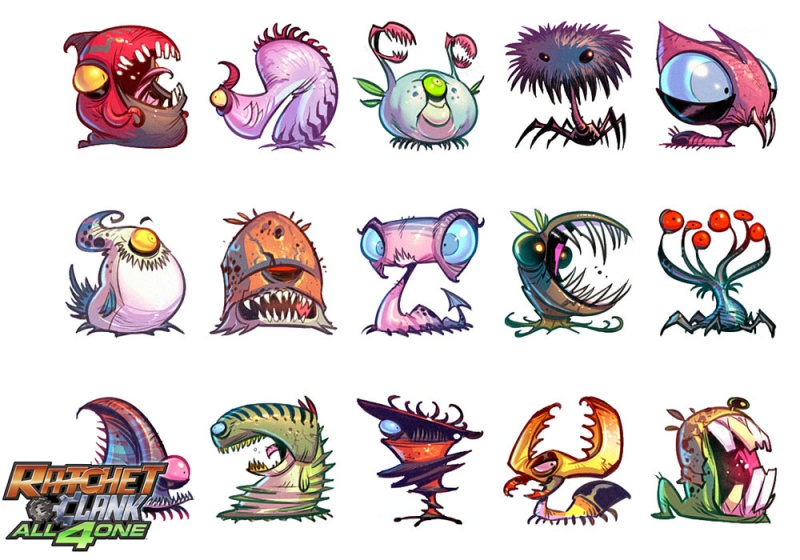
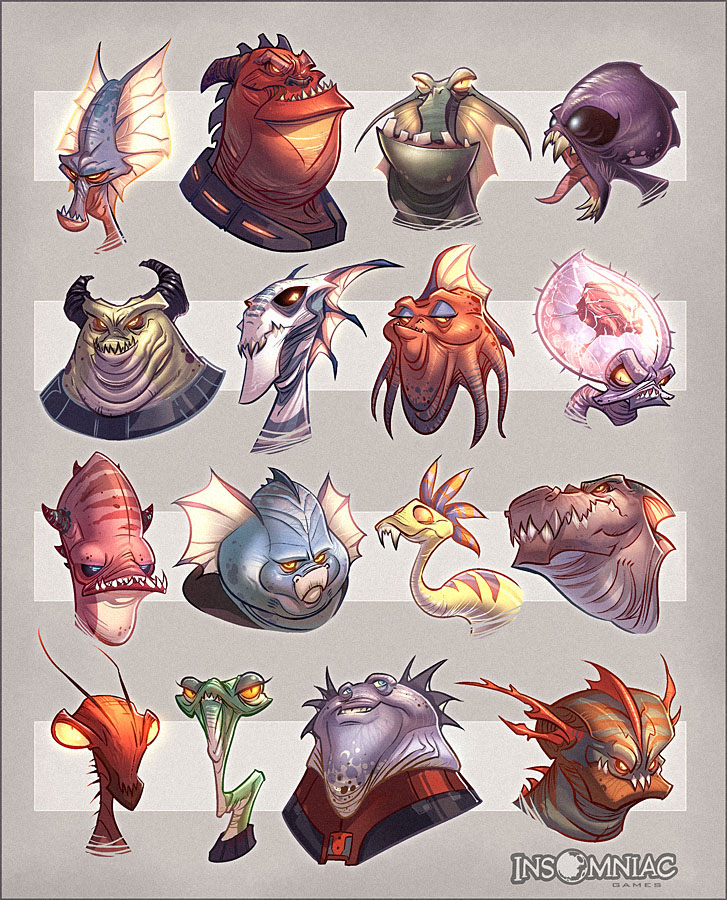
Now, I didn't come up with these ideas purely on my own. Ratchet and Clank was a huge part of my gaming childhood, and I'm glad that the video game series has released so many games up to this day. Why? Because they have created so many fun and goofy alien and robot characters and enemy designs as a result.
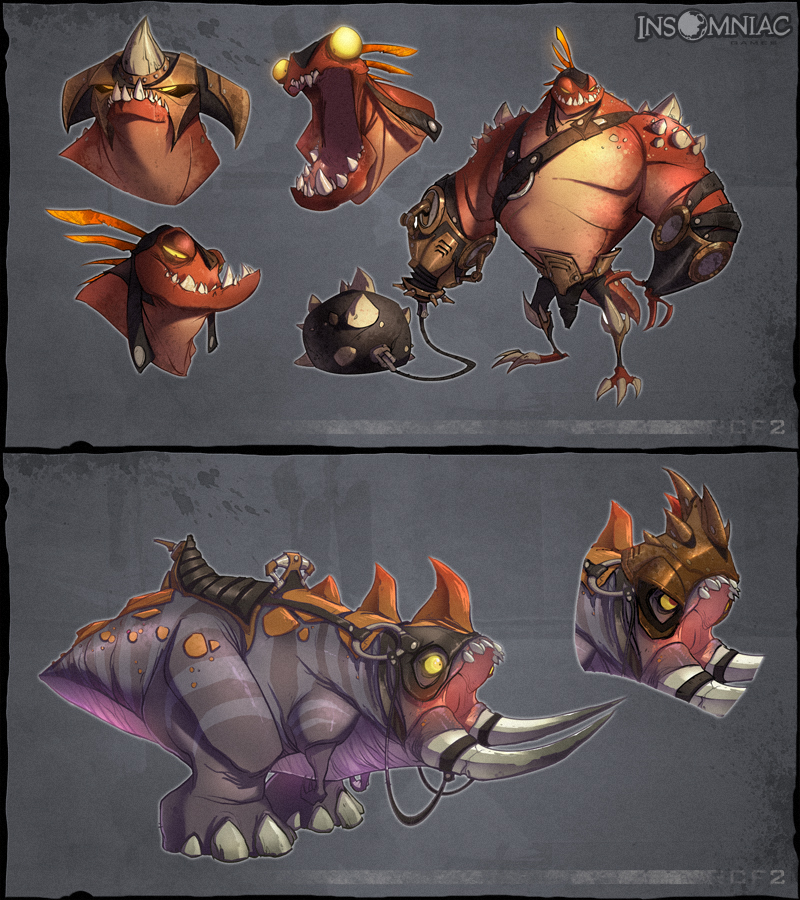
The big artist (or at least a big artist) that played a huge role in the art of Ratchet and Clank games was Dave Guertin. He was the main concept artist for Ratchet and Clank games ever since the first game was in development, and here are some of his alien and artworks.
Brainstorming Your Own Creatures
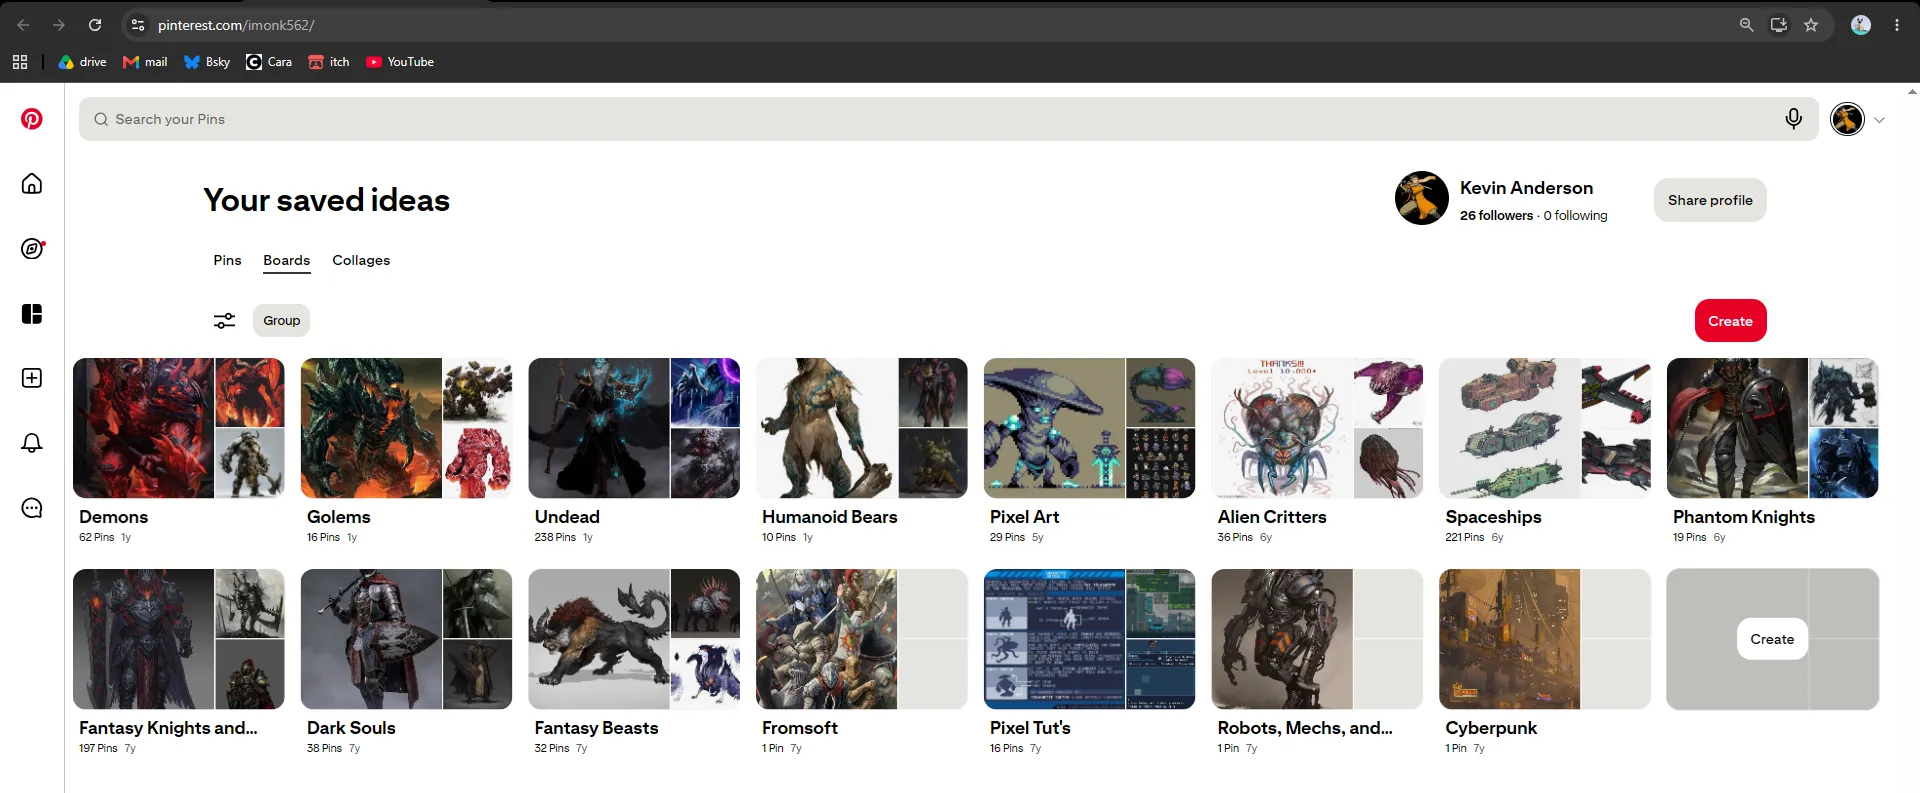
I have a process to come up with wacky creature and monster ideas, but a lot of this is derived from existing visual inspiration. A great source of browsing and gathering inspiration is Pinterest. Pinterest allows you to browse any category of creatures such as demons, zombies, golems, ghosts, orcs, trolls, goblins, dragons... the list goes on, but yes also aliens. The key difference between searching for images on Google and Pinterest is that Pinterest let's you save pins to board (essentially bookmarking your favorite images for future reference). I suggest you try it out because it's free!
Deconstructing Visual Features
I don't know if anyone remembers playing Spore Creatures...
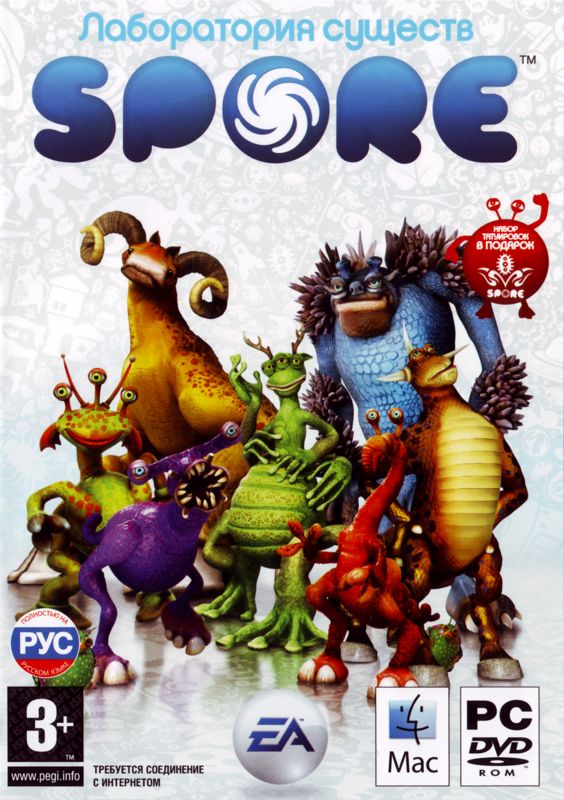
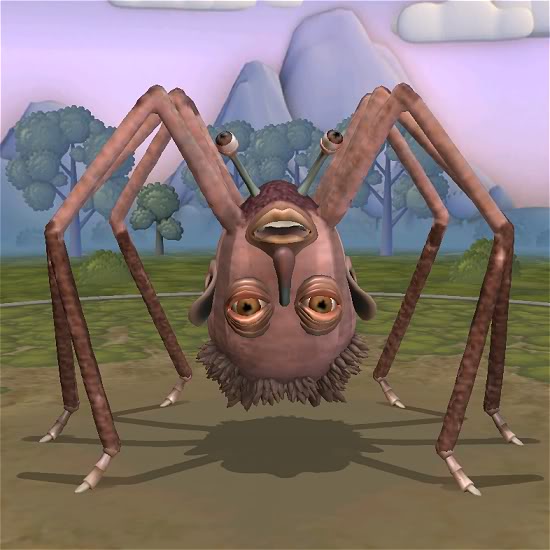
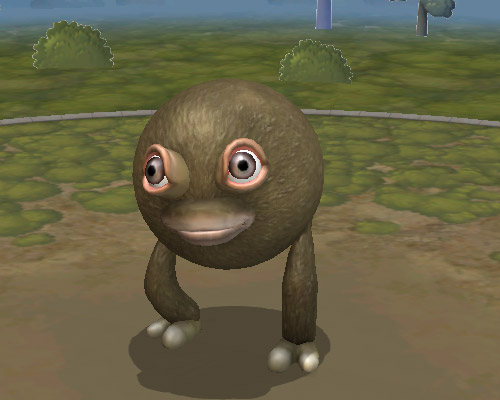
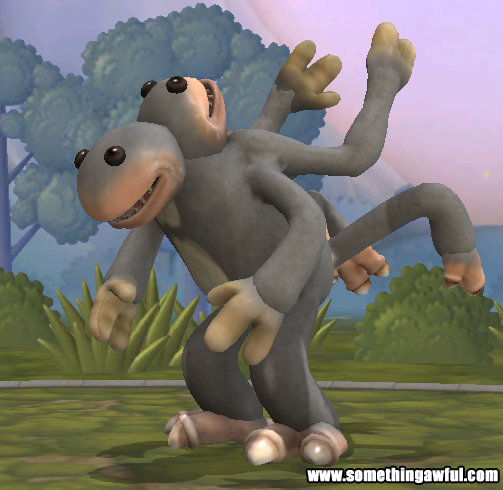
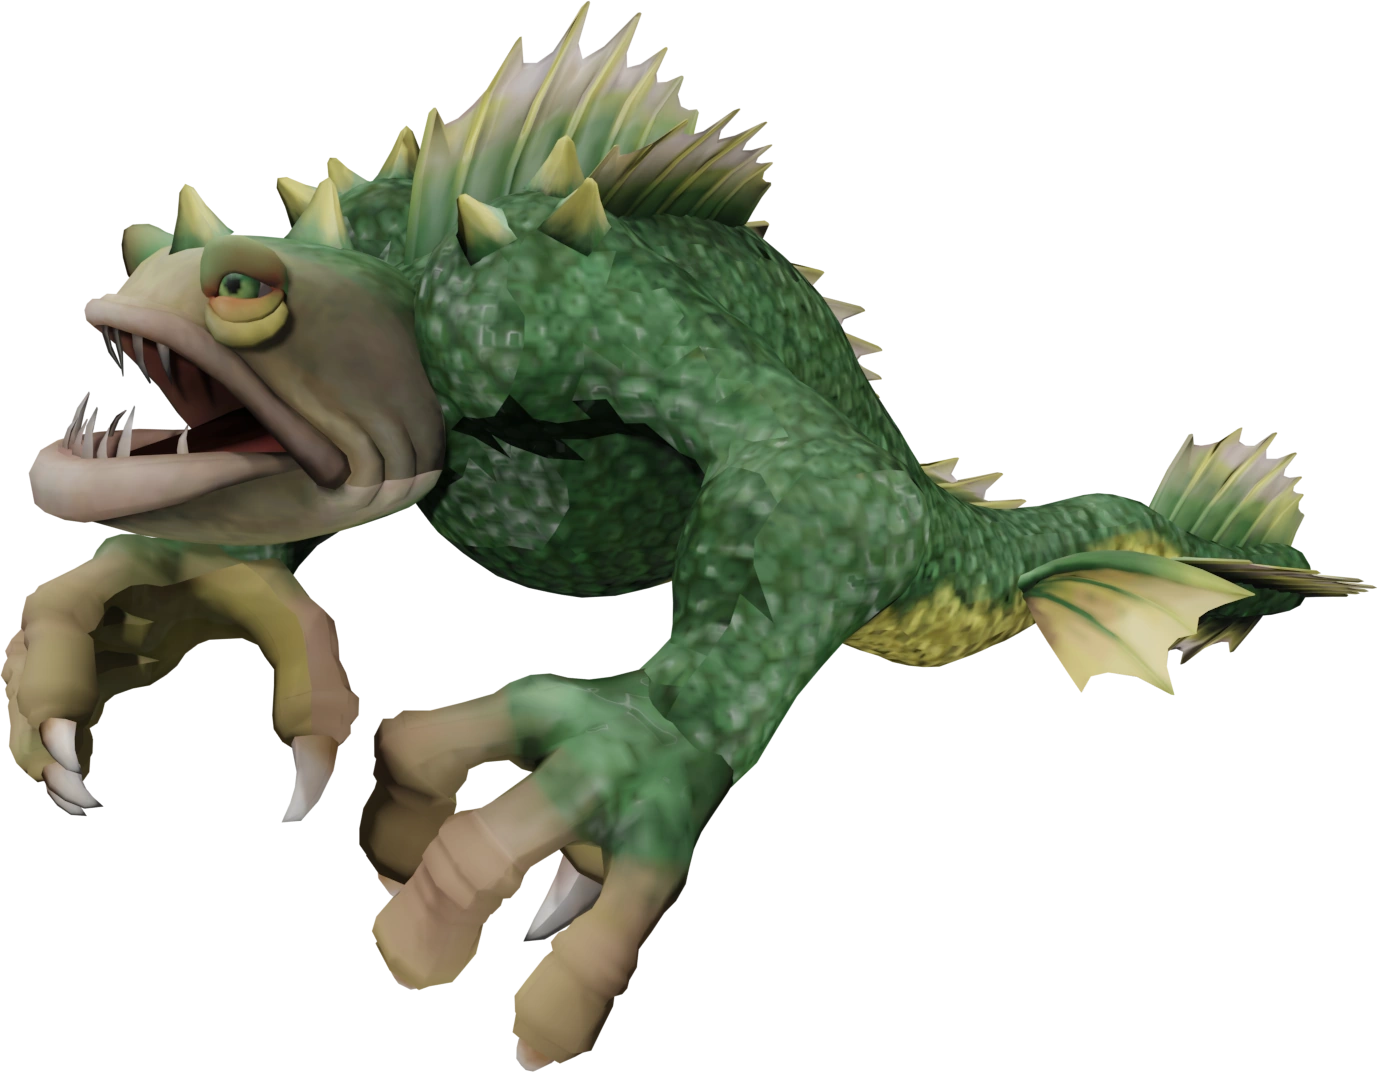
That game let you design creatures as weird, and bizarre, and disturbing as much as you could ever want, but the point I want to make is that in that game creatures would start off as a simple shape (for example, a sphere blob if I remember correctly), which you could then add and remove features from, such as eyes, hands, feet, tails, fins, bug legs, etc.
Mentally Deconstructing Creatures Into Smaller Features
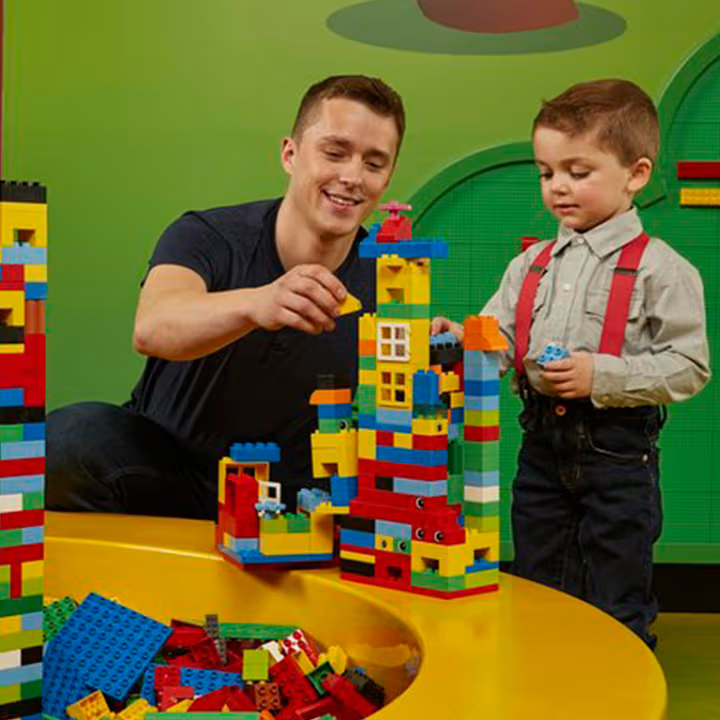
Now that I mentioned Dave Guertin's various alien designs, Pinterest, and Spore Creatures, I want to talk about deconstruction. Creatures are "constructed" from various smaller visual features. They are just assembled together (like LEGOs TM).
Design Freedom
Unless you're drawing a trope, you have full freedom to draw whatever creatures you want. You can always decide what features you want to include, but also what features you want to exclude, allowing for a pretty much endless combination of creatures.
Tropes Have Some Rules
There is a small caveat when it comes to trope monster categories however. Trope monsters have rules, which serve as design constraints you must (or at least generally should) follow to draw the monster. For some examples, a dragon must have wings, a skeleton must be made of bones, a zombie doesn't need decaying flesh wounds, but it probably should, etc.
Think Critically Instead Of Cliche
Although some creatures have contraints by their definition. You often still have some design freedom. Think critically about if they must have certain visual tropes or not. Ask yourself "Does it always need to look like that?", because sometimes the answer is "No, people just make it look like that a lot.". A dragon (or wyvern) typically has 2-4 legs, but maybe try 6 and give it 4 eyes or even 4 wings. A skeleton can have a big blue magical soul orb protected within its rib cage. A zombie can have poisonous blisters or fungi ready to explode upon death. Try to not constrain yourself too much whenever possible.
Some Things You Can Practice First
If you're terrible at drawing, try drawing in grayscale first and try small sprites that are about 32x32 or 64x64 pixels. You can also try just directly drawing fan art of some of your favorite monsters. For example, one of the things I did early on was practice drawing chibi-sized Final Fantasy monsters. This way you don't have to think so hard about "designing" but can focus on improving your general pixel art skills first and get used to drawing various monster features this way. These early general drawing skills will become second-nature over time and practice.
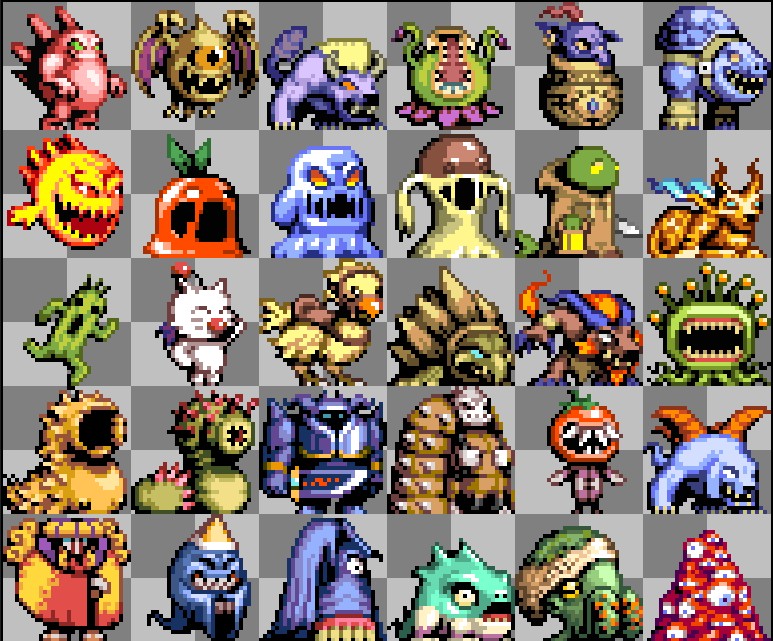
A Few More Of My Monster Examples
Then once you become great at that, you can practice imagining your own stuff and even upscaling your sprites if you're up for the challenge!
"Halloween" Creatures
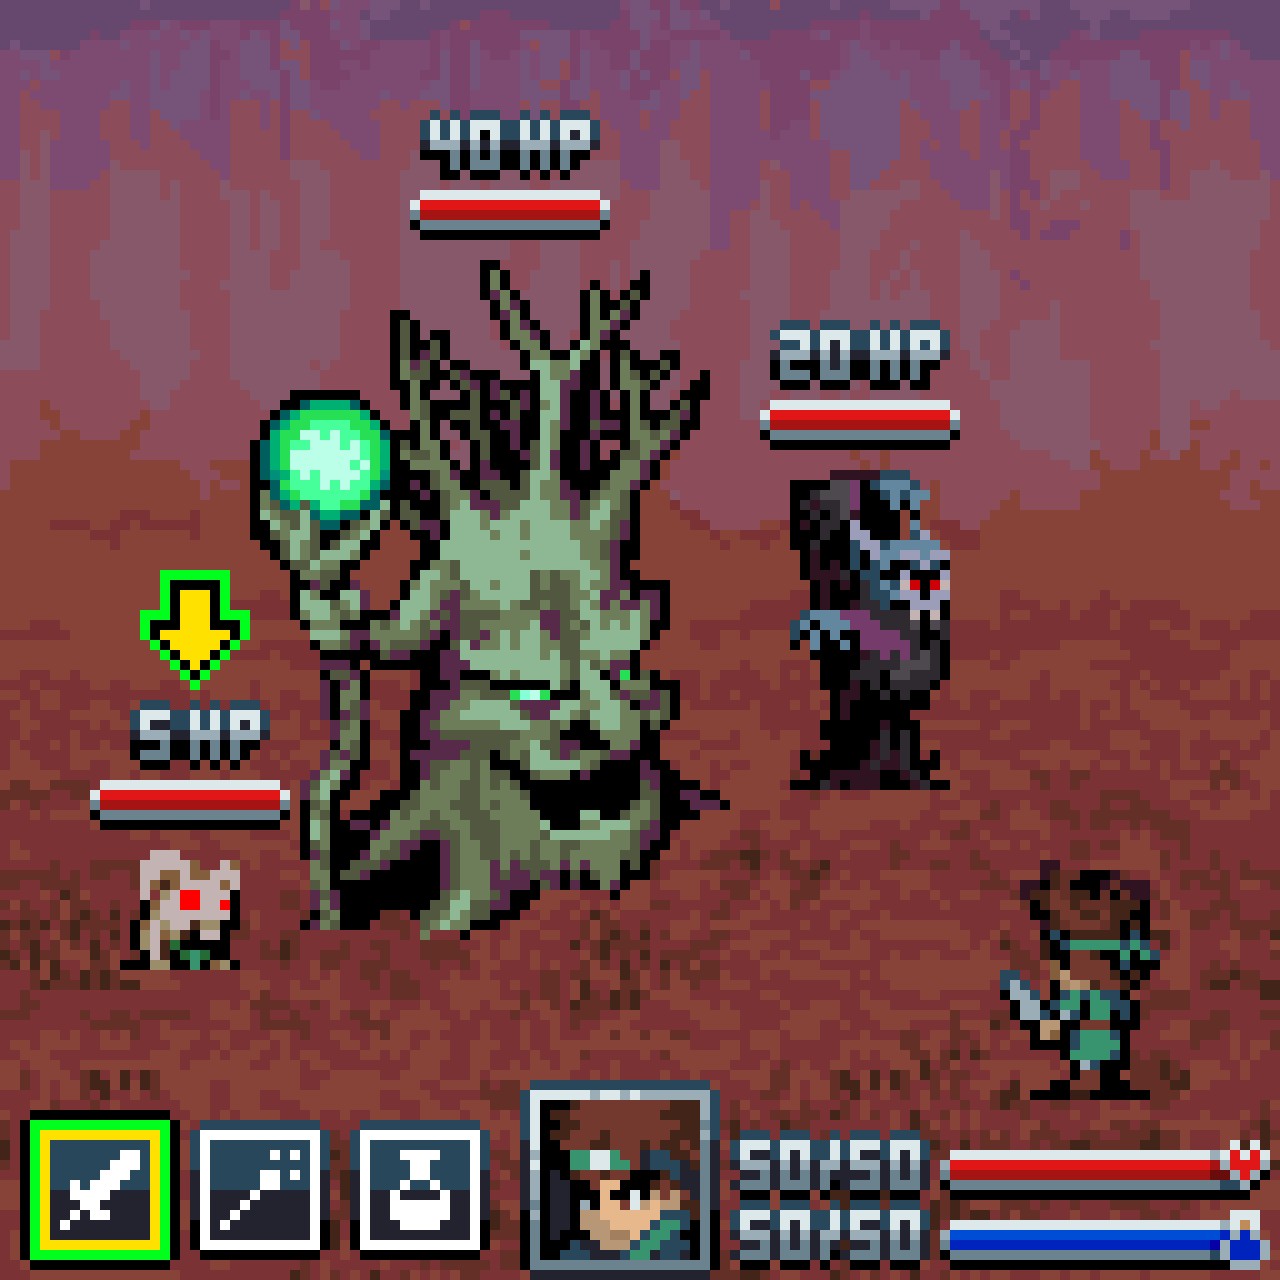
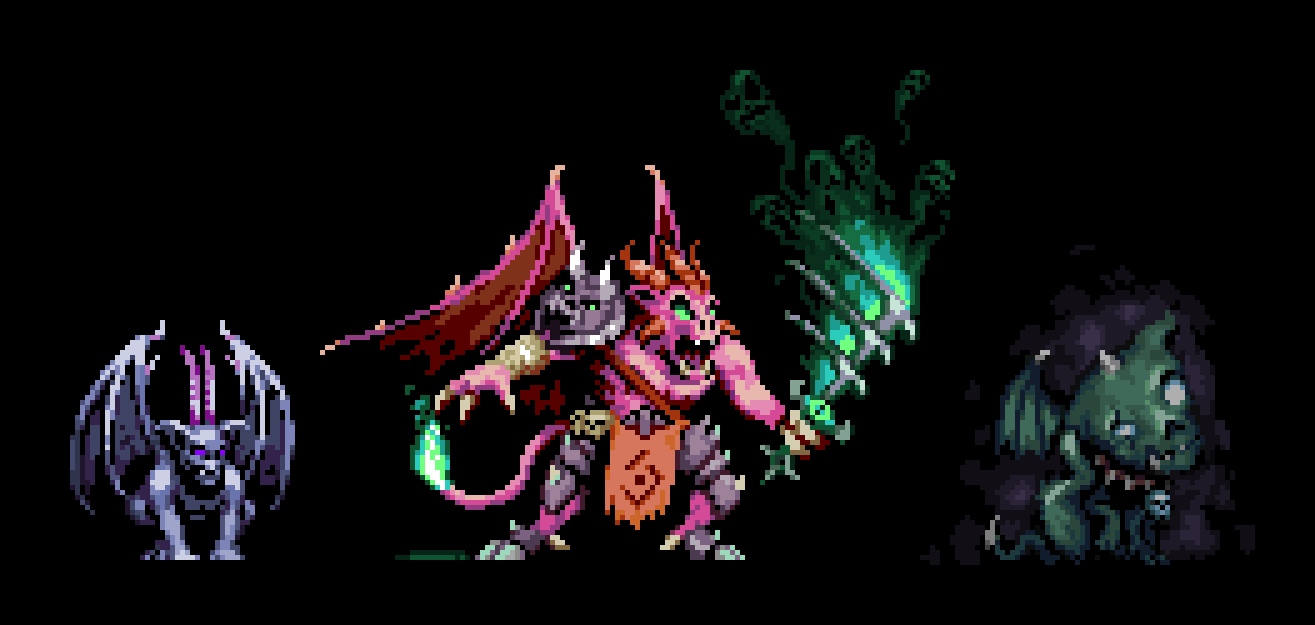
Demons
"Meatball Zombie"
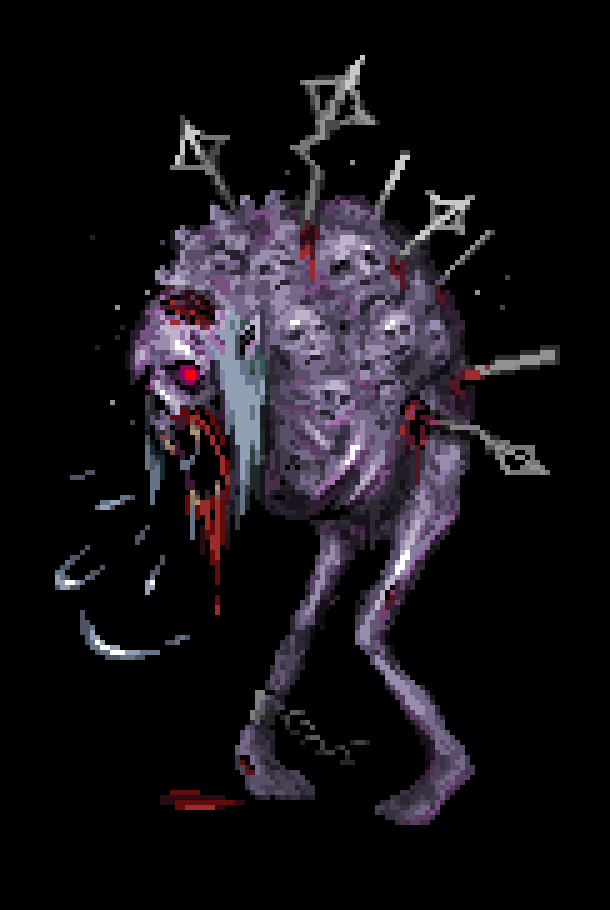
Anyway so those are my tips for drawing monsters and creatures in Aseprite. I hope this inspires you and remember to have fun. Thanks for reading!
itch.io Community » Creativity & Art » 2D Art · Created a new topic Aseprite - Line Art Accuracy Tips
Hey I'm back. In this blog I want to talk about how to achieve highly accurate line art without without literally tracing reference and instead iteratively correcting linework.
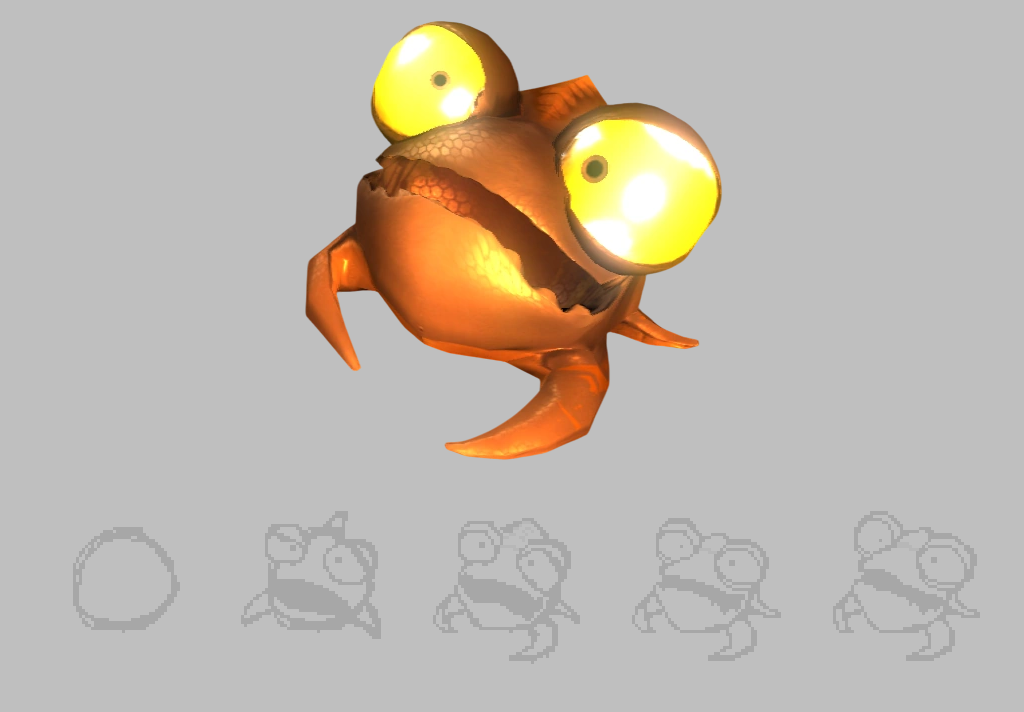
So I drew this drophyd creature as an example from the Ratchet and Clank series. Drophyds are a species of intelligent talking alien fish and they can operate mech suits or pilot aircraft for battle. Here's some examples.
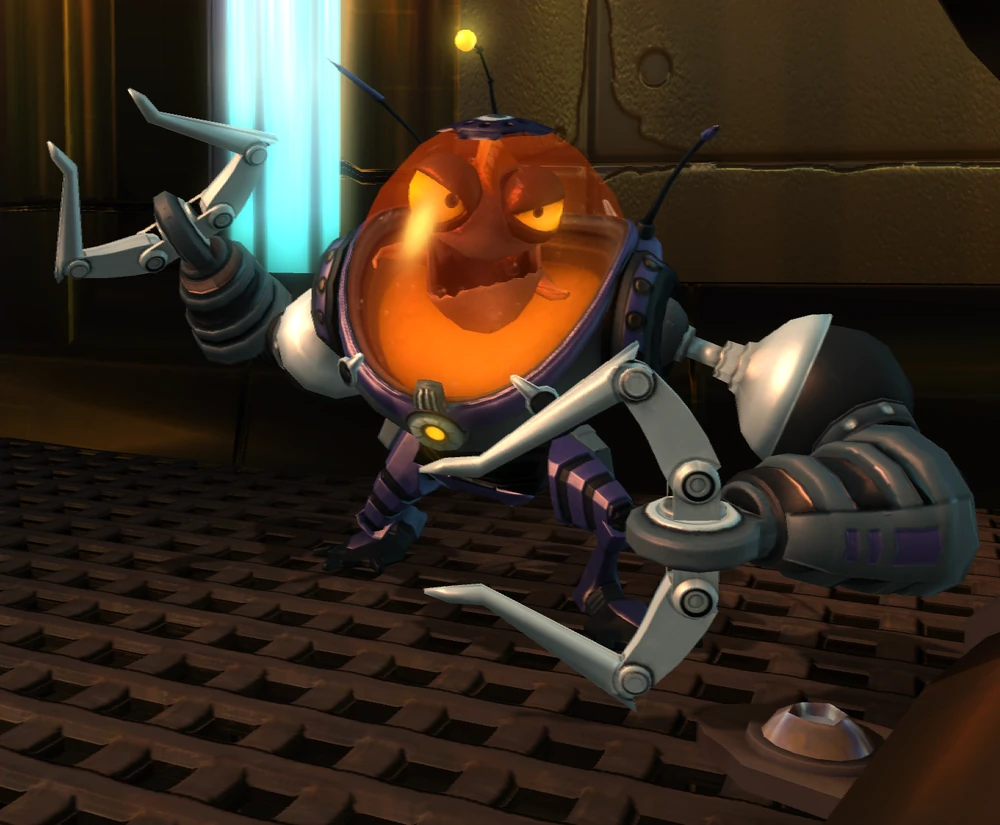
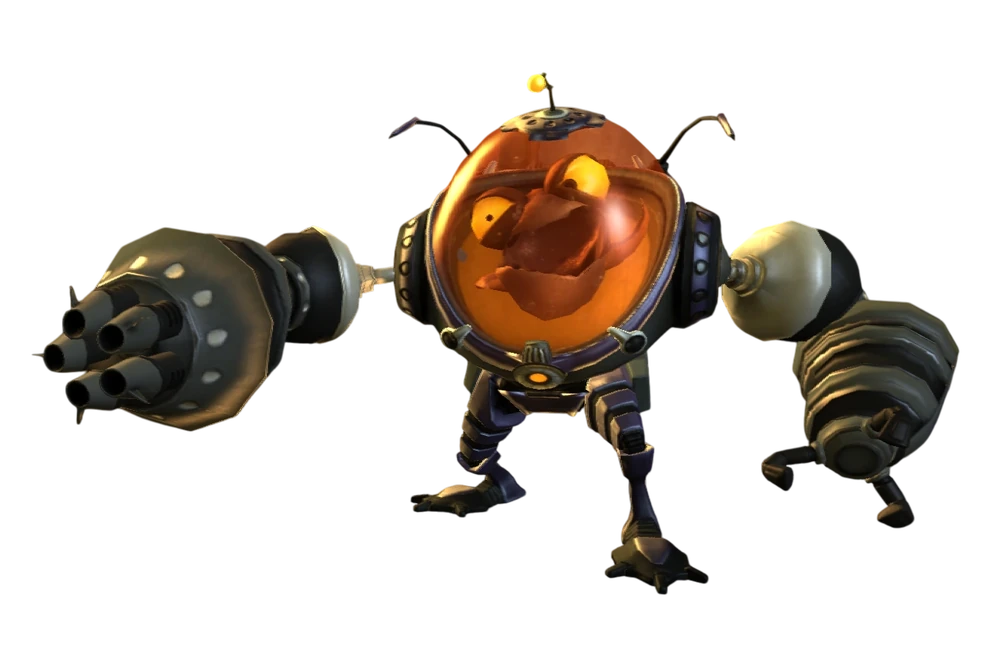
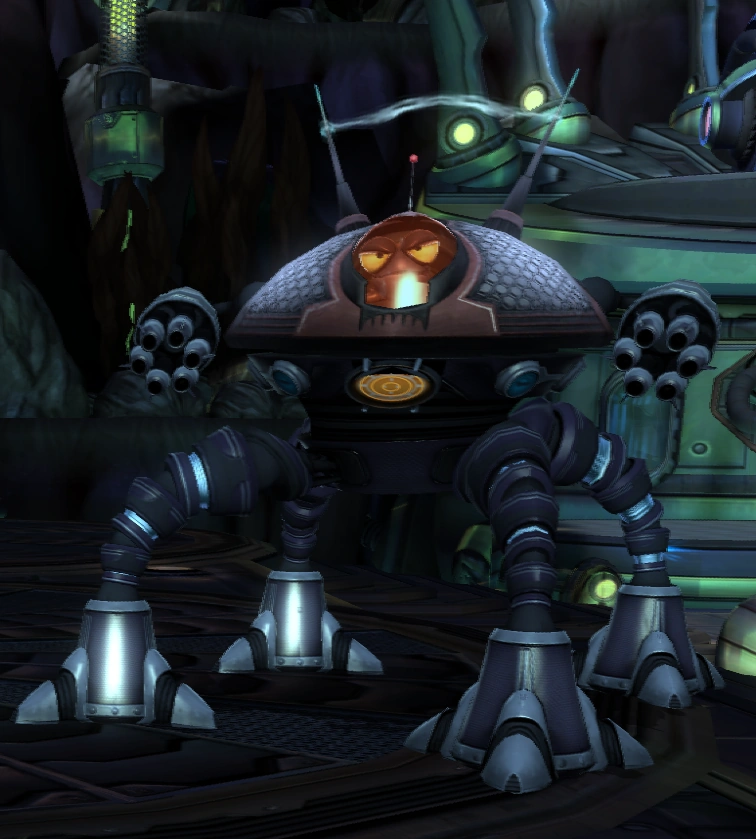
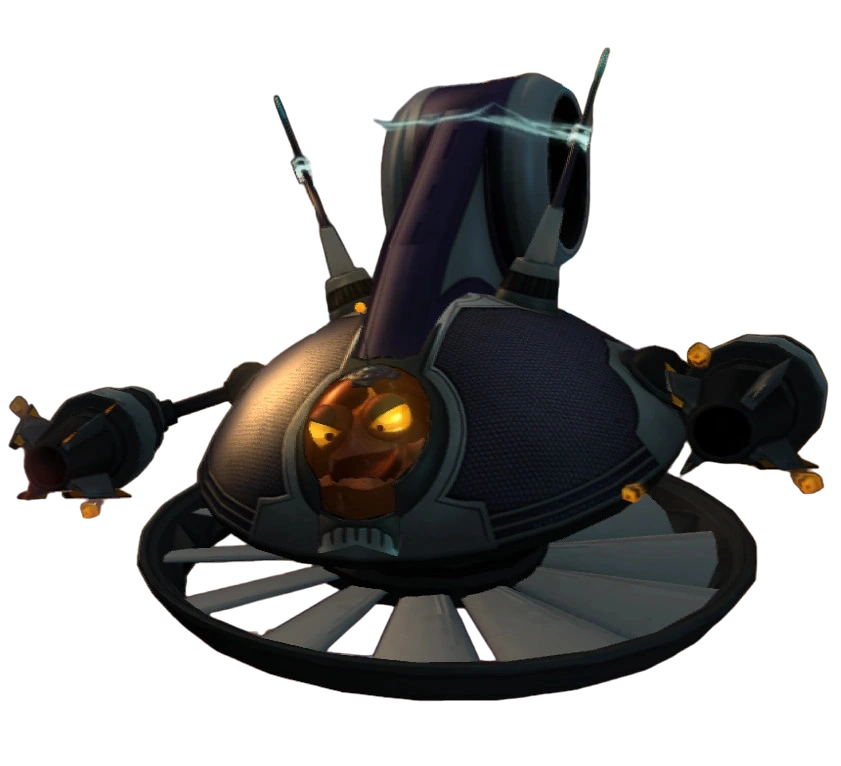
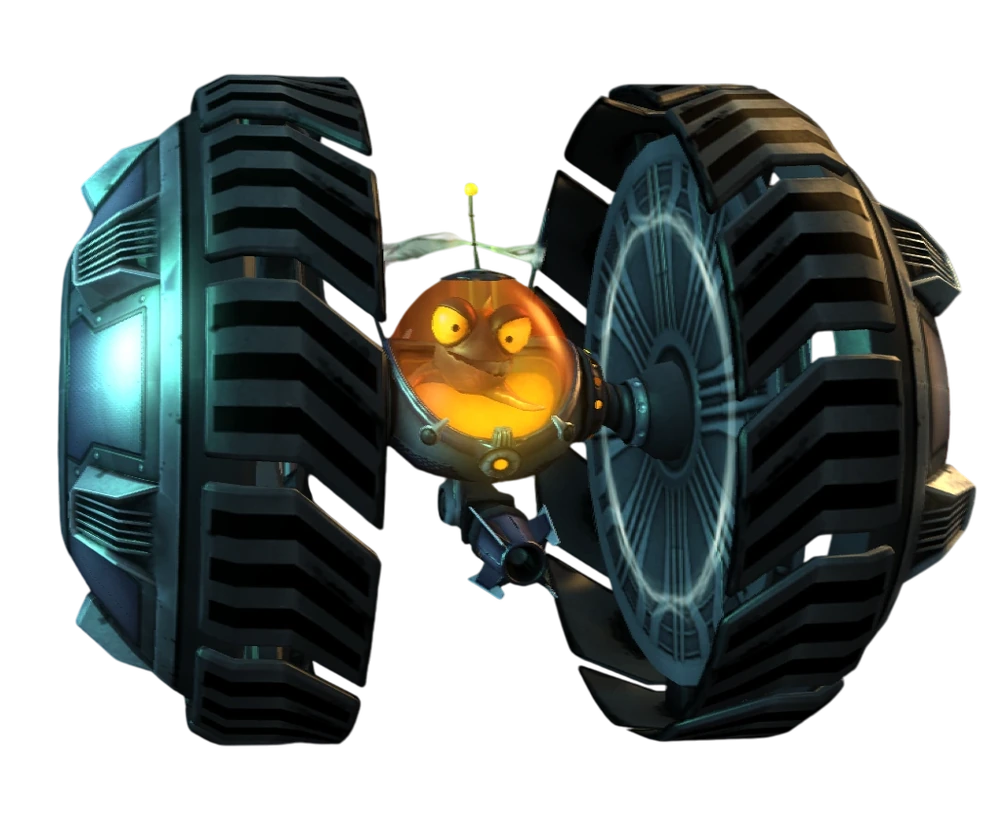
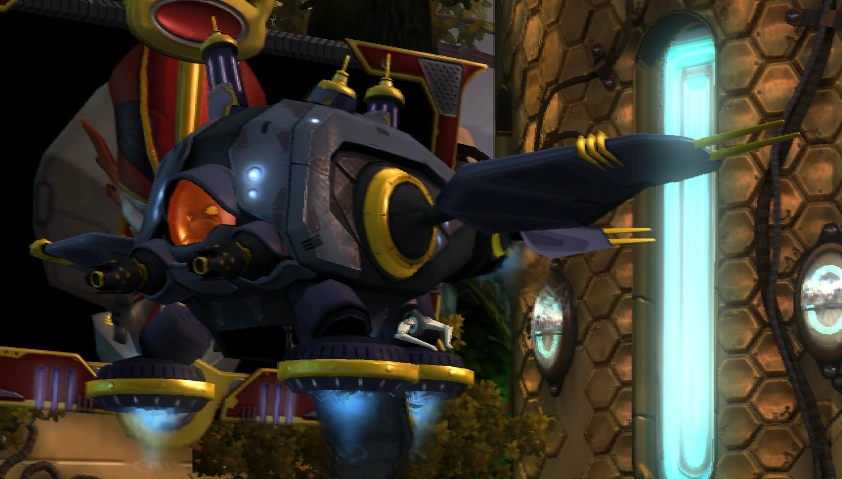
For this blog, I'm using just the fish alone without any extra battle gear because it's pretty simple, not too time consuming, and will help me explain how to create accurate line art.
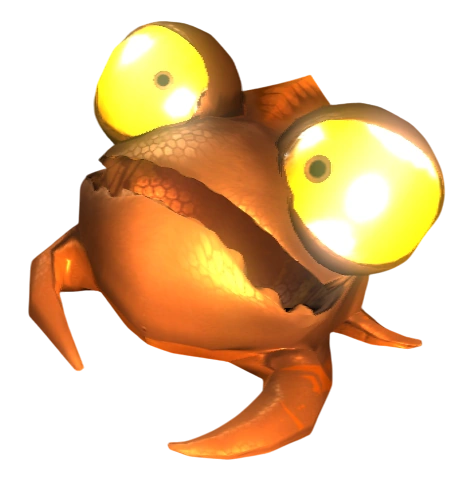
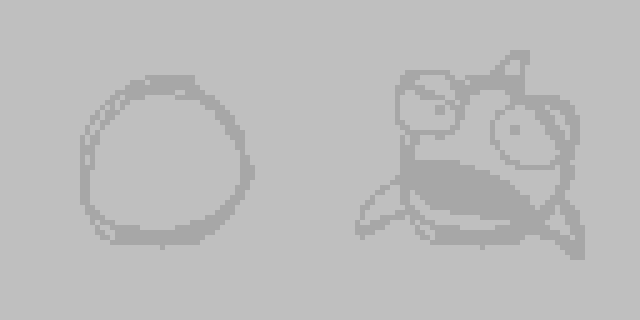
Lines can establish bounds that help you estimate measurements for smaller details (proportions, positioning, spacing, angles, perspective, etc.). For example, if we draw a basic shape that represents this fish creature, then we know mouth and eyes generally go inside the circle and the fins go outside (although the eyes are pretty bulgy and stick out of the circle).
Keep Comparing And Iterating
So that's nice and all, but that was just to get started... the fish isn't actually a circle. A circle was just a good template. To make the line art more accurate, we need to spot inconsistencies between our sketch and the original reference image.
How To Spot Inaccuracies
To spot inaccuracies, it can be pretty hard as a beginner because we often just look at the entire line sketch and can't figure out what's wrong, but once you make a habit of comparing proportions (width/height), position (X/Y), and spacing of lines of the details in relation to each other, you will have an easier time.
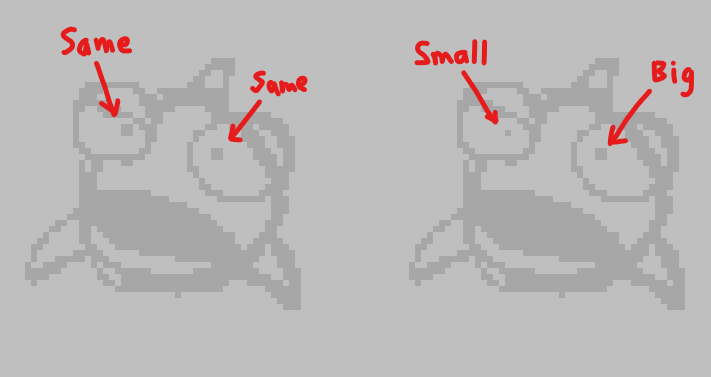
Proportion Comparison Example
For example, a proportion flaw we currently have here is that the fish pupils are currently the same size, but one is supposed to be smaller than the other. We wouldn't notice that if we only pay attention to each pupil in isolation.
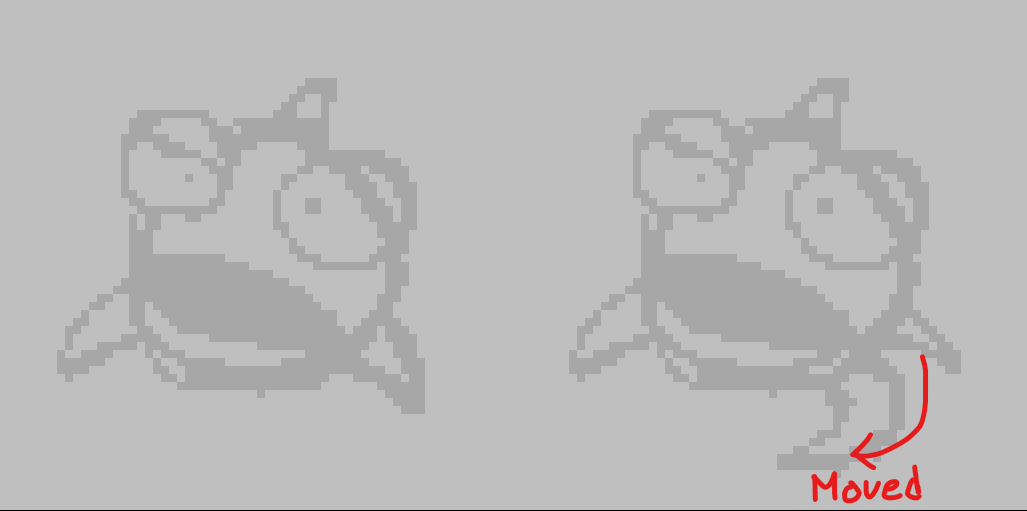
Position Comparison Example
A positioning flaw we have right now is the fin on the right, and in isolation it might be hard to notice, but if we compare the fin position with the fish's right side of his mouth (or dimple area) as a reference point, it's easier to make sense of. We'd have to move his fin over slightly, and this actually reveals his other fin in back too.
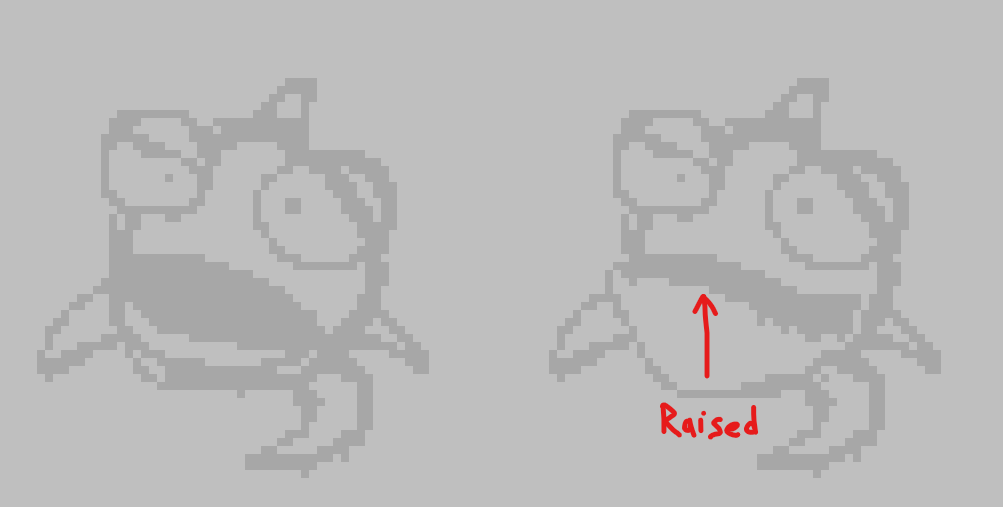
Spacing Comparison Example
In this example, we can compare the space between his bottom-most line and his lower lip from our sketch to the same exact thing but instead from the reference image, then we'll notice that the space should be much larger and that his lower lip should be raised or tucked much higher.
My Actual Iteration Process I Went Through
I just illustrated those examples to get my points across, but in actual practice, these were the iterations I got, and I think the final example on the right is pretty accurate to the original reference image.
I hope those line art tips helps and thanks for reading.
itch.io Community » General » General Discussion · Created a new topic Limiting Social Media Distractions
Hey! I'm a pixel artist here! Sometimes I'll write Aseprite tutorials and I have a portfolio on Cara. I'm not entirely sure if linking those are allowed, but anyway today I want to talk about something a bit different rather than pixel art or tutorials. Instead I want to talk about limiting social media distractions and why I think we all should, but not cut it all out entirely either.
Why?
There are a few key reasons why I think we should limit social media use per day:
- Prevent wasting a few hours per day
- Gradually reclaim peace of mind
- Save your energy
Common Types Of Distractions
- Doom-Scrolling
- Self-Improvement Videos
- Even just scrolling... honestly
Doom Scrolling
Doom Scrolling is a specific kind of digital scrolling habit... and is probably the WORST out of all of the distractions. All you're doing is endlessly looking at global pessimism like:
- Inflation
- Wars
- Loneliness
- etc.
It's a waste of time--and for some reason--highly addictive!
Doom Scrolling Drains The Most Energy!
You may just think doom-scrolling is spending some time scrolling on the internet, but do you ever realize that after you stop, you're not in the mood to do anything else or feel angry or sad? I can't say doom-scrolling is the only cause, but it could be a huge reason if you're doing this everyday.
Self-Improvement Videos (Hustle Culture)
Self-improvement content often sounds nice in theory, but most that content on the internet boils down to: work hard to succeed. But the problem is hard work isn't defined. You can literally make up whatever you think hard work is but everyone will have their own definition. And then you might make up a formula for yourself like:
A x B = C
-----------
Where...
A = Effort
B = Reward per unit of effort
C = Total success
This formula is very linear, and practically only works for fitness or leveling up in video games as far as I know... basically things where the math is predictable and generally works, so I can write these as general examples:
Videogame Example
Let's say...
A = Number of goblins you killed
B = XP per goblin
C = Total XP gained
If you kill 5 goblins and each gives 10 XP, well you get 50XP.
Fitness Example
I love doing my pull-ups so let's say...
A = Number of pullups
B = Muscle cells gained per pull-up or something
C = Total muscle cells I gain
Okay well then if I do 20 pullups and I gain 2 muscle cell per pull up, then I gain 40 muscle cells.
Maybe that wasn't a great example, but it wasn't supposed to because self improvement videos were never supposed to make sense anyway. They're there to steal your attention and watch time endlessly. Moving on.
Even Just Scrolling Is Draining
So this one is tricky because it's subconscious! It's scrolling any social media app, but it doesn't feel toxic; just a "neutral" or boring time-sink. This is still an energy drain, just not as bad as doom-scrolling. Occasionally you might see some exciting new game or piece of art and that's fine, but over time--at least for me--I've became very numb and desensitized to scrolling social media apps.
Some Quick Tips...
"Nuking" Your Youtube Homepage
My YouTube homepage became INCREDIBLY toxic over the past several years. I'd say it became 95% doom-scroll content. So what I did was I just went over to my YouTube watch history a few days ago, cleared it, and paused it. Now it looks like this:
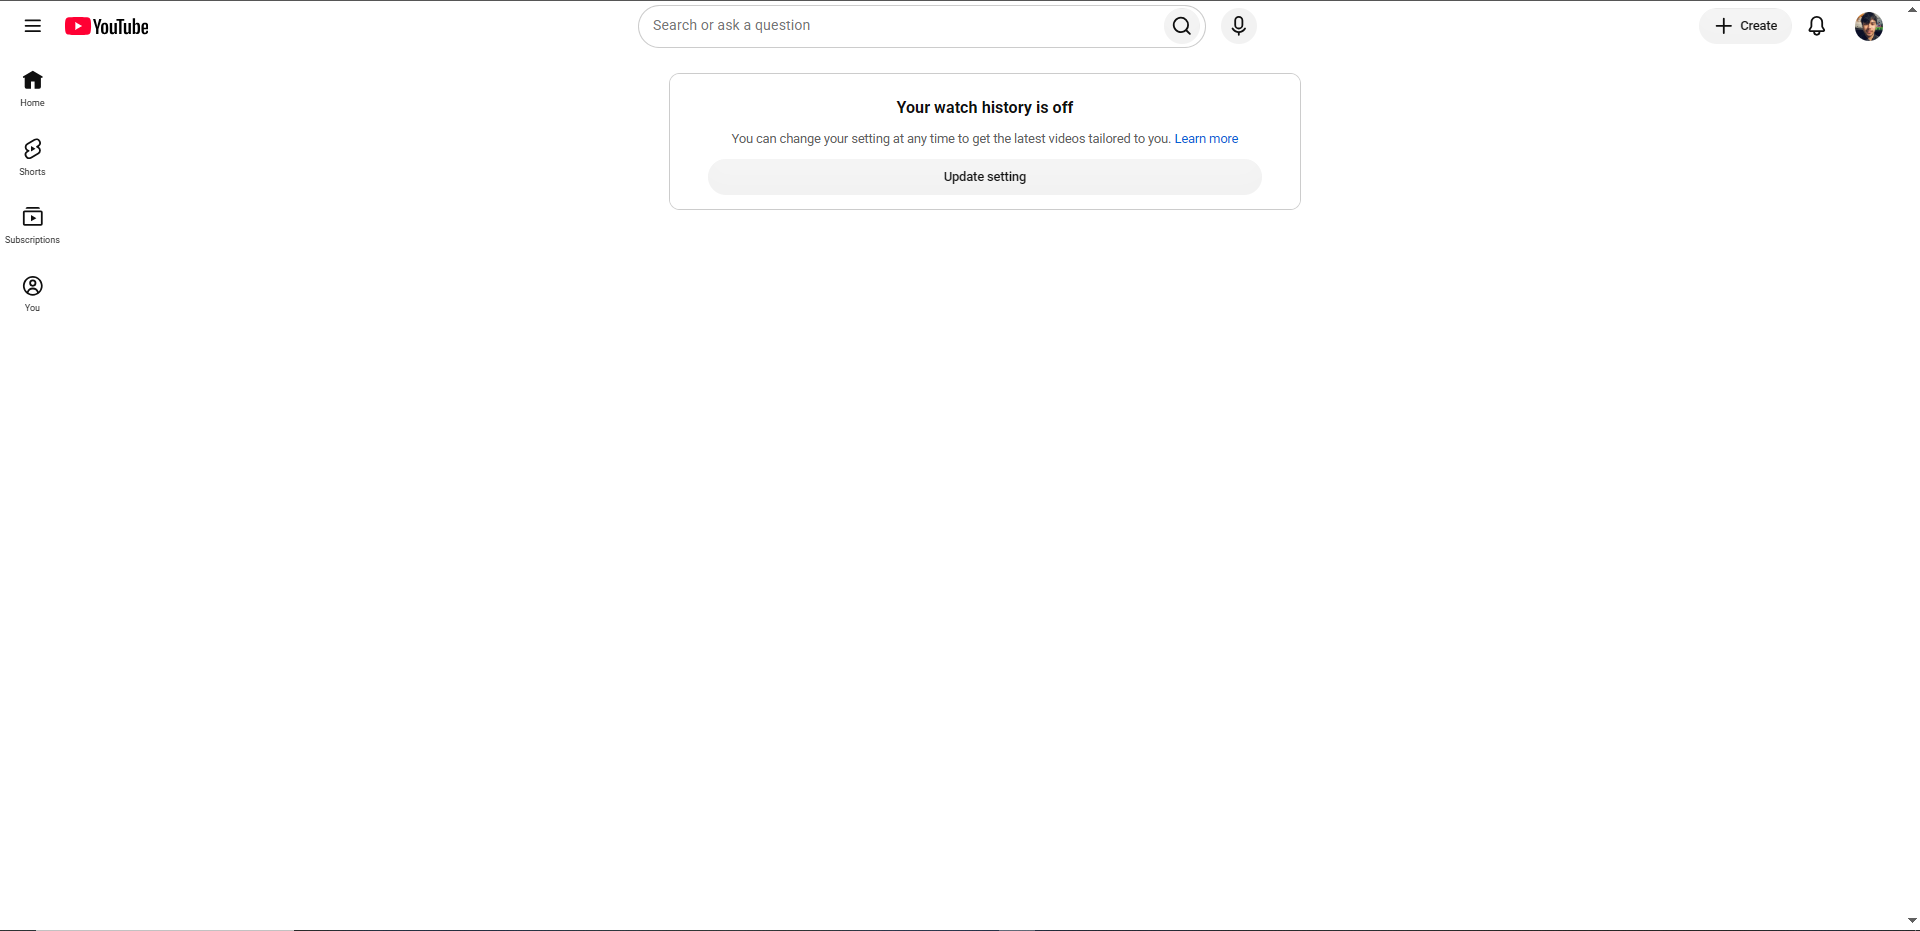
Now it's nothing but a search bar and some channel subscriptions. I did this because I've noticed that every time I saw a thumbnail on the homepage (especially when it auto-plays), I'd have an urge to click it, immediately get bored, then scroll for a different random video, hoping a good one would come up, but it's extremely rare because I've became so desensitized to the majority of homepage recommendations at this point.
Limiting Common Social Media Apps (Twitter, Bluesky, Instagram, etc.)
Limiting common social media apps is generally not as straightforward and it does take some willpower still I guess, but you can set up some daily limit rules and I don't think these apps should be entirely cut out of your lives either.
My Common Limit Rules
I'm a pixel art freelancer and I also occasionally write Aseprite tutorials in this forum in the art discussions, but these things require time and energy. I have to do whatever I can to fight for this free time. I'm not perfect at avoiding these social media apps all the time, and I don't think you should fully do that either because that can cause loneliness, but I completely deleted my Twitter account a few years back and so now I only have Bluesky and Youtube in terms of social media distractions. The other thing that helps me is to just completely avoid the main feed of these apps on most days. It's very easy to get caught in that and I will never forget how toxic the main-feed/home-page of Twitter and Youtube could be. Now instead I made a practice of just taking a few quick glances at social media throughout the day, generally to post art, art tutorials, or check what a few of my closer friends are up to, but there's not a whole lot to do on these apps most of the time in my opinion. Generally I limit my "glance check-ins" to maybe 3-5 times a day and each glance is only like ~1-2 minutes. There are exceptions where I'll slip up and go over... or even do better and not use it at all some days, but the main thing is I don't like to get caught up in the main feed of these apps. The main feed can be the absolute most distracting thing about social media apps whether they're toxic or not.
Conclusion
So those are my thoughts on social media and how to reduce time spent using them. I hope this encourages some of you so that you can spend my time making games, creating art, music, or even just gaming or fishing or whatever. I'm not here to judge how you spend your free time, but I highly encourage you to try at least nuking your YouTube homepage because that was probably the most awesome thing I did recently. Thanks for reading! If you want to visit some of my Aseprite art tutorials, you can access them below.
itch.io Community » Creativity & Art » 2D Art · Created a new topic Aseprite - Coloring, Hue-shifting, and Polish
Hello I'm back. In the previous post I talked about grayscale sketching before coloring. In this post I want to talk about coloring and polish.
These were the grayscale sprite examples from Doom in the previous post: The Cyber Demon Boss and The Spider Mastermind Boss
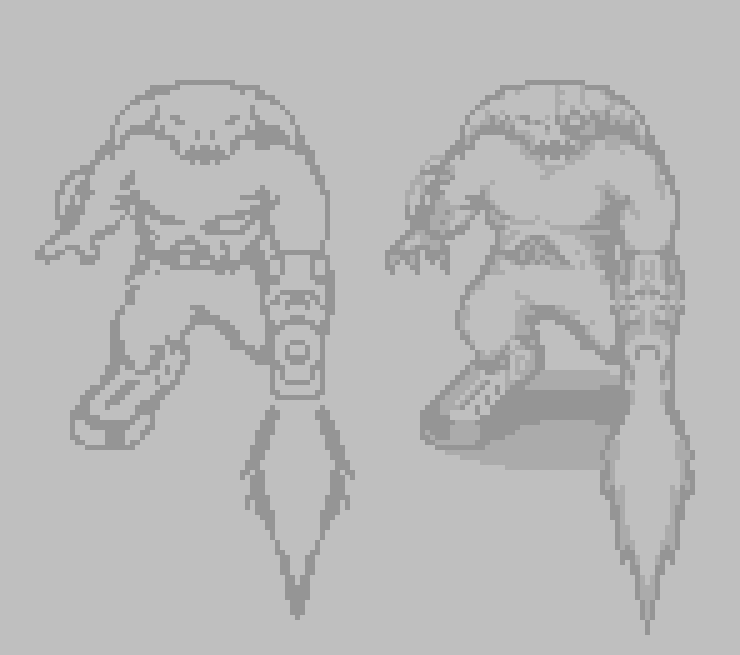
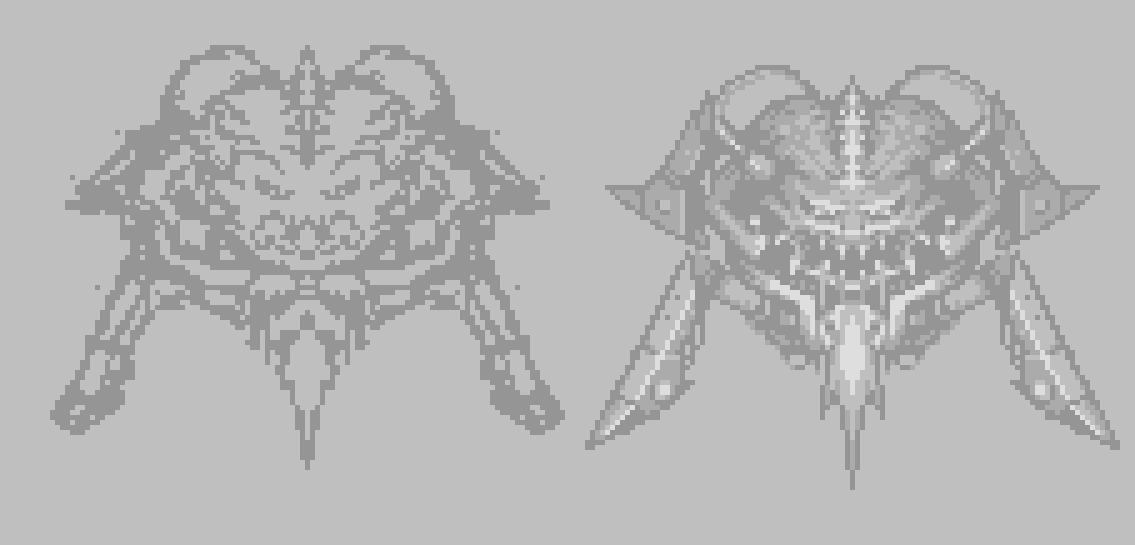
and now we want to color these sketches.
Quick Color Overlay Test
What I typically do first is create a new layer above the grayscale shaded sketch. Then I'll set the Layer Mode to Overlay and set the Layer Opacity to about 50% (It doesn't need to be 50%, but 0% you won't see any color and 100% is often too strong of color, just experiment with the % value). Let's start with the cyber demon. If you look at the bottom of the image, you can see my layer sequence and properties for the overlay.
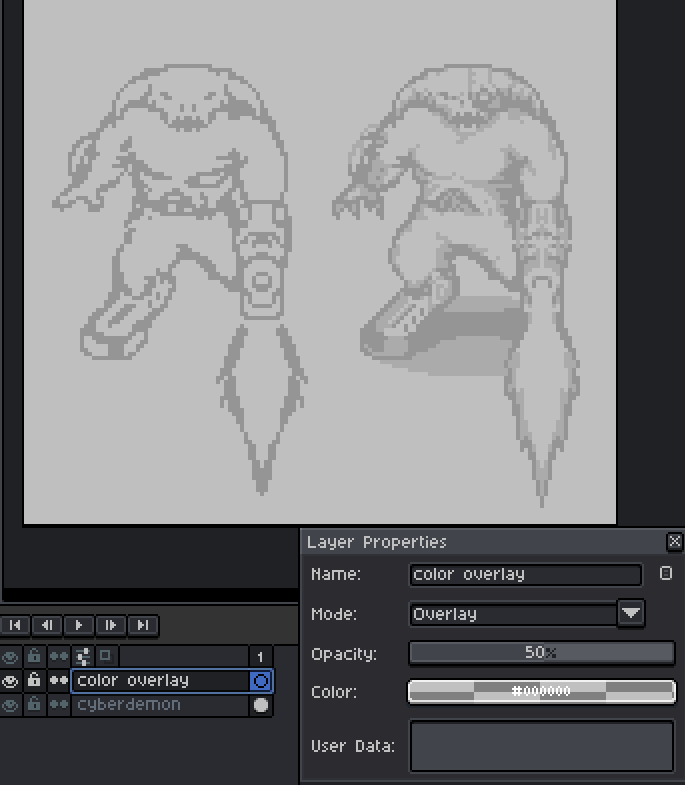
Some Cyber Demon Refs
Now here's what a cyber demon boss looks like from the Doom series, though he takes various appearances depending on the game entry we're talking about. I kind of just drew something inspired rather than copying any one cyber demon exactly the way it is.
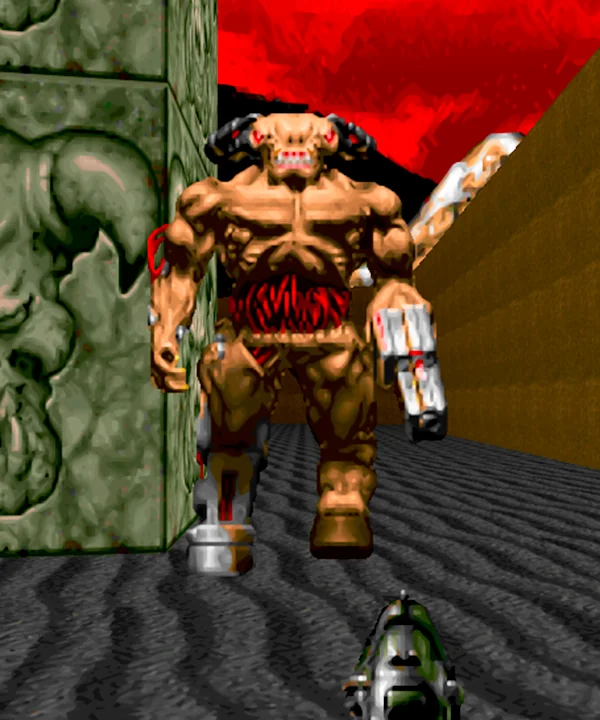
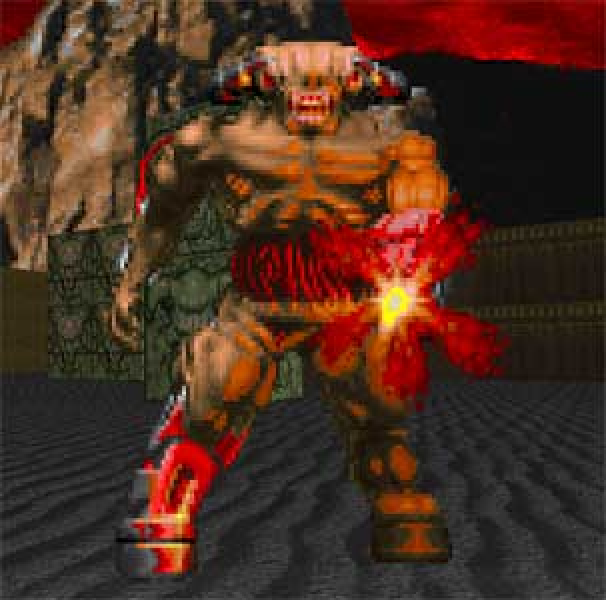
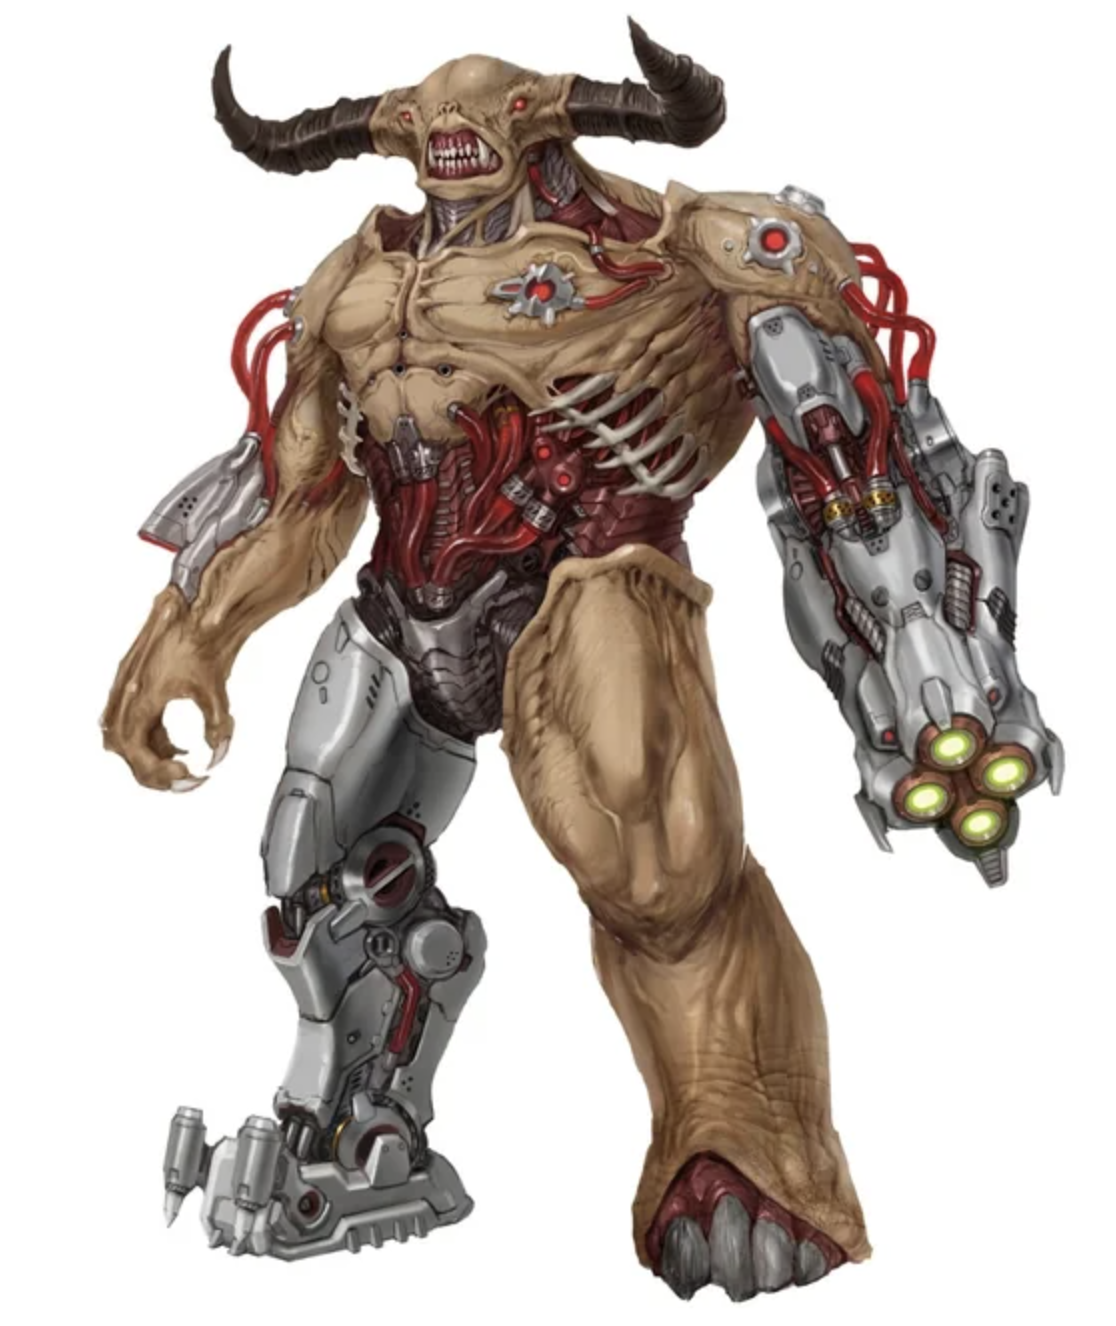
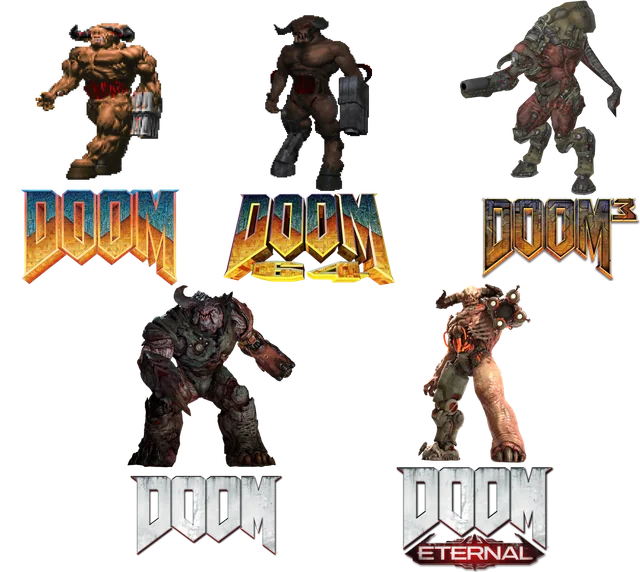
He's basically a large cybernetic demon that shoots rockets. If you get hit once or twice, you're pretty much dead.
Picking Initial Colors
You don't need to stress to hard about perfect colors yet. Just pick some general colors that seem to work enough because we will pick more accurate colors later. With the new color overlay layer we just created, try drawing colors over the grayscale drawing, and you can use a large brush to speed up the process if you want. Notice that the overlay mode keeps your original shading work intact as you color on top. You can also experiment with the alpha value with your brush too if that helps. In the end you can erase any excess color edges.
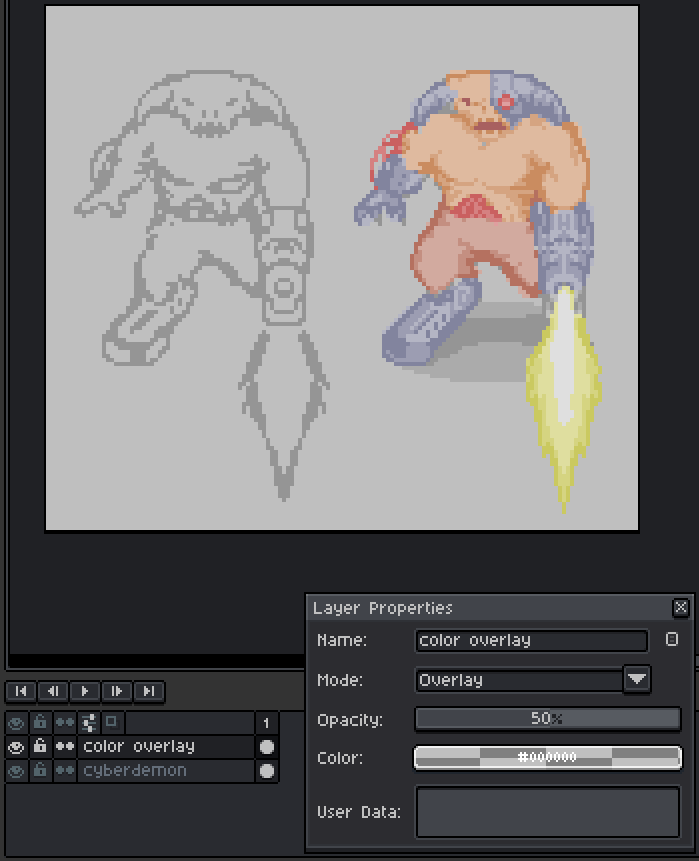
Merge Down The Layers
Now at this point I like to just keep layers simple. We can overall see our cyber demon sketch already and I typically don't like having multiple layers for something like a monster sprite as multiple layers often confuses me, especially if they aren't fully opaque and contain semi-alpha values and stuff like that, so I would suggest merging down the color layer into the grayscale layer (in this case we'll just smash everything down into the "cyberdemon").
Note: Sometimes merging down the overlay will cause weird colors, but only typically if you have just a bunch of layers... specifically transparent layers layered on top of each other and you merge them down in random order. This stacks and combines layer opacities together, which can be problematic. If that happens, just undo and "flatten visible layers" you want to merge instead.
If you want to repeat and do more color overlays to achieve a better start, you totally can, but anyway now I have just one layer, "cyberdemon".
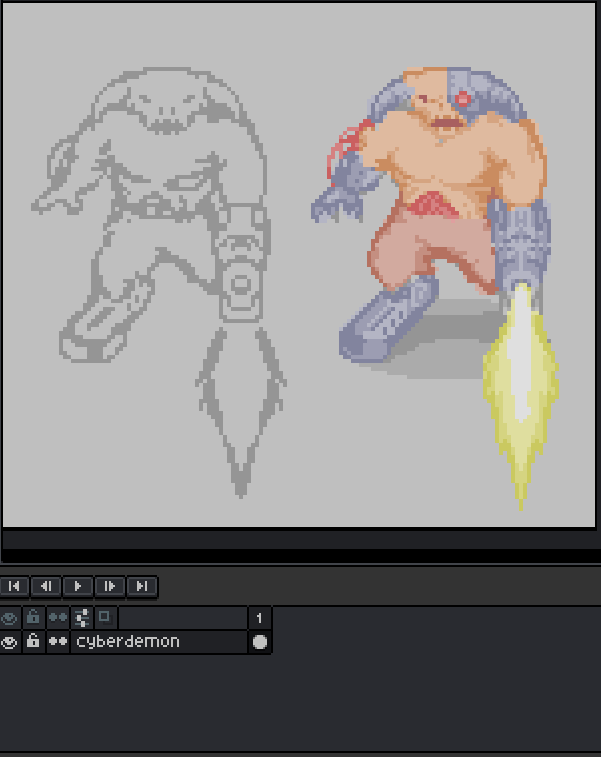
Magic Wand Tweaking and Hue-Shifting
Here's where the magic wand tool is pretty useful, you can select any resulting color on the canvas and then slide the HSV (Hue, Saturation, and Value) to pick better colors. You typically want the wand tolerance to be pretty low, generally like 0 to 10, and have contiguous unchecked. For example:
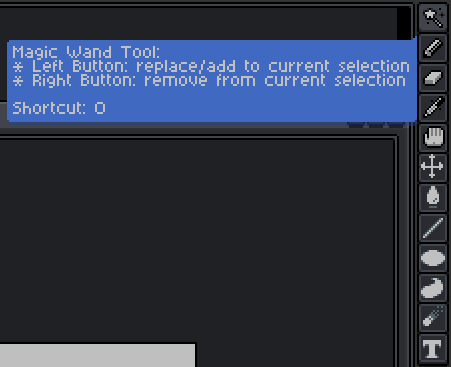
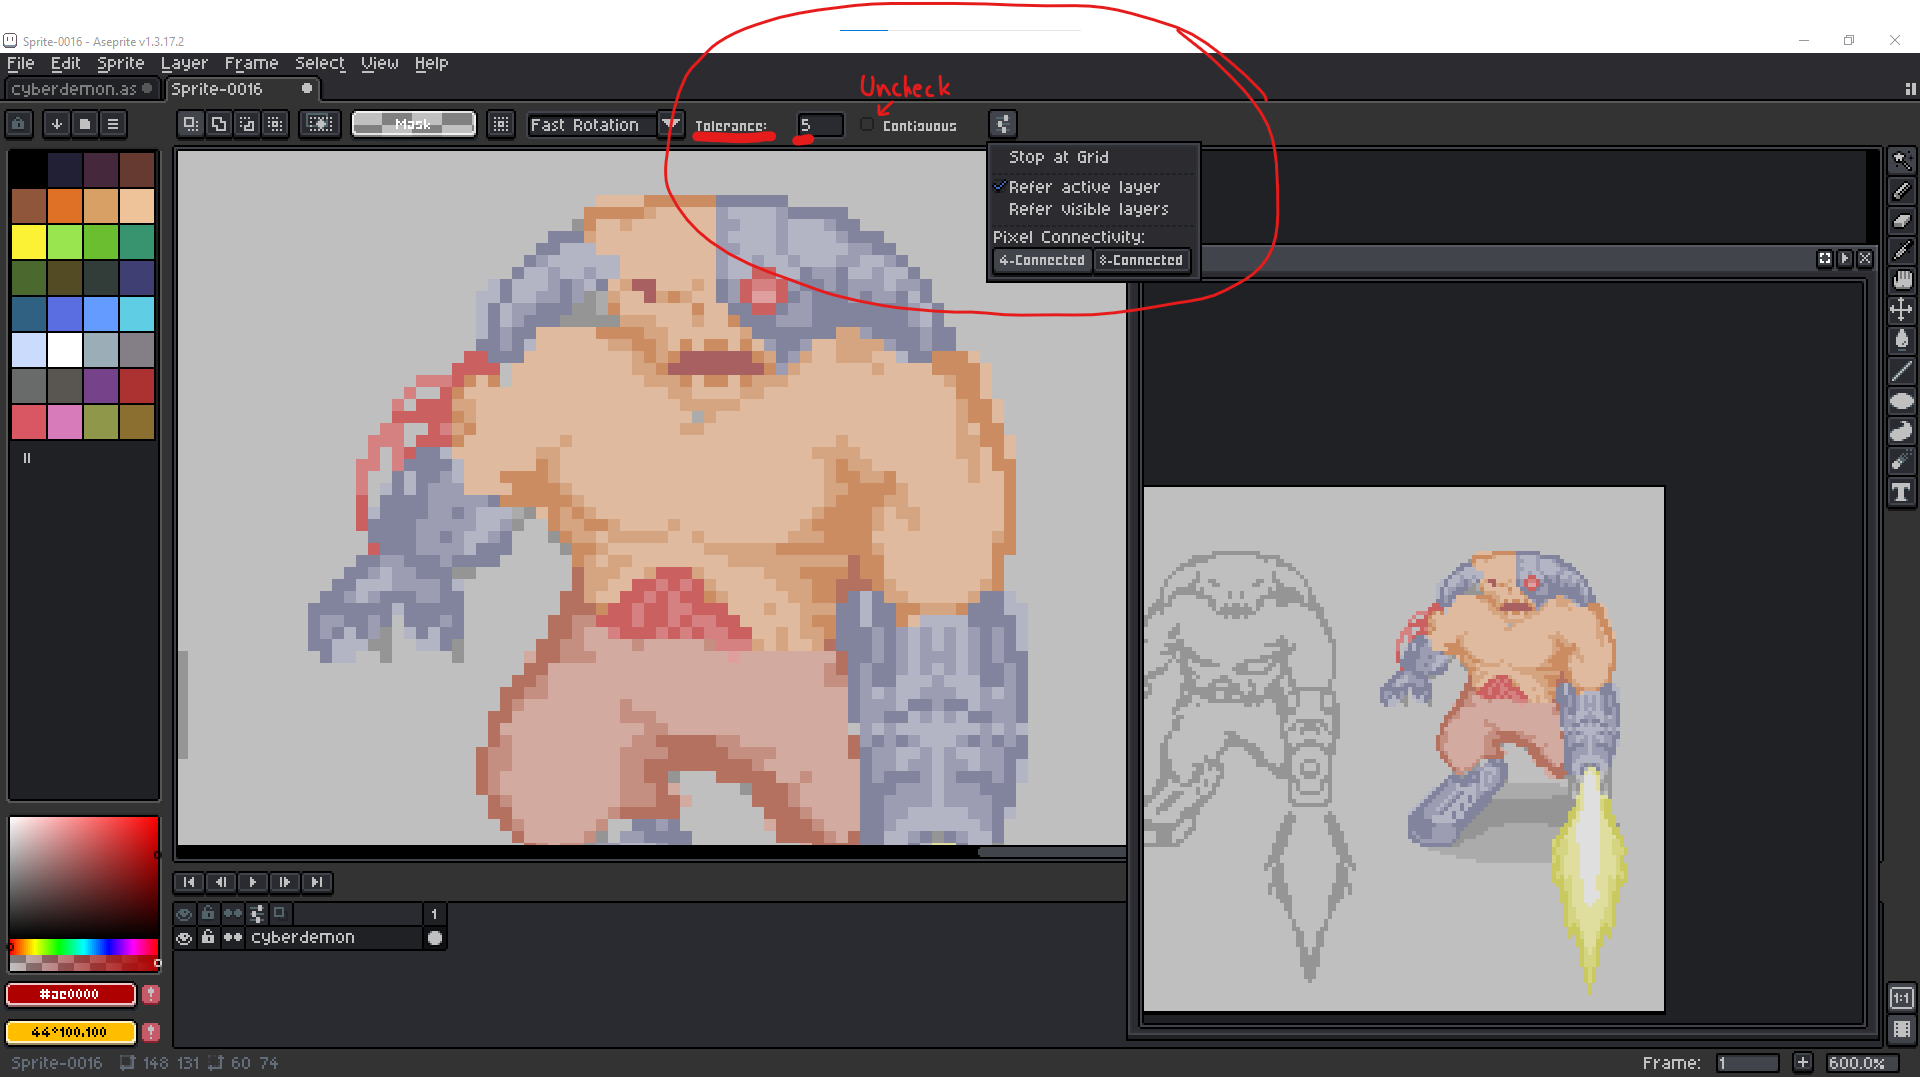
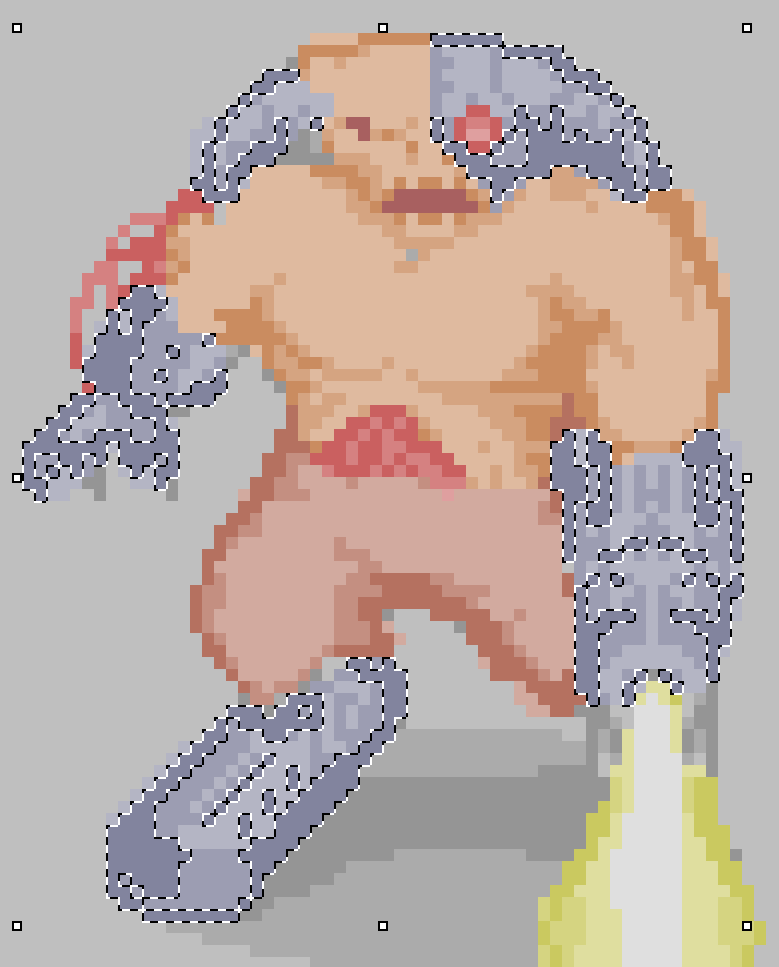
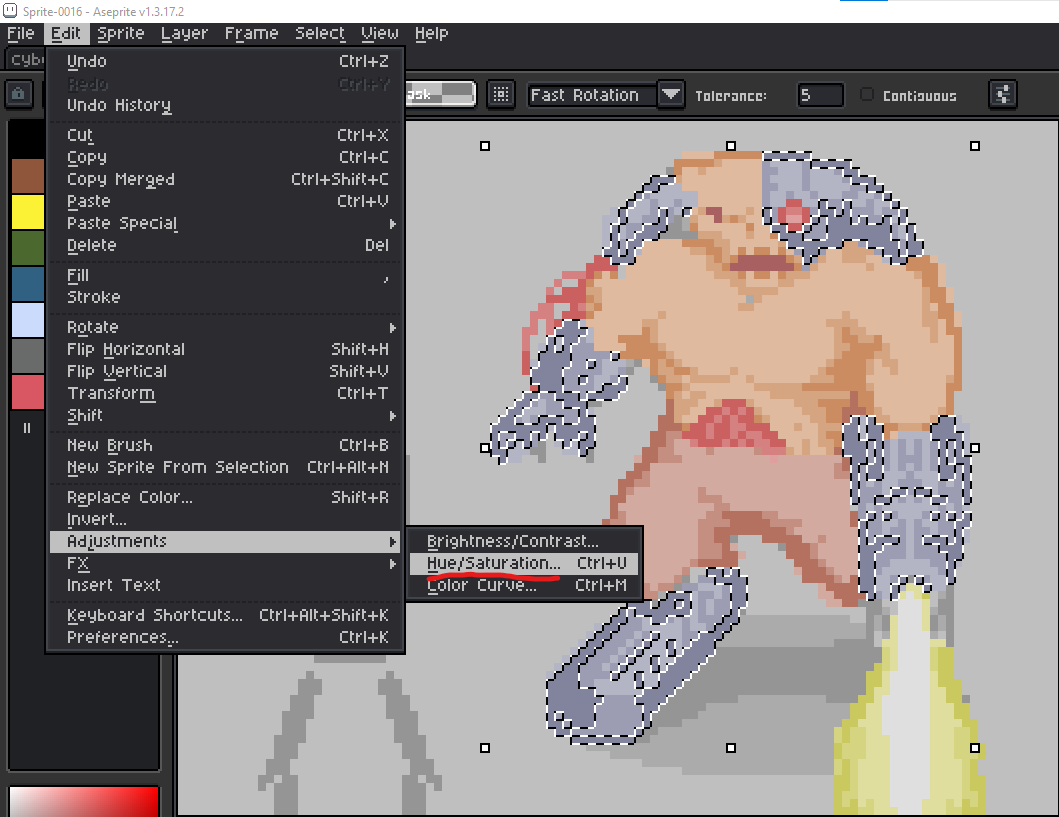
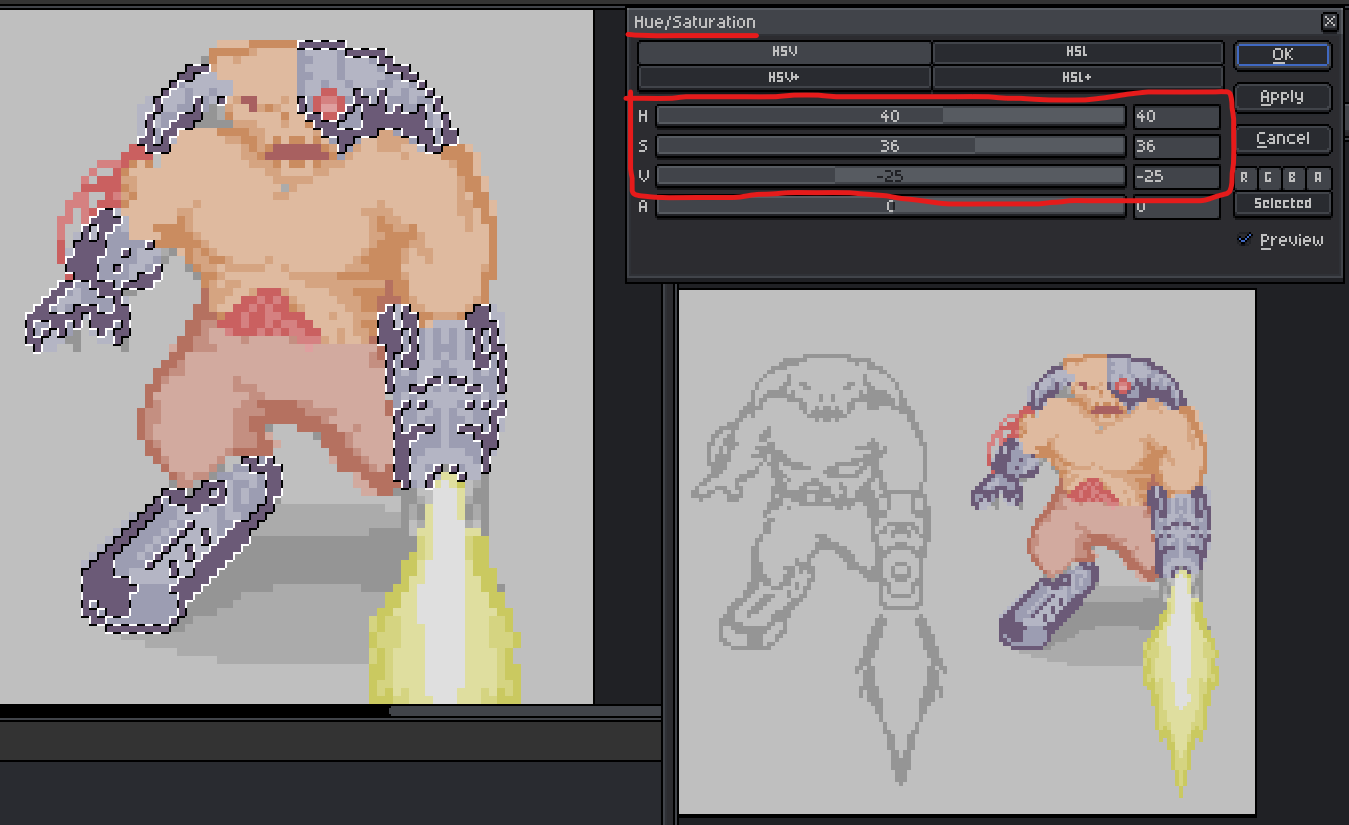
So that's just a quick example, in case you're not familiar with the magic wand tool yet.
Hue Shifting Explained
Although we can make up nuances for hue-shifting, the general formula is:
- Shadows -> Cooler Hue (Blue or Purple) -> More Saturation
- Highlights -> Warmer Hue (Yellow or Orange) -> Less Saturation
Remember that and you're golden.
So after messing around with the magic wand and sliding colors around, here's the progress you can expect:
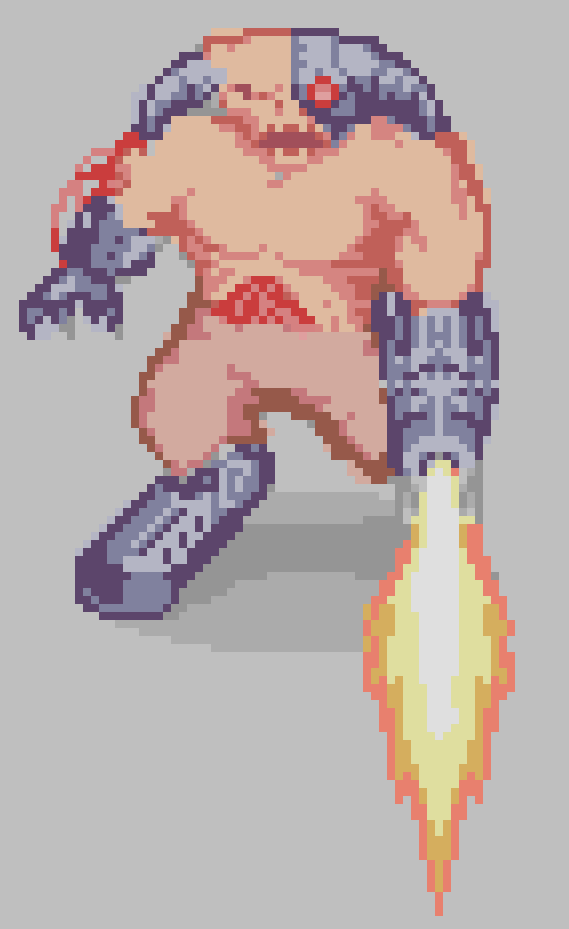
Polish
Now... you can push the polish further, but this requires the eyedropper tool (which you can actually just set to right click from the Aseprite Preferences) and the standard ordinary pencil tool. This is the point where shortcuts and little gimmicks don't work as much, but I hope you enjoy the process.
Deriving New Colors With What We Already Have
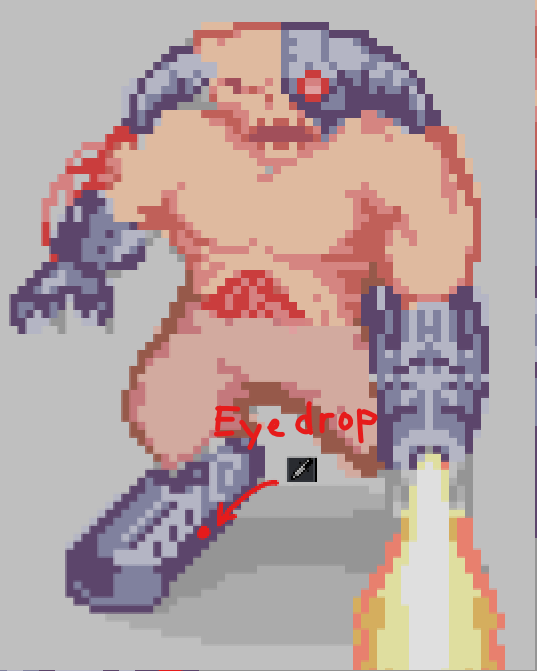
So we already have decent colors at this point, but the sprite isn't final yet. You can use the eyedropper to select these existing colors off the cyber demon, then very similarly to hue we were just sliding HSV values around earlier, we can do that with our brush color sliders. For example: I can eyedrop the darkest purple color on the cyber demon's metallic bits, then tweak the resulting brush color just a bit to achieve a stronger shadowy color.
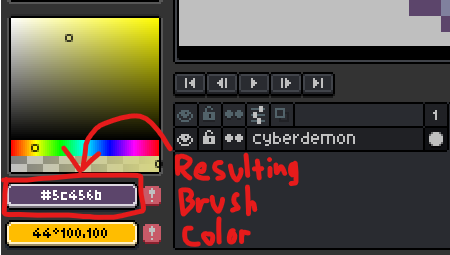
Click that purple rectangle and pop out the brush color sliders so the slider window doesn't annoyingly auto-disappear for you.
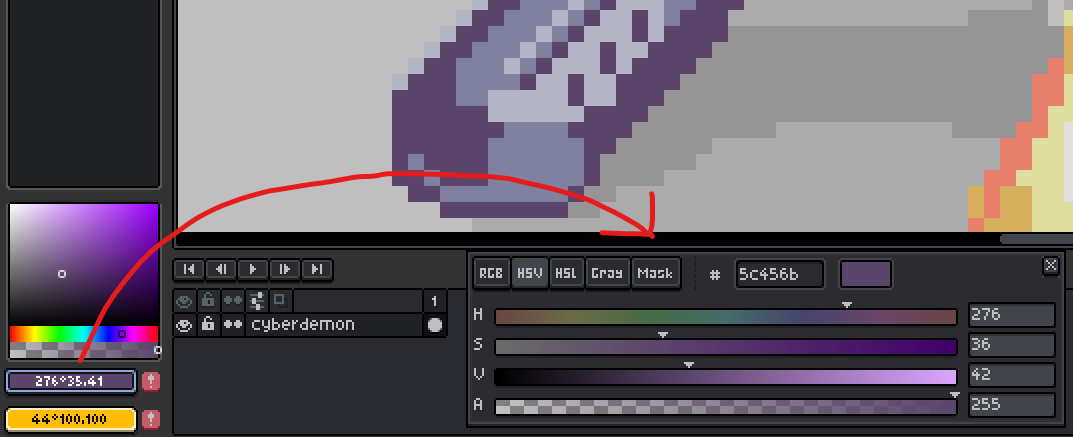
Then tweak the brush color by hue-shifting into a shadow color and use the new brush color to draw and see the result!
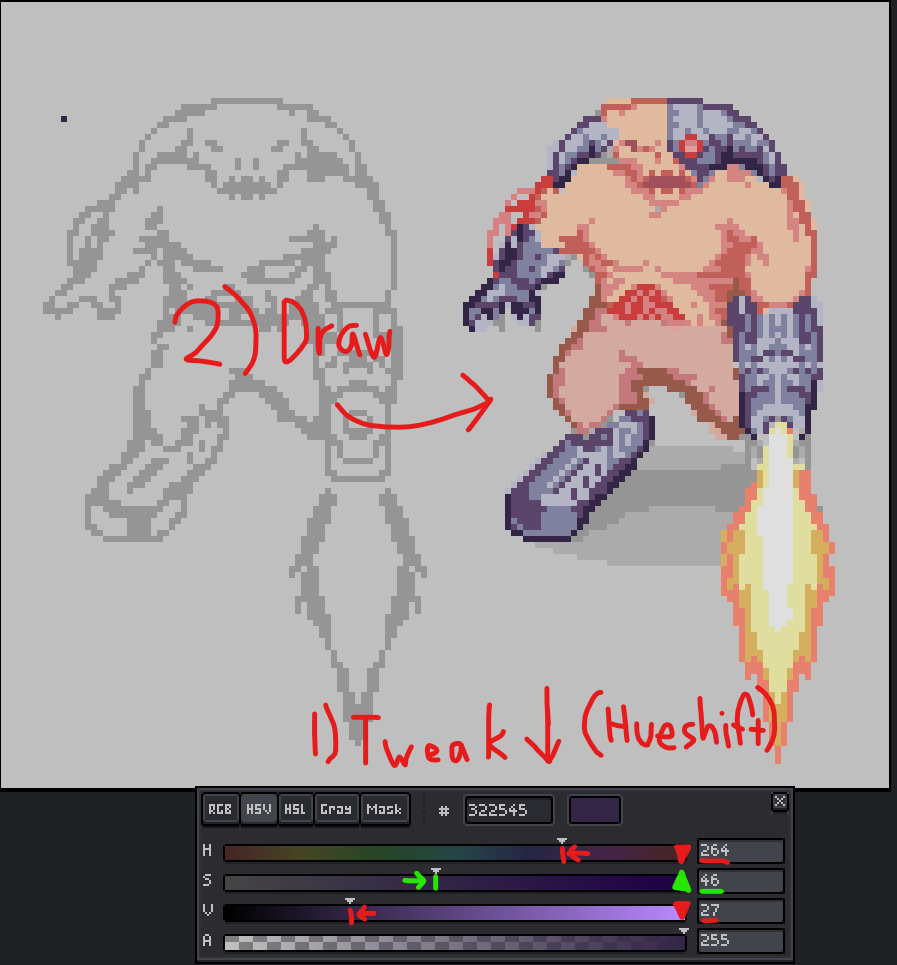
Then from here, that's pretty much the process you're going to repeat, along with using the eraser tool if you have to. In the end, with enough practice, you can make sprites like this!
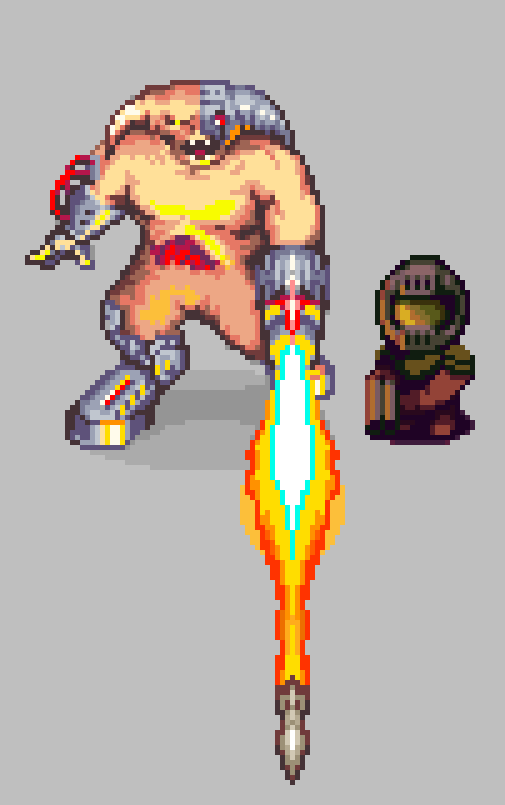
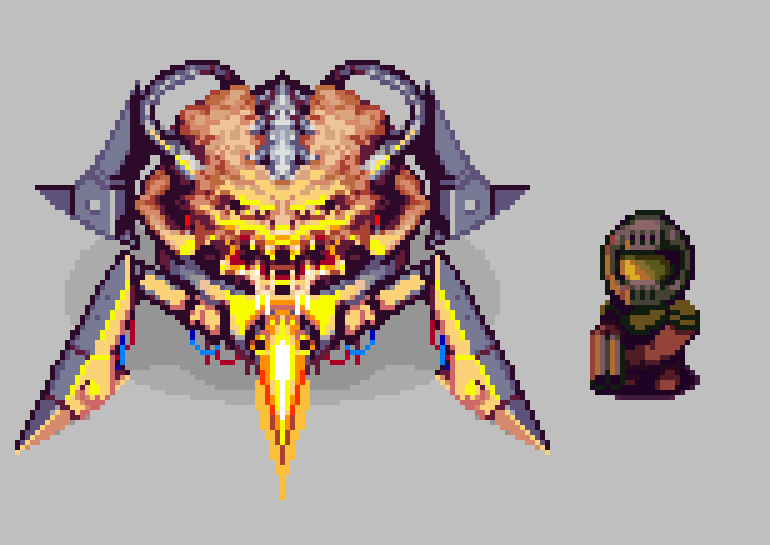
I hope this tutorial was helpful and thanks for reading!
Hey guys. Sorry for being inconsistent and abandoning some of my previous tutorial series! :( But today let's talk about Aseprite and "grayscaling". It's just a useful overlooked process for beginner artists but even I to this day still do grayscale under certain situations before I color my art.
Grayscaling
I don't know if "grayscaling" is an official art term but I know many artists use this as part of their early art process. The point is to not necessarily focus on grays, black, and white when you're sketching, like you can sketch in monochrome and that's totally just as effective as grayscaling. The point is to focus on sketching shading values onto a canvas in order to achieve accurate shapes, details, lighting, and proportions, and planning, without thinking about colors just yet.
The Pros
Grayscaling is useful because it can save time and energy when your goal is only to figure out all that stuff I mentioned earlier (accurate shapes, details, lighting, proportions, planning) first, without the added stress of simultaneously picking the right colors as you're sketching. You're not sliding Hues or Saturation. You're only sliding Values, and using them create the appearance of 3D forms on a canvas. Also this might be subconsciously overlooked or maybe it's just what I think, but grayscaling is a chill way to zone out and actually enjoy the art process instead of hating it all the time.
The Cons
Grayscaling is literally extra initial draw time. The time it takes to complete art is mathematically Sketch Time (Linework, Shading) + Color Time (Colors, Polish). If you're trying to just draw a little bird that's like 16x16 pixels, you may be better off skipping the grayscale sketch phase if you think you'll save time skipping it. So in some cases, just skip grayscale entirely. It's not a rule. By doing so, you save initial draw time, but you risk working harder and spending more time later. It doesn't really apply to every art task, but specifically for highly complicated art tasks. Imagine trying to draw something highly complicated like something as full as a metropolitan city like New York, Los Angeles, or Tokyo, but skipping grayscale... That's probably hard! I can't do that! I think only Kim Jung Gi can do that. So sometimes just plan ahead and gauge the risk.
How to Grayscale
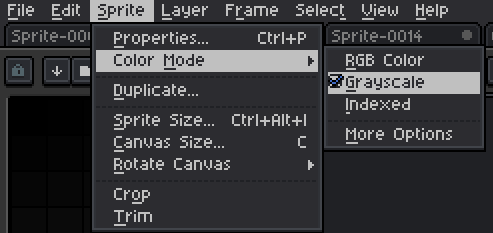
In Aseprite, it's pretty simple. To grayscale, you can set Color Mode to Grayscale and switch back to RGB later,
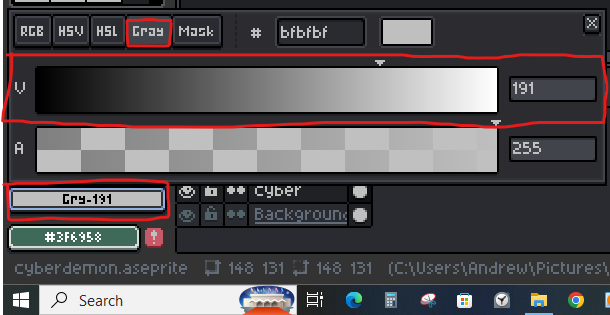
or you can use the grayscale brush slider at the bottom left of Aseprite.
Examples
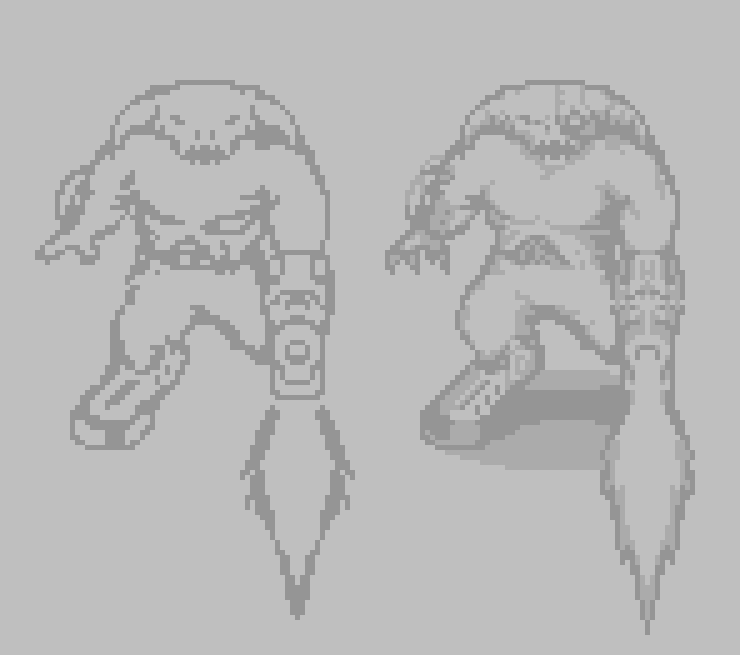
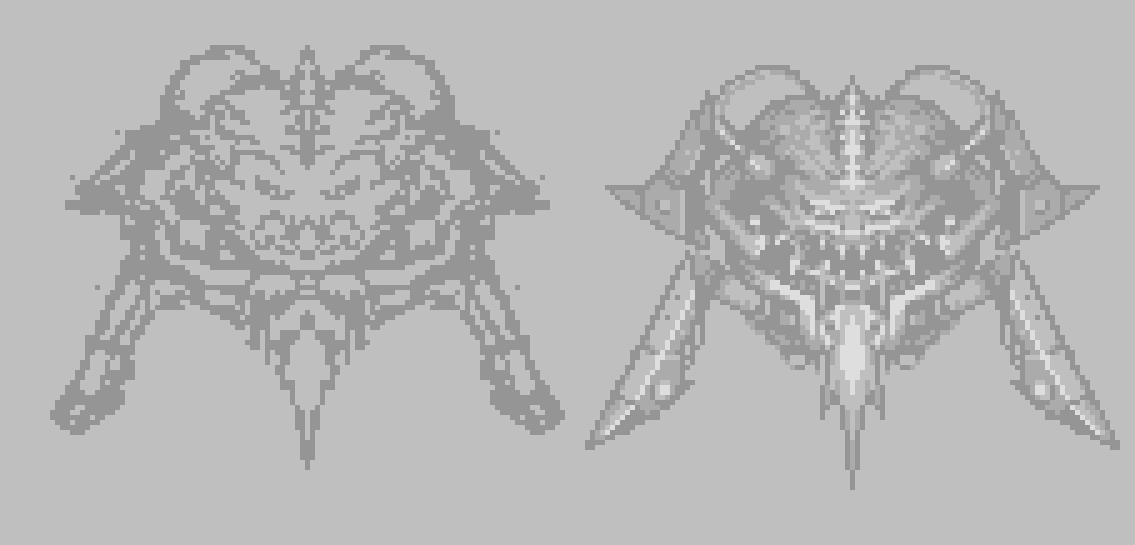
Some of you on social media probably hear my talk about Doom too much, but the Cyberdemon and Spider Mastermind bosses from the game serve as perfect examples of how grayscale can be used. I show step by step going from Linework to Shading. Hopefully this makes drawing not look so hard to do!
Cyberdemon Grayscale Example
Spider Mastermind Example
Final Thoughts
So that's grayscaling. I want to keep a coloring, hueshifting, and polishing tutorial seperate as it would make this tutorial redundant and convoluted but thanks for reading!
itch.io Community » Creativity & Art » 2D Art · Created a new topic Turn-Based RPG Monster Pack Ideas
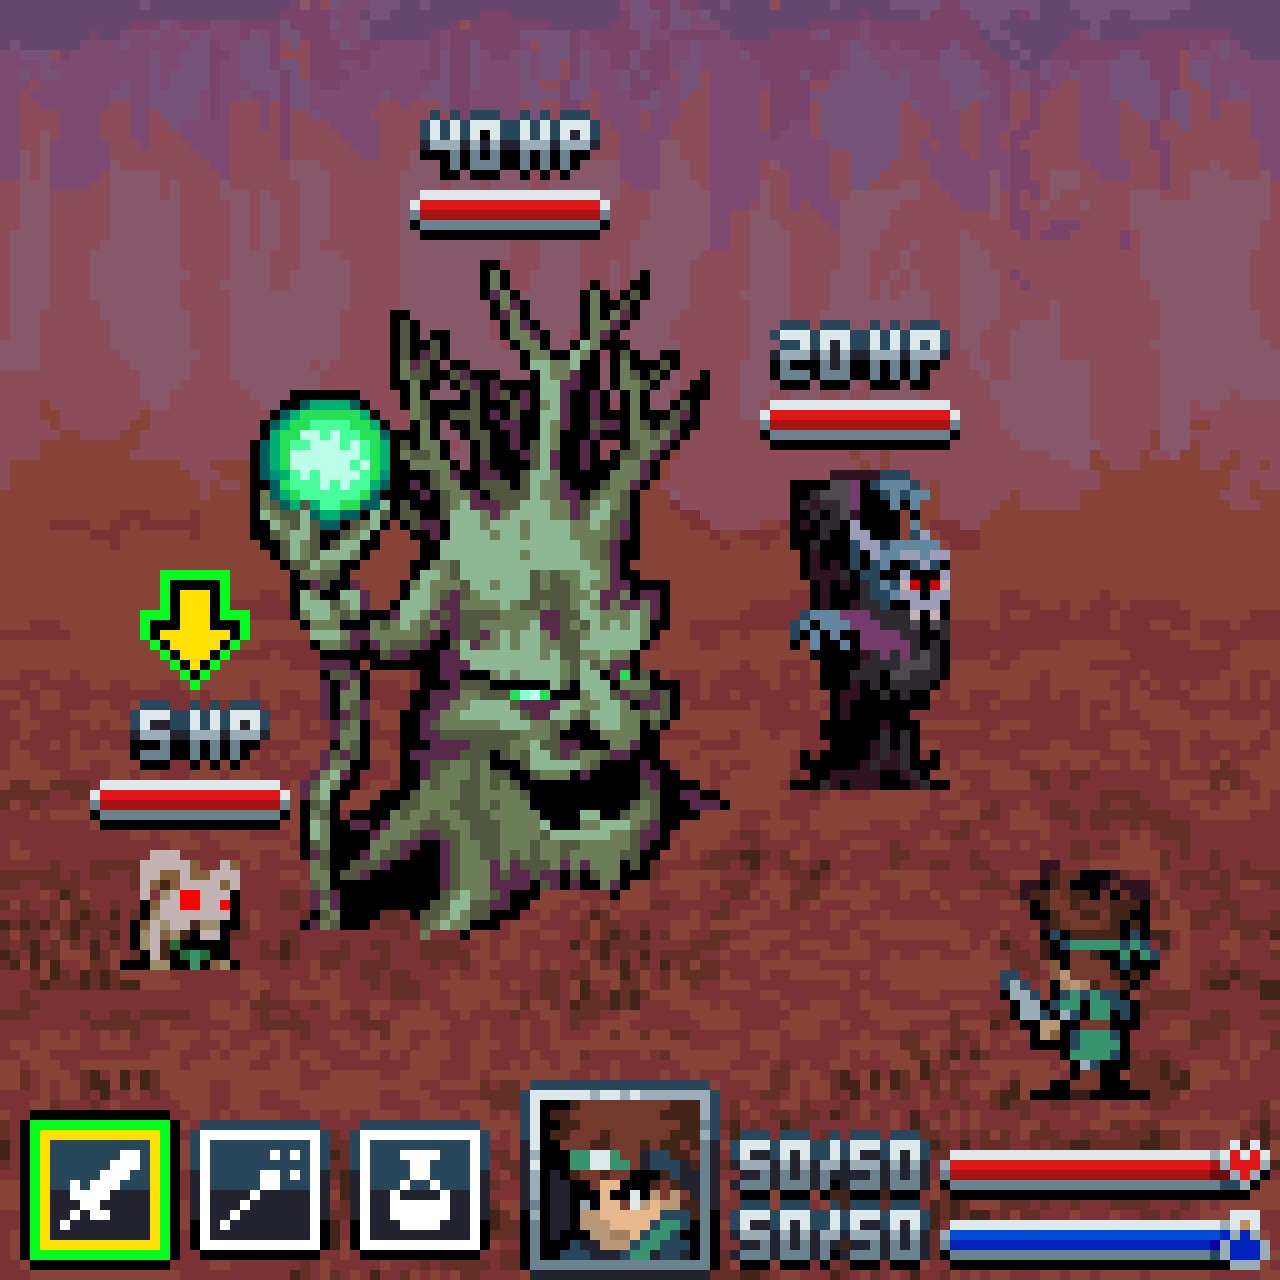
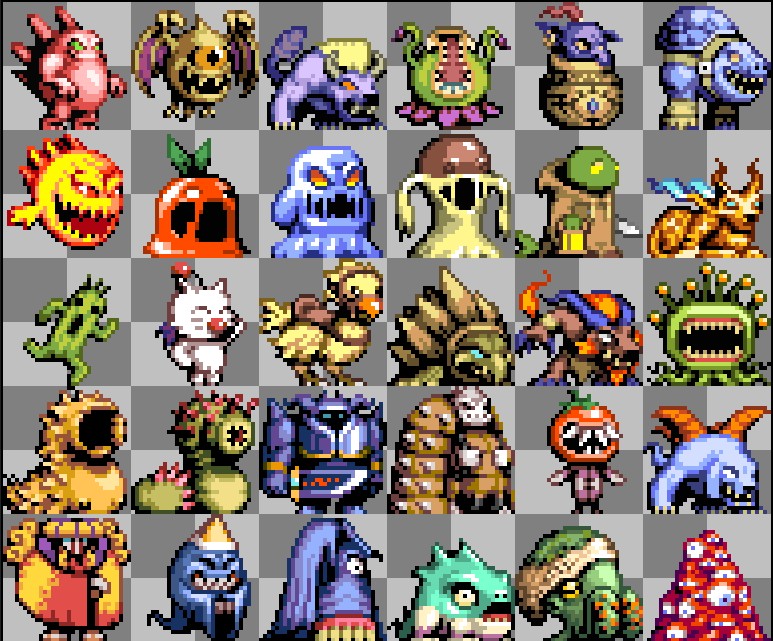
Hey people of Itch. I'm a monster pixel artist and animator. Here's some of my work, some is personal art and some is fan art here.
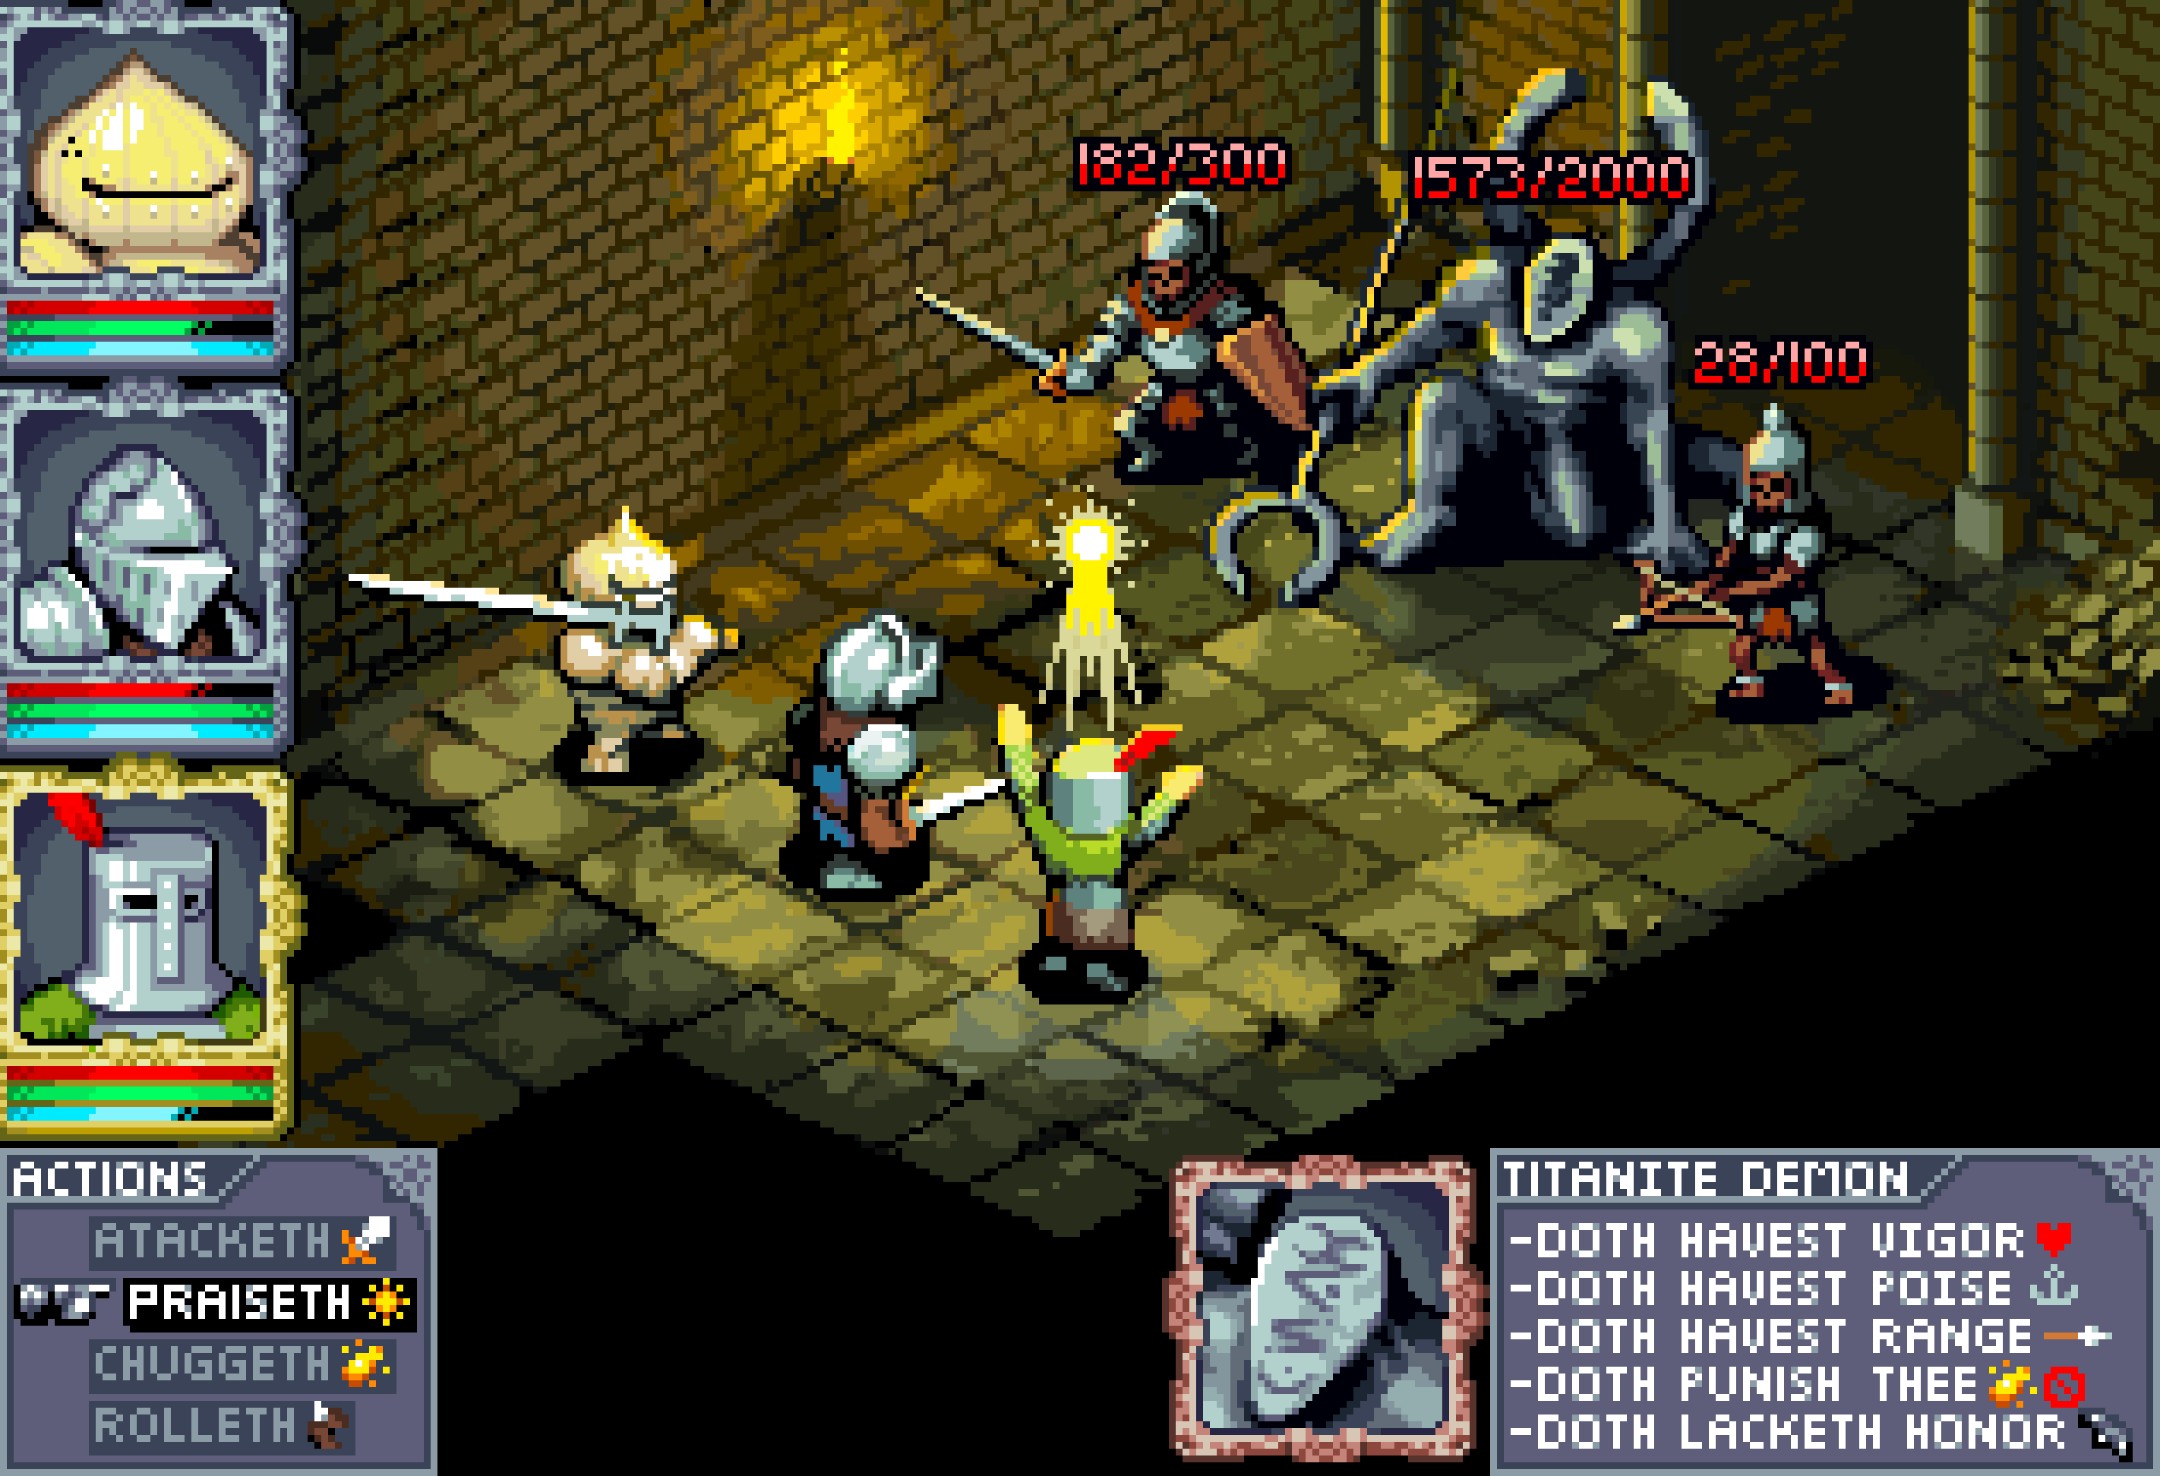
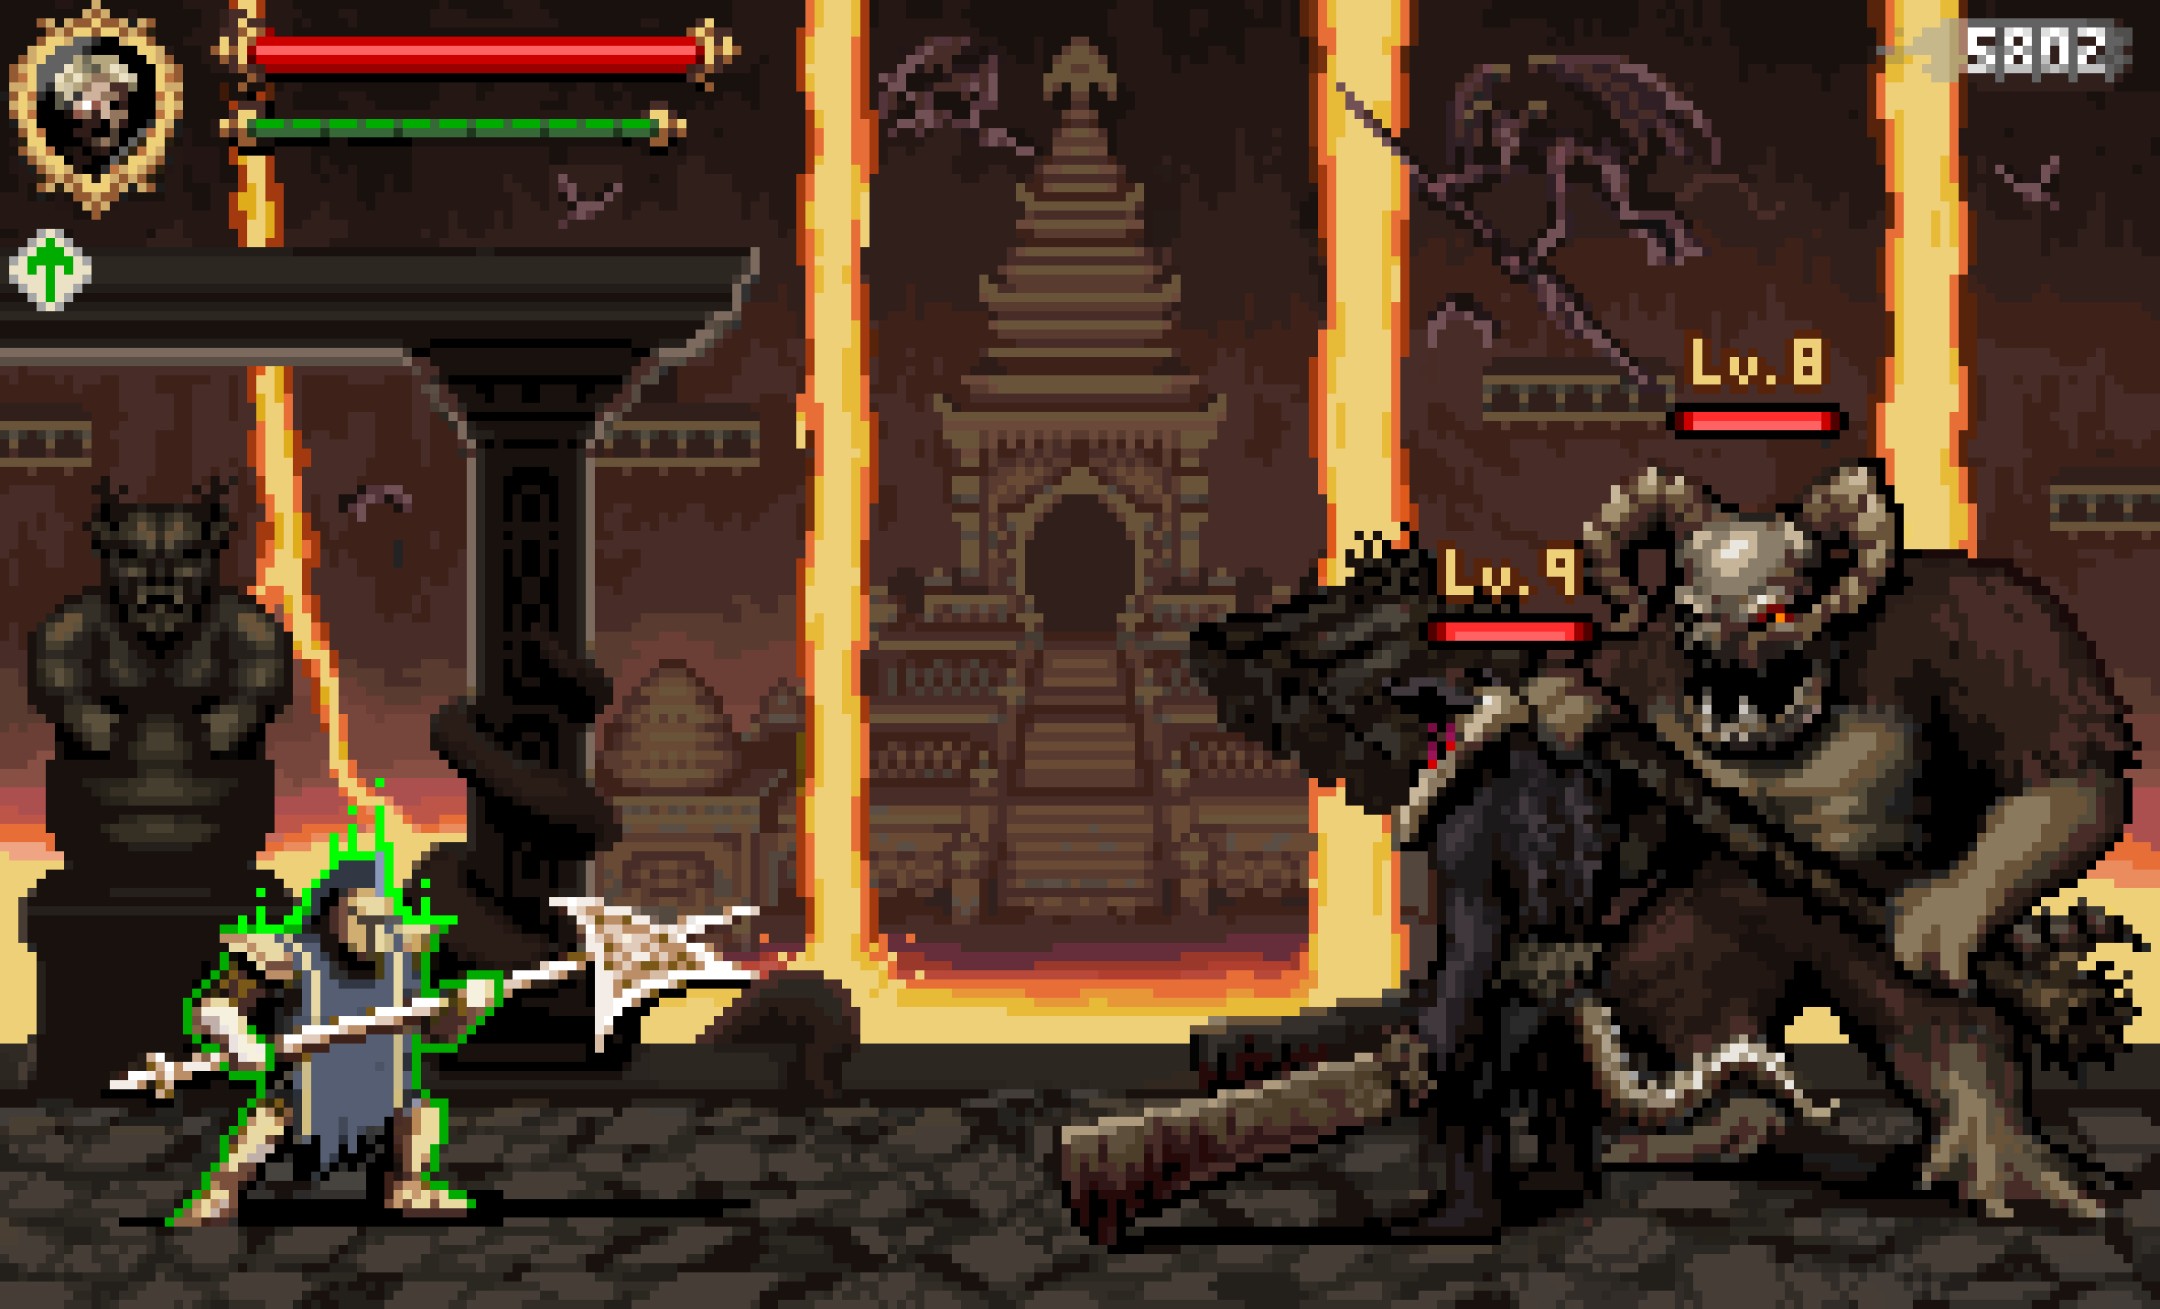
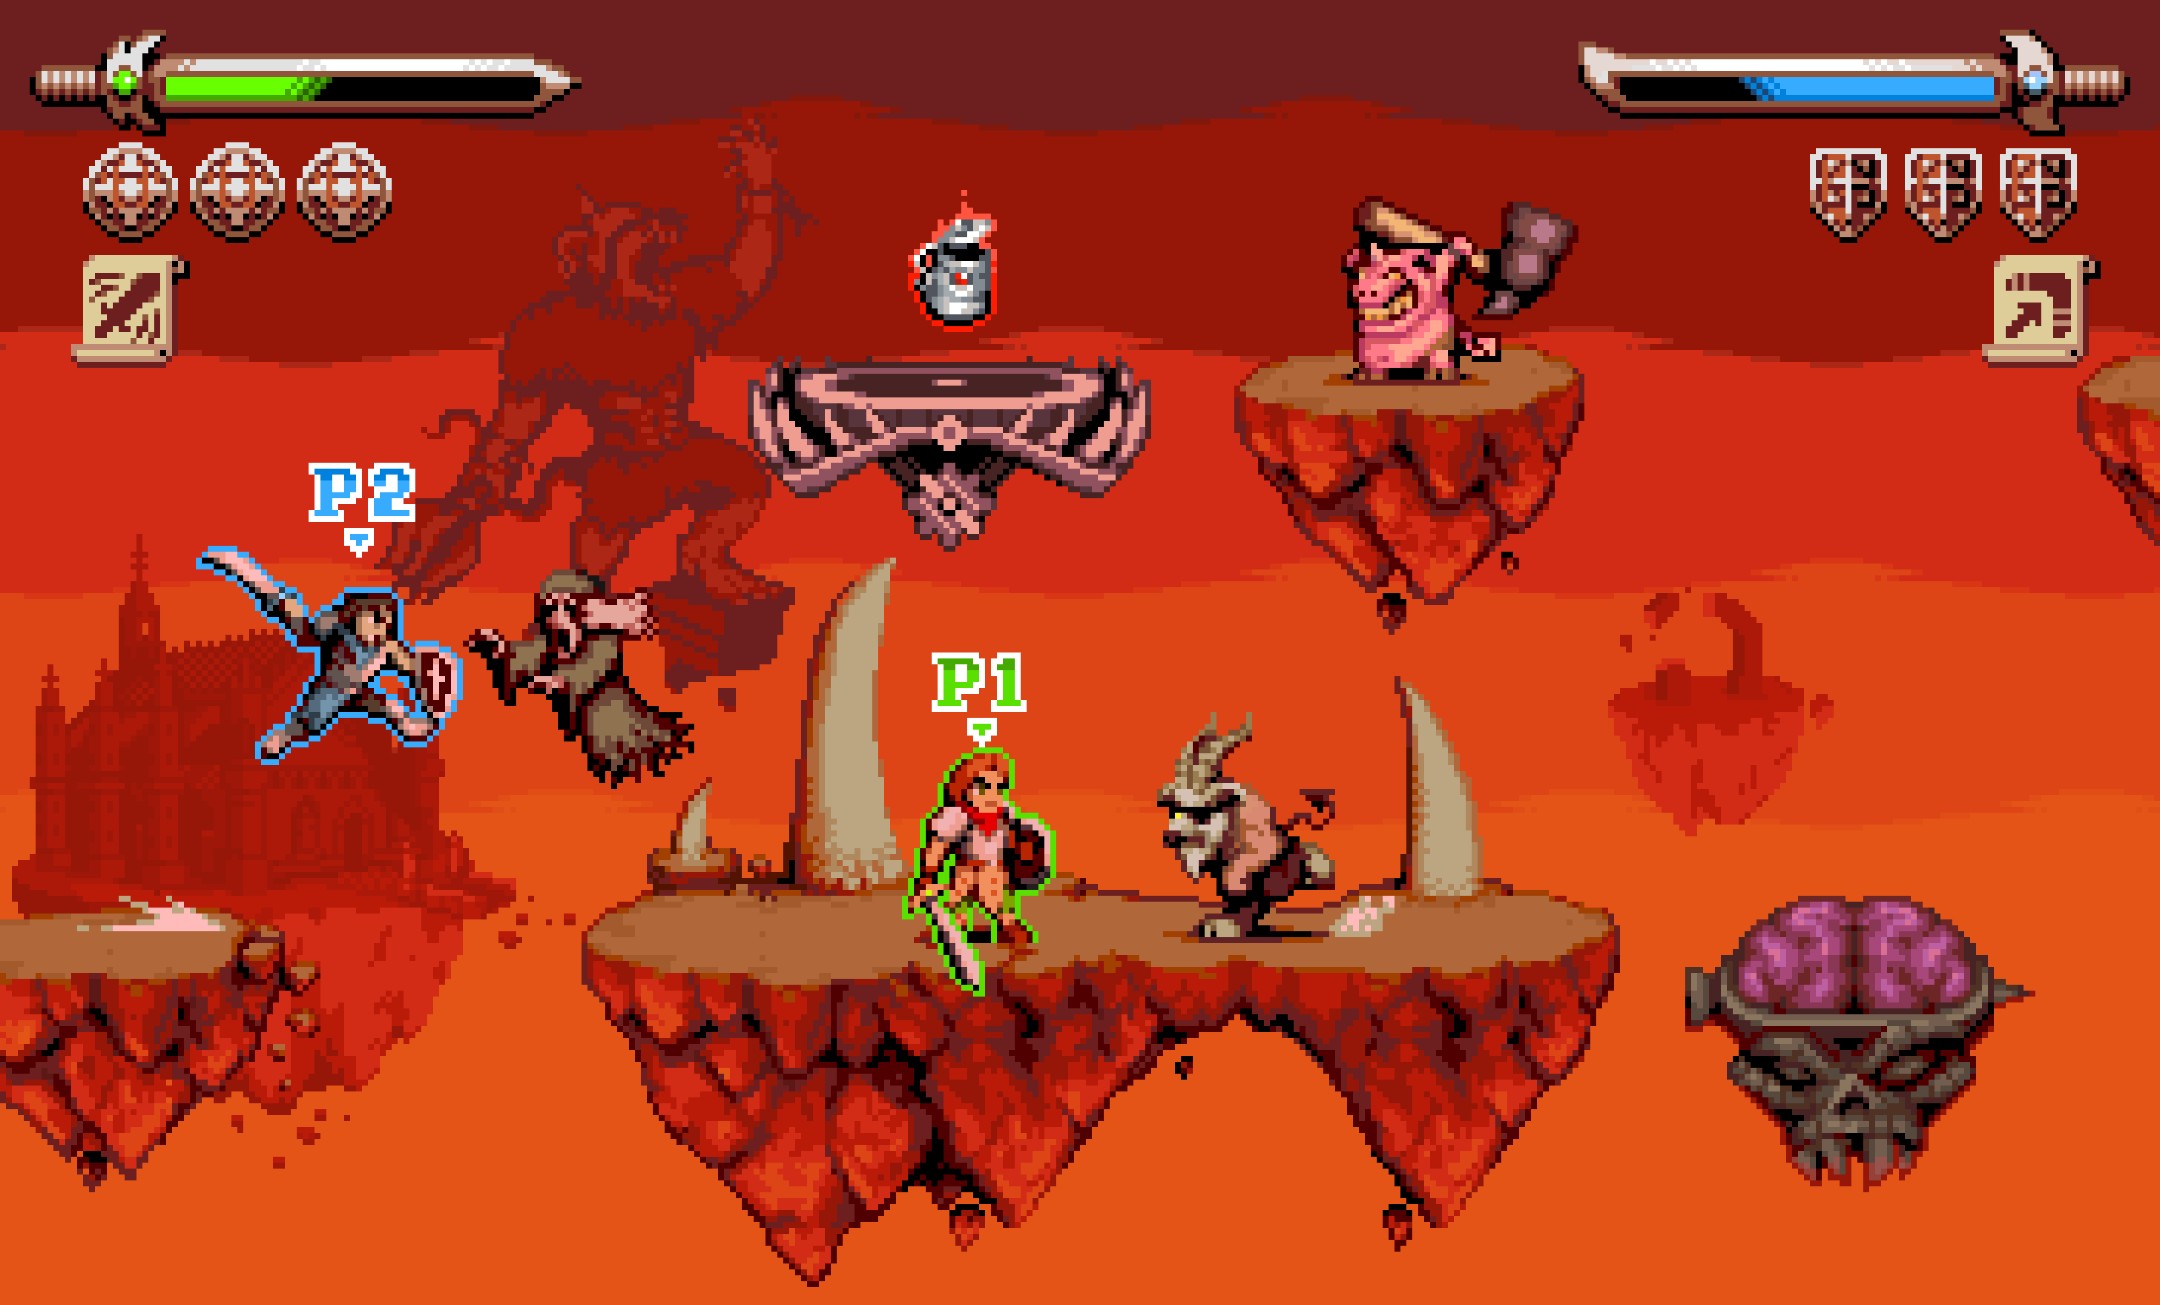
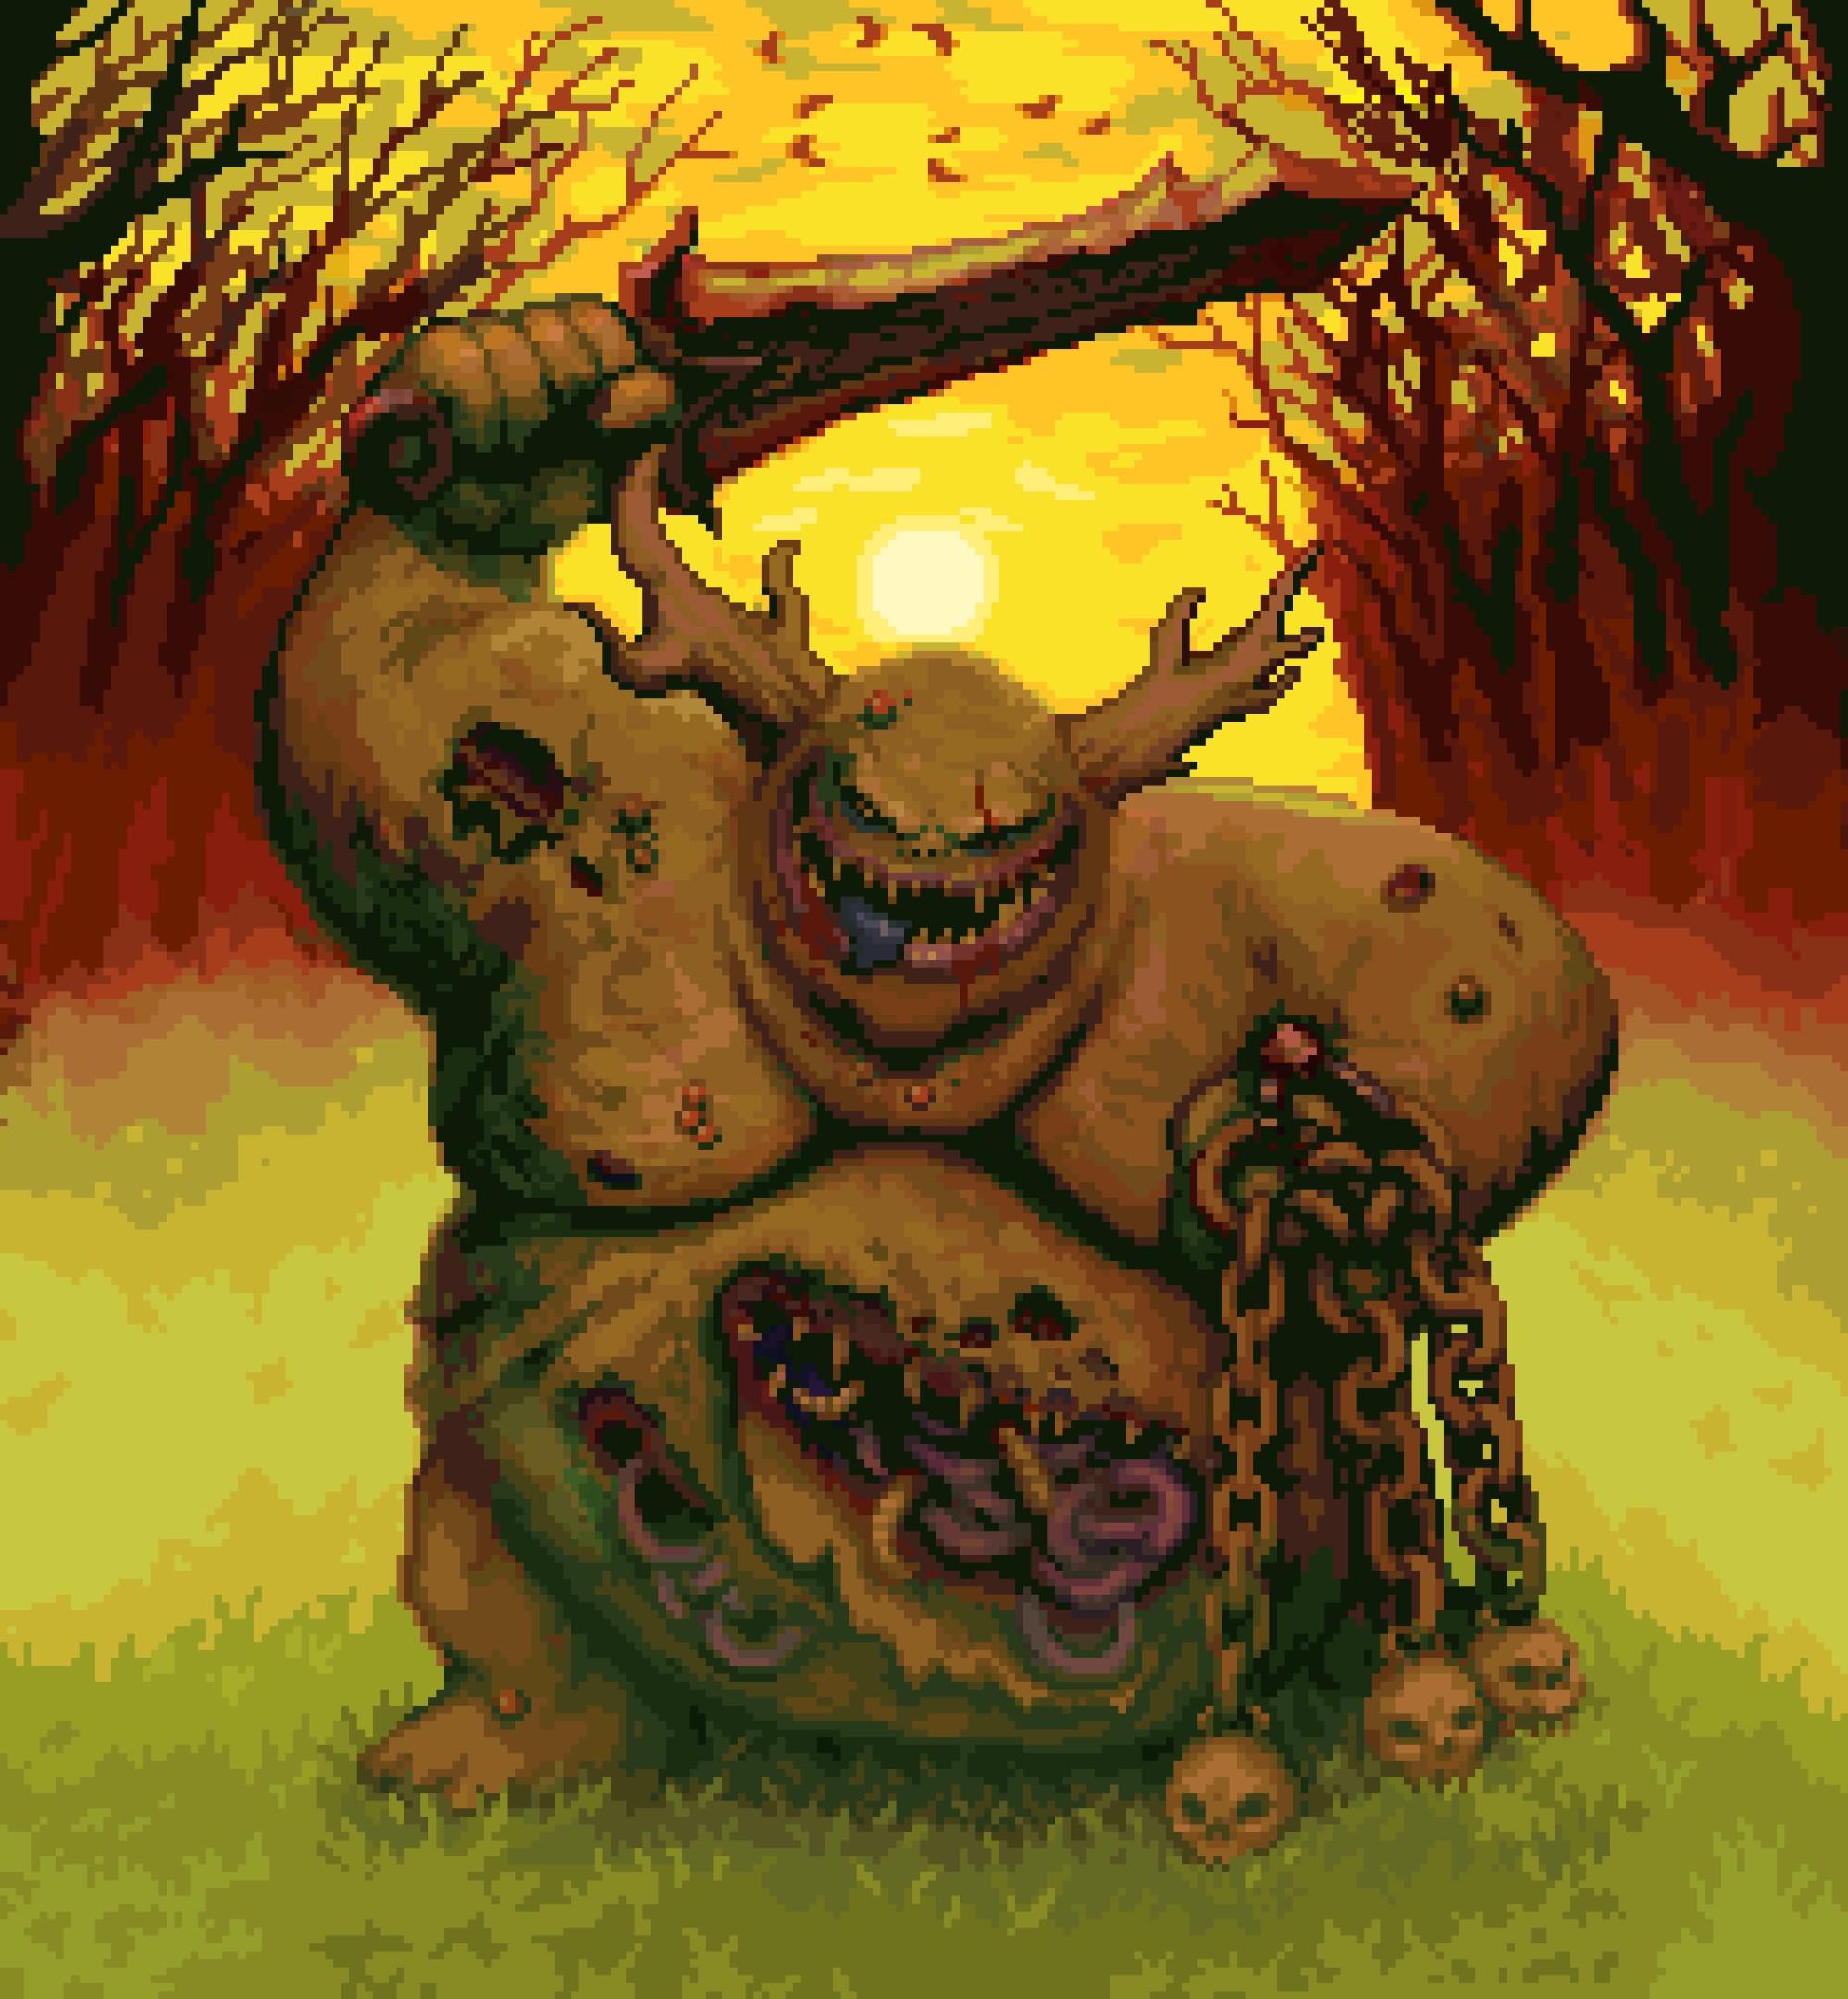
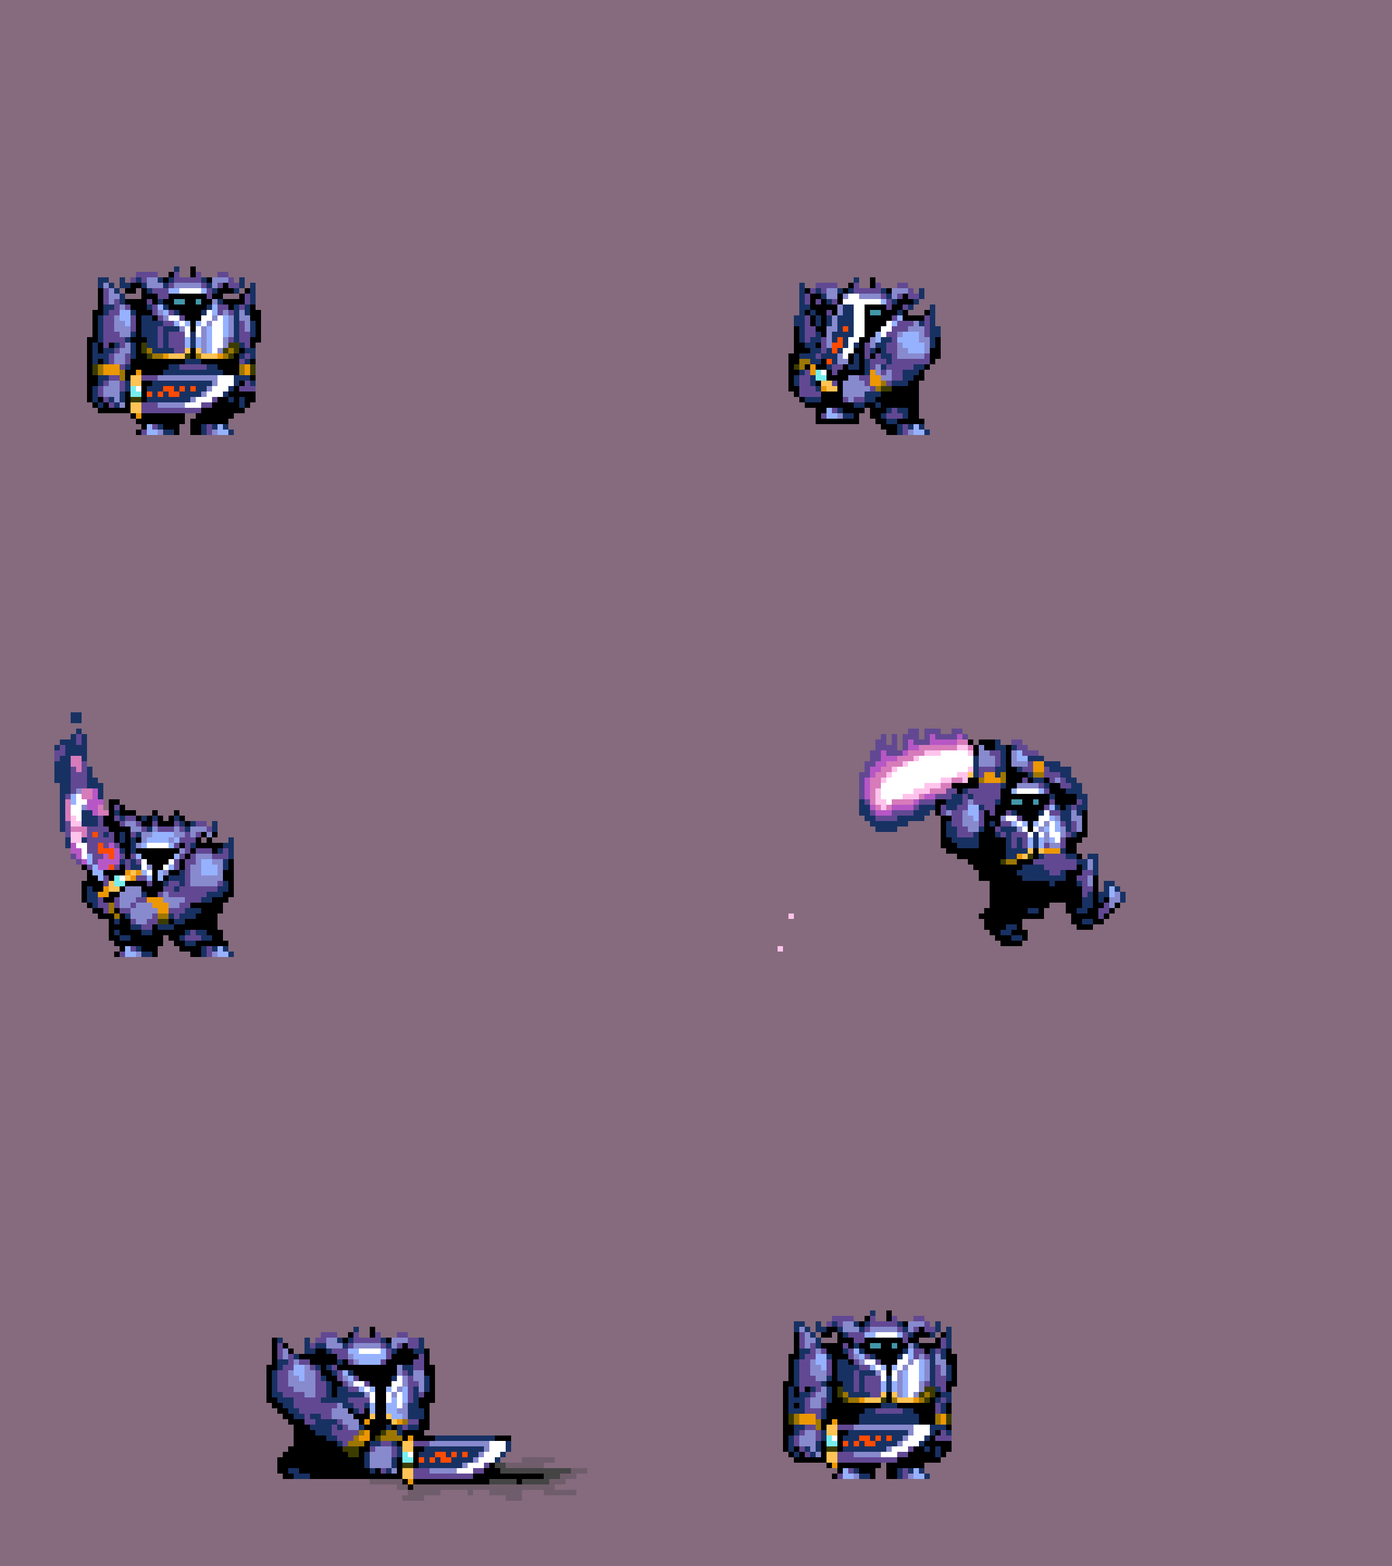
If you want to see more, here's my cara portfolio.
I want to create a monster asset pack to sell here on itch.io at some point, maybe starting with 20 monsters, but I'll probably add more or make multiple separate monster packs. I only draw though so I don't know what game devs would want exactly in terms of monsters, sprite sizes, animations, and the overall perspective/angle to draw these monsters in. It could be drawn in close-up first person dungeon crawler style, it could be side-by-side (monsters on left/right, players on left/right), or it could be monsters in background and players in foreground. I'd like to know what your suggestions are. I'd probably sell the pack for like $15-20 if I end up delivering at some point. Let me know what your thoughts are because currently I have zero asset packs set up and I think it's about time I change that. Thanks!
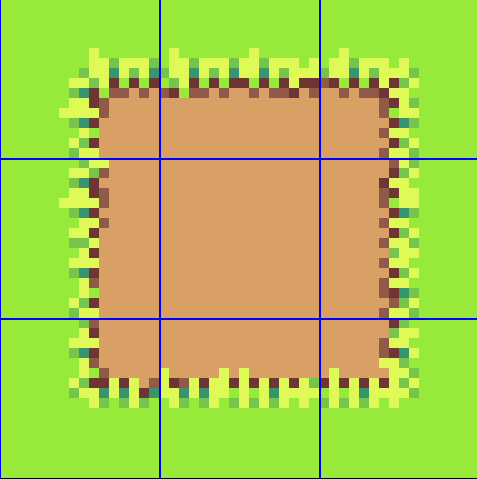
Hey I'm back. Have you ever wondered how to create a tileset with various materials that you can place around against each other without the result looking ugly? This tutorial is very short but very useful for that! The process is called "9 Slicing" or "9 Slices" and it's called that because you can take any two tileset materials, arrange them against each other into these two specific 3x3 arrangement of tiles, then freely place them around without an ugly result. However I must emphasize that for full tileset placement versatility of 2 materials you want to place around, again you should include two sets of 9 slices. To explain, for now here's a grass/dirt example below which showcases two sets of 9 slices.
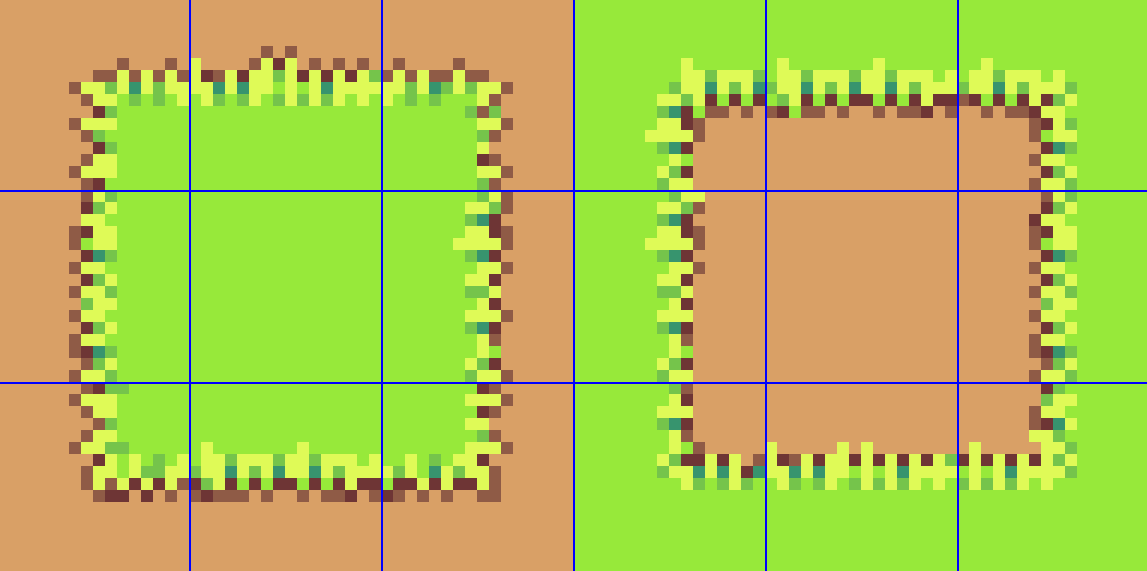
The left set has a grass center tile paired with grass-dirt bordering tiles while the right set has a dirt center tile paired with dirt-grass bordering tiles. To create 9 slices like these, the process is simple.
First 9 Slices
For the first 9 slices, take a single inner material and make a full center tile out of it. For example, grass.
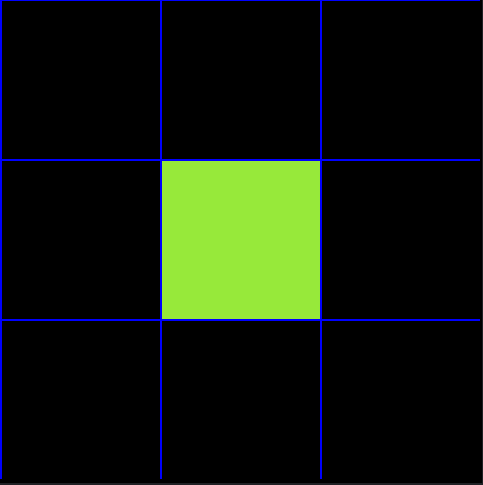
Then draw the outer tiles with a secondary material outward so that they connect seamlessly with the inner tile.
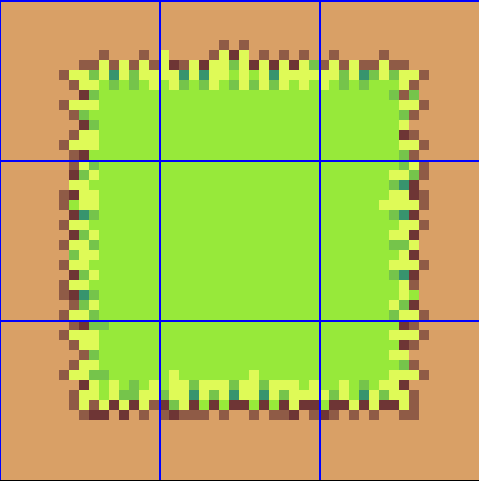
Second 9 Slices
That gets you some grass/dirt tileset functionality if you want to design levels including grass and dirt, but don't forget to duplicate and swap the inner and outer materials for the 2nd set of 9 slices. If you look at this inverse set here below where dirt is the inner material and grass is the outer material, there are 4 new corner tiles and 1 new center tile compared to the only having the original set.
What You Can Do With This!
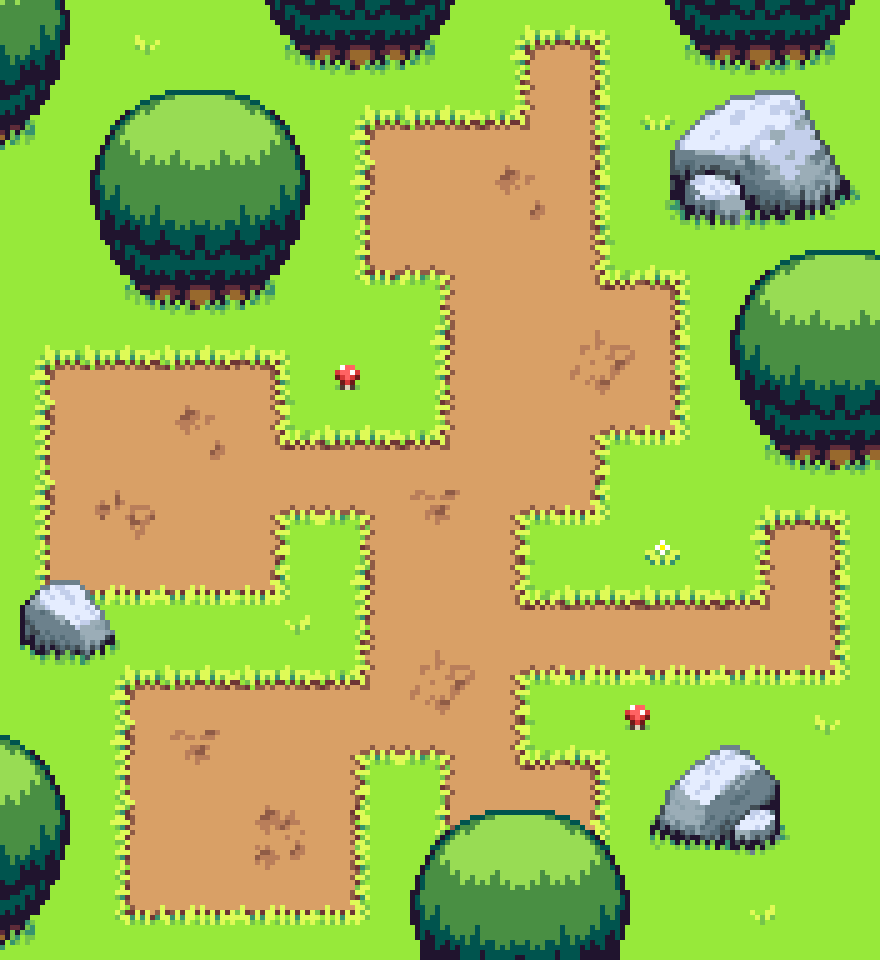
In theory, there's a lot you can do with this, but you may have to draw more of your own details to make the tileset more interesting. For something like this, you can add trees, mushrooms, rocks, houses, sign posts, etc. I'd say look into well known pixel art JRPGs or Zelda. Here's an example of something you can do if you spent a little more time working on the tileset.
That's it for this tutorial. I hope you found this useful as it should be for my dungeon tilemapping series soon enough! Thanks for reading.
itch.io Community » Creativity & Art » 2D Art · Created a new topic Aseprite Tutorial - Animating Tiles
Hello and welcome back to another Aseprite tutorial. In the previous tutorial we created a few new tile variants for our dungeon. In this one we will create some new tiles and animate them!
Drawing a Candle Tile
Open up your dungeon tilemap from the previous tutorial where we left off. Modify one of the brick tiles. Create a small alcove in the center of it and add a candle inside. Afterwards, feel free to place it around the dungeon.
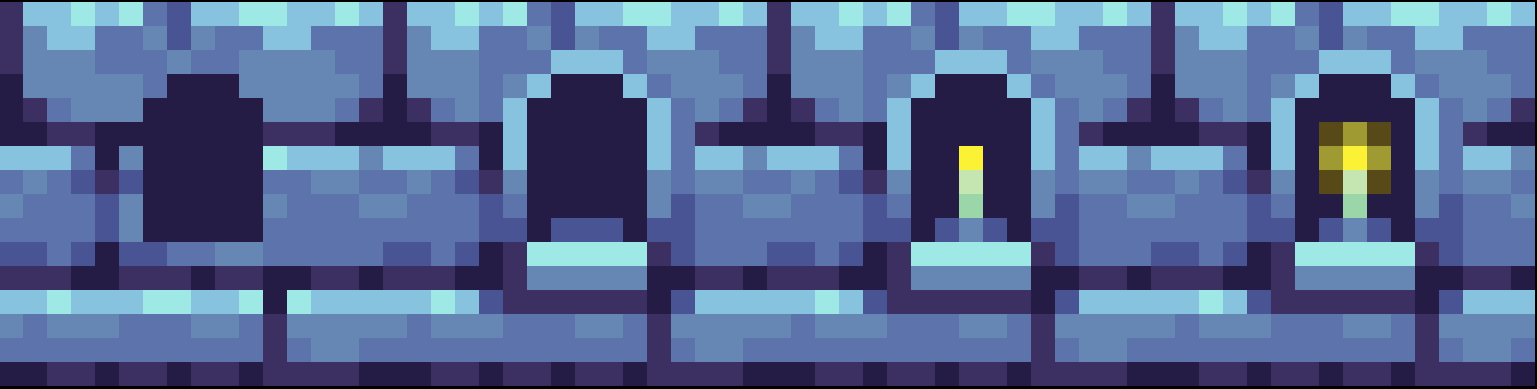
Animating The Candle
To animate the candle, we need to create at least one more frame for it. Your Timeline Panel is actually directly integrated with the layer panel, however by default, there is only 1 frame.
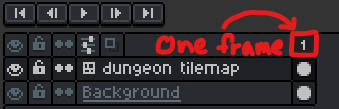
Creating a New Frame Slot
To create a new frame slot, by default you can press 'Alt + N' or right click the frame number and click New Frame or New Empty Frame. "New Frame" duplicates the original frame, "New Empty Frame" creates a new frame but does not duplicate the original frame. Since we probably don't want to manually redraw our entire dungeon all over again for the second frame, let's duplicate the original frame using "New Frame" specifically.
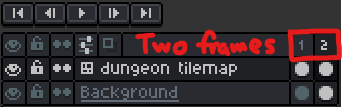
Drawing the 2nd Frame
Now that we have a 2nd frame slot, we can visually edit that 2nd frame of our animation. You can view and edit any frame's canvas by left clicking its frame number. While animating, you will constantly need to switch frame views to see the development of your animation. You use the arrow keys to do that or you can autoplay your animation in the preview window. The preview window has a playback button.
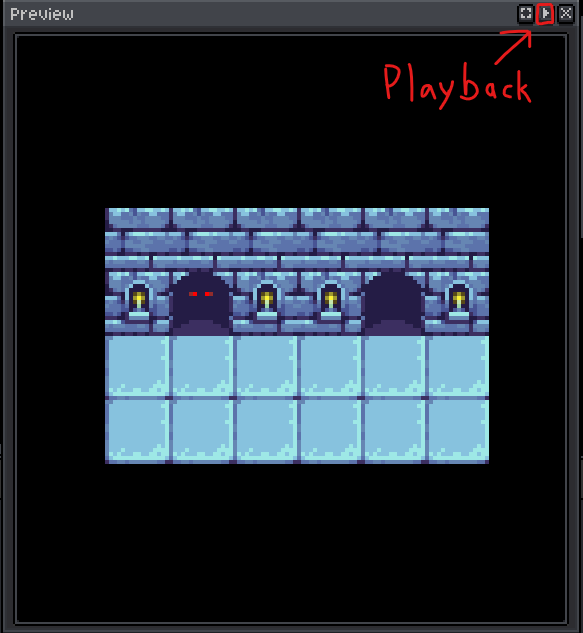
Changing the Frame Speed(s)
You may notice that your animation is too fast or too slow. You can modify any frame's speed by double clicking it or right clicking it and opening the frame properties. I think 200 milliseconds (ms) per frame for a 2-frame candle cycle looks ok.
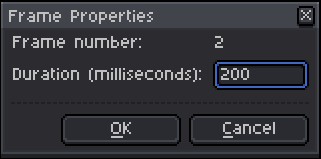
If you need to modify frame speeds in bulk, you can select multiple frames by clicking inside of a frame number square and then drag across a range of them.

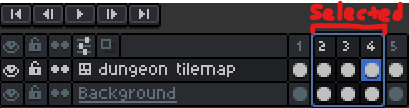
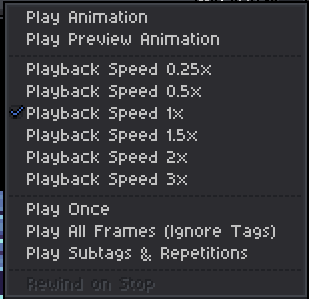
You can also modify your preview playback speed by right clicking the preview playback button. Generally, you can ignore Play Animation, but Play Preview Animation is for seeing your animation in action in just the preview window.
Resorting Frames
If you ever need to resort frames, select the frames first then drag from any of the edges.

Important Note
For animated tiles, you will need to use the "new tile" button specifically.

This is because each frame of an animated tile must be a new tile. If you attempt to edit frame #2 of the candle tile but don't create a new tile, then you'll replace the 1st frame with the 2nd frame. You will also need to place these new tile frames again manually within the dungeon as far as I know.
Flame Movement
The flame of the candle should rise and fizzle out or have some natural subtle movement. It can have a slight pulsing light radius. We have options. Here's a first pass with a 2-frame cycle at 200 ms/frame, which is alright but I think could be improved with more frames.
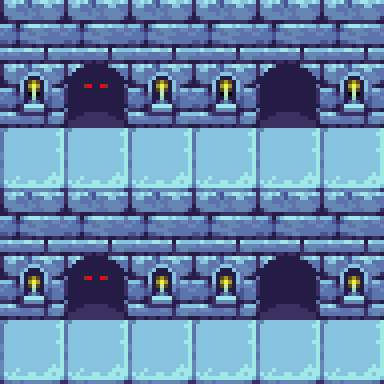
I believe this is a better pass with a 4-frame cycle, although could be sped up.
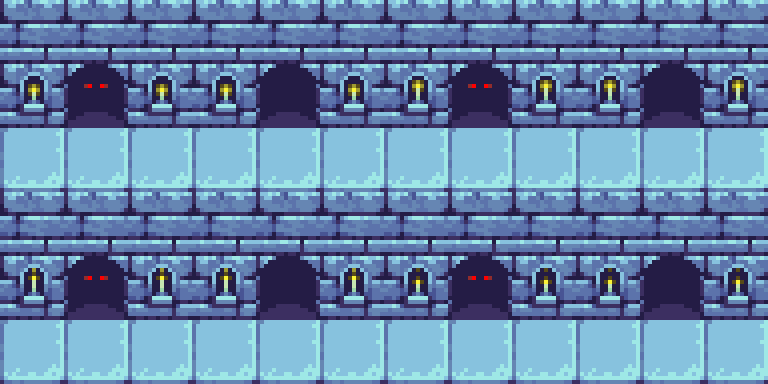
Here is the sped up version at 100 ms/frame.
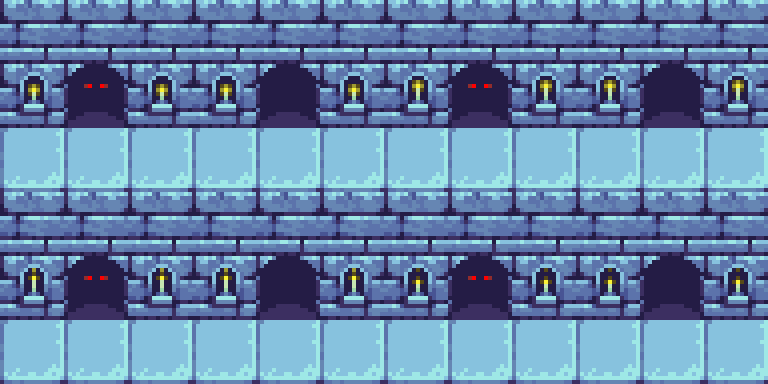
Spike Trap
We can also have spike traps, though 4 frames for it would be too little. Let's try 8 frames. You can select all of the original frames 4 frames simultaneously, then if you hold down 'Ctrl' or 'Alt' and drag that selection to the left or right, it will duplicate the set of frames! This gives us a decent loop delay for the spike animation because we don't need spikes coming in and out every 4 frames, without altering the candle animation.
Marquee Selection Tools
I guess now would be a good time to briefly introduce you to the marquee selection tools, but not the time to go over all of them in depth yet. it can be convenient for creating our spike trap tile.
Each of them lets you select groups of pixels or tiles in your canvas. This can be convenient while drawing when you need to duplicate/ transform/rotate/flip/move/recolor them etc. For example, with the rectangle marquee tool allows me to select a single "spike hole" by left click dragging across one of them, corner to corner, then copy/paste that selection around 4 times to achieve 4 holes on the spike trap tile. To move the contents of a marquee selection, have any marquee tool active, then left click drag the inside (not the edges) to a new location on the canvas. Deselect when you're done to lock it in place.
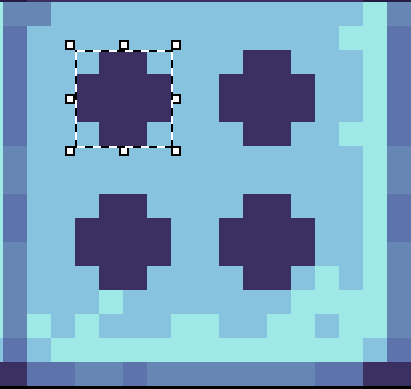
This gives us a better and faster start, rather than manually and slowly drawing each of them with the pencil tool.
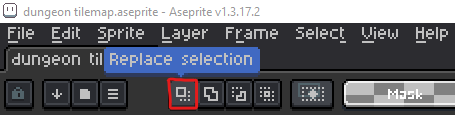
Pay attention to the settings near the menu bar. Generally I never mess with these, but I keep "replace selection" on.
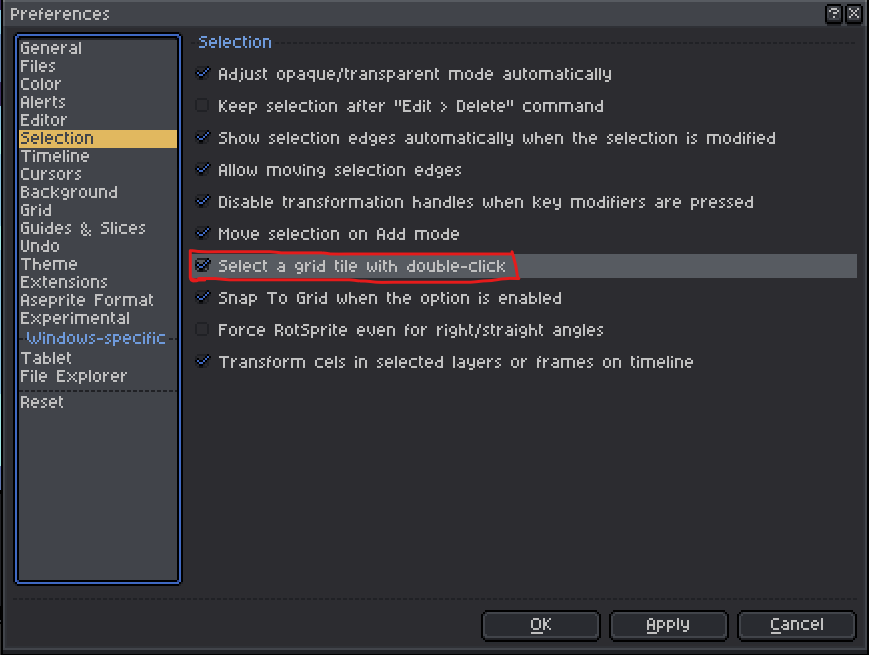
Also for tiles, there is a preference setting for marquee selecting tiles with double click.
Spike Trap Animation
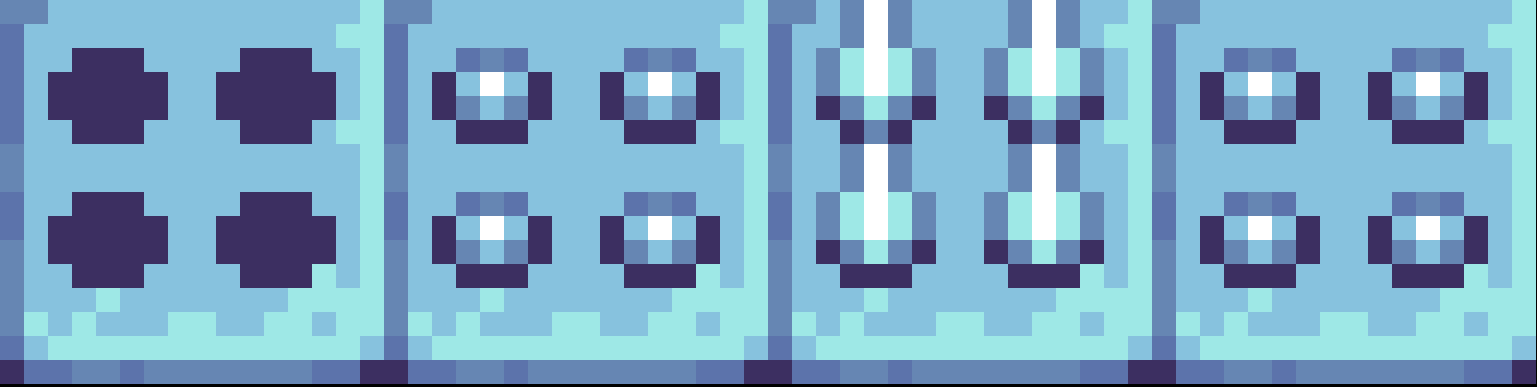
I actually had to make the holes slightly bigger so the spikes can be sharp rather than flat-topped, but here is a sprite sheet for the spike trap. Frames 2 and 4 are identical.
and here is the result:
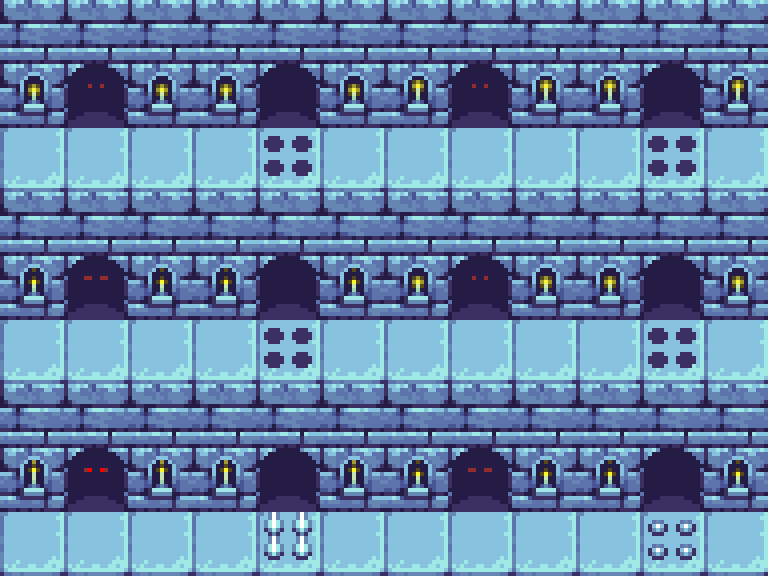
Notice that delayed intervals I mentioned on the spike trap activation. It's actually just the same 5 frames without the spikes times. In theory, if you had the spike trap on its own layer, you could use the "frame link" feature to achieve this. You can select multiple of the white circles (cels) underneath the frame numbers by drag selecting them, then right click and select Link Cels. This would make all of the frames with linked cels display the same image.
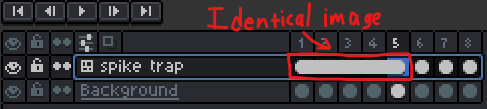
Although I'm not actually going to do this, because our spike trap is NOT on a separate layer; it is shared with the candle layer so this would cause a delay in the candle animation and we don't that.
That's enough talk for this post. I'll see you in the next post when I find the time.
Hello and welcome back to another Aseprite tutorial. In the previous tutorial we created a brick tile which looped seamlessly. In this tutorial, we will create a floor tile and a door tile which we can place into our dungeon.
Open the Brick Tile Aseprite File
First thing is first, make sure you have your brick file open in Aseprite.
Turn off Tiled Mode
The "Tiled Mode" feature we used originally is nice for seeing just one tile loop seamlessly, however the disadvantage is that it is restricted to only one tile type. If we want a whole dungeon scene, we will need more tiles to work with. For this tutorial, turn off Tiled Mode completely.
Enlarge the Canvas
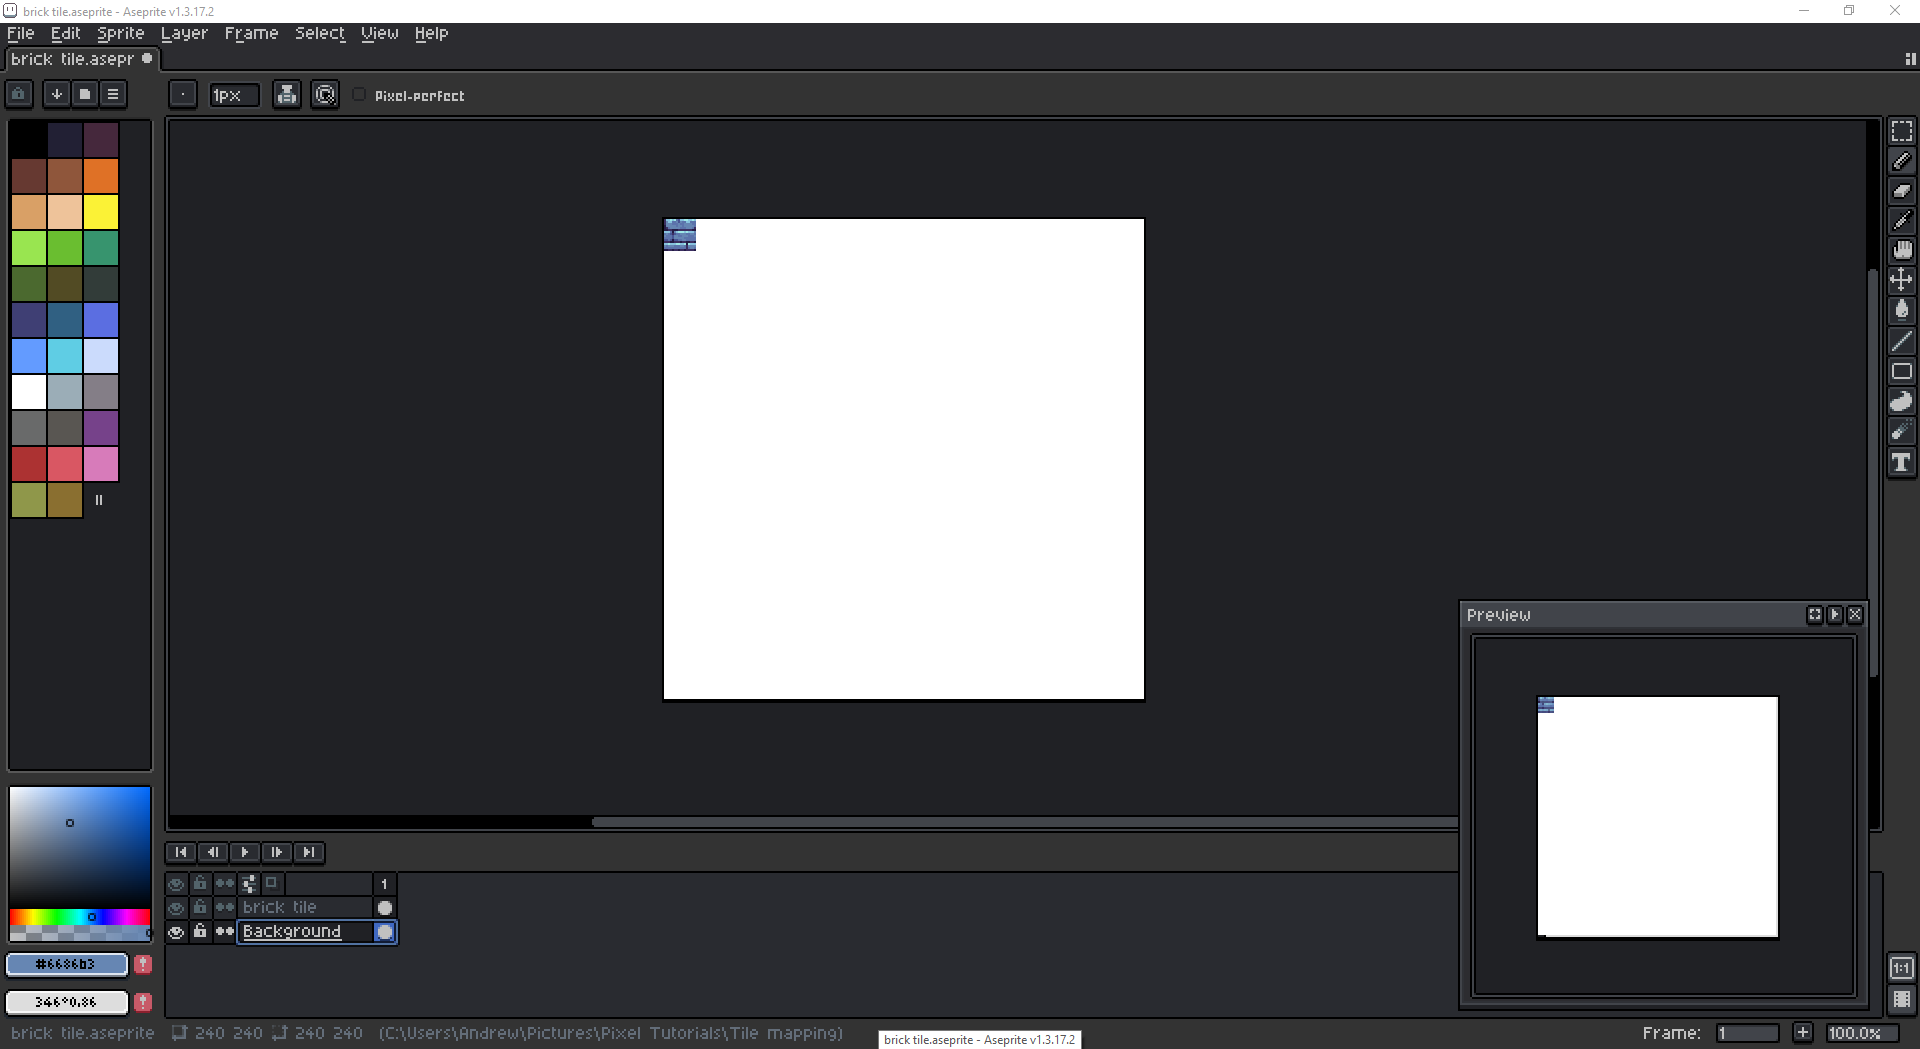
Enlarge the canvas size using Sprite - Canvas Size specifically, not "Sprite Size". This way we won't stretch the brick tile. The resize prompt can calculate math automatically. This is convenient because we want our enlarged canvas to be a multiple of 16 in both width and height (otherwise we'll have a cropped tile grid which will be harder to work with). For example if you type in 16*15 (* is the multiplication operator) the output is 240. We can use 240 pixels for the width and height. Anchor the brick tile to the top left using the arrow icons in the window prompt and click OK.
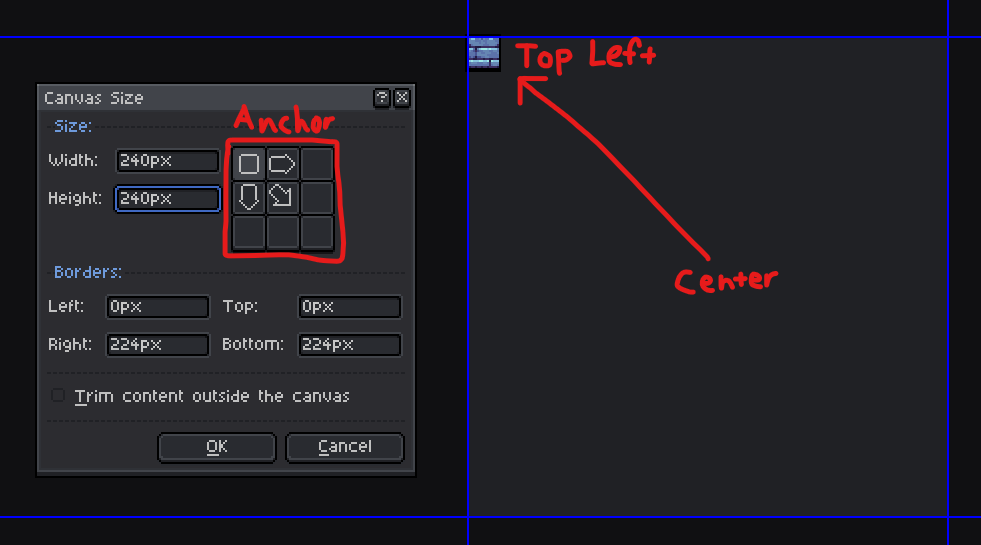
The Result
The resulting canvas should look something like this, using your secondary brush color (the toggle color) as the background.
Changing a Few Things
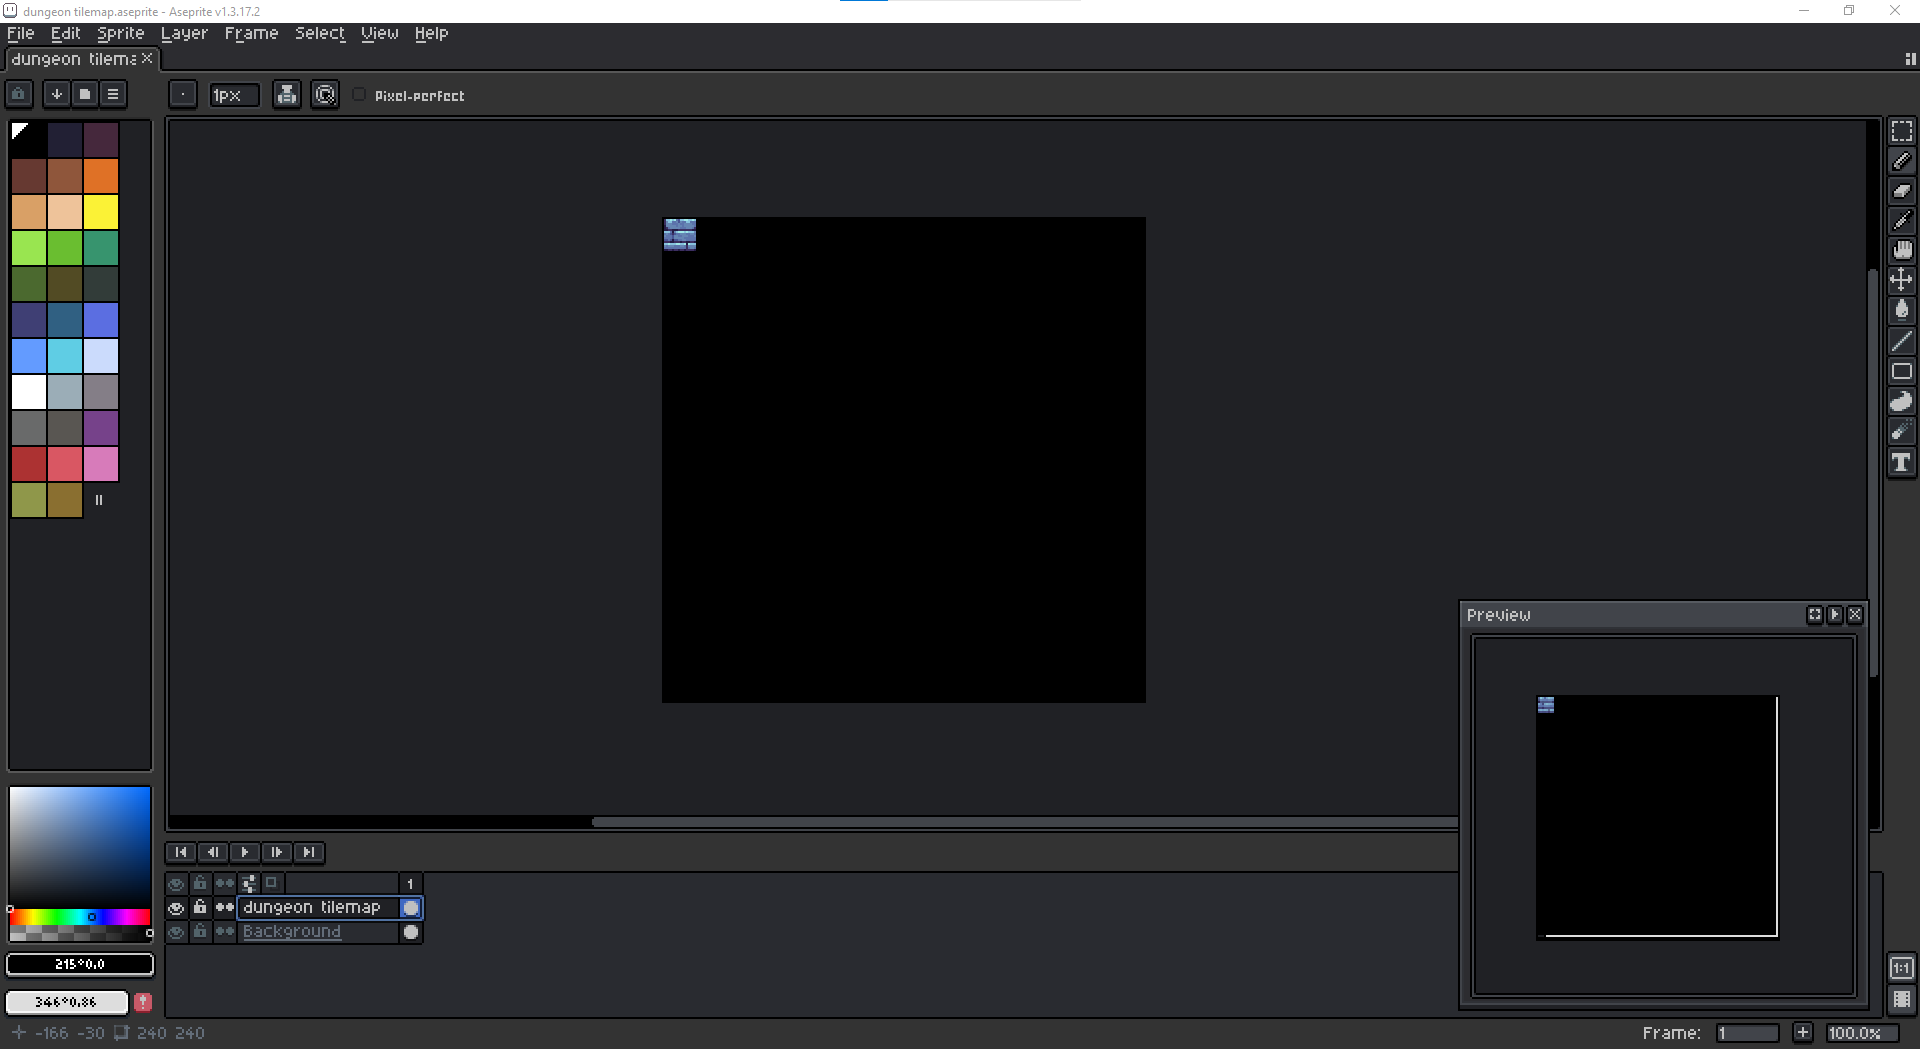
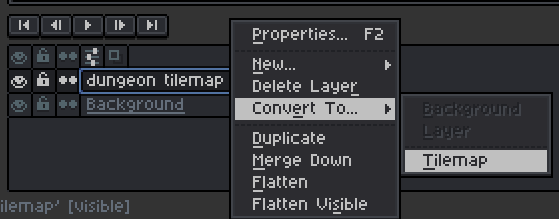
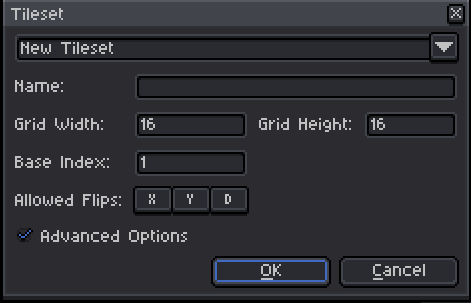
In your file explorer, you should rename the file to "dungeon tilemap.aseprite" or something similar, because we're creating a dungeon tile map, not just a single brick tile anymore. Select the background layer and fill it with black. Rename the "brick tile" layer to "dungeon tilemap", then convert it to a tile map layer with a 16x16 grid. Ignore the other options.
After you have done that, you officially have a tilemap layer!
Tilemap Panel and Buttons
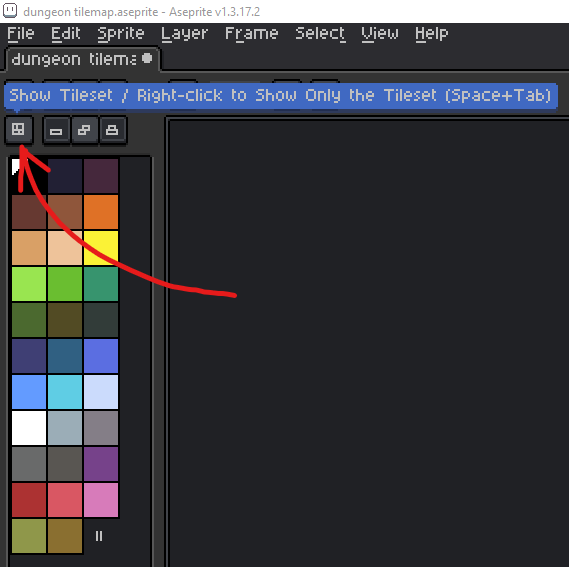
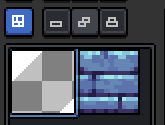
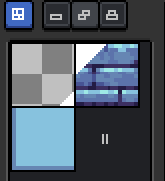
With the tilemap layer selected, there is this button on the far left of the Tilemap Panel. If you click it, it will show the tiles available to place around on that specific layer. Currently we just have a single brick tile so that's all that will appear, as well as a "checkerboard" tile which actually just represents no tile or tile eraser. In other words it's "null".
Placing Tiles Around
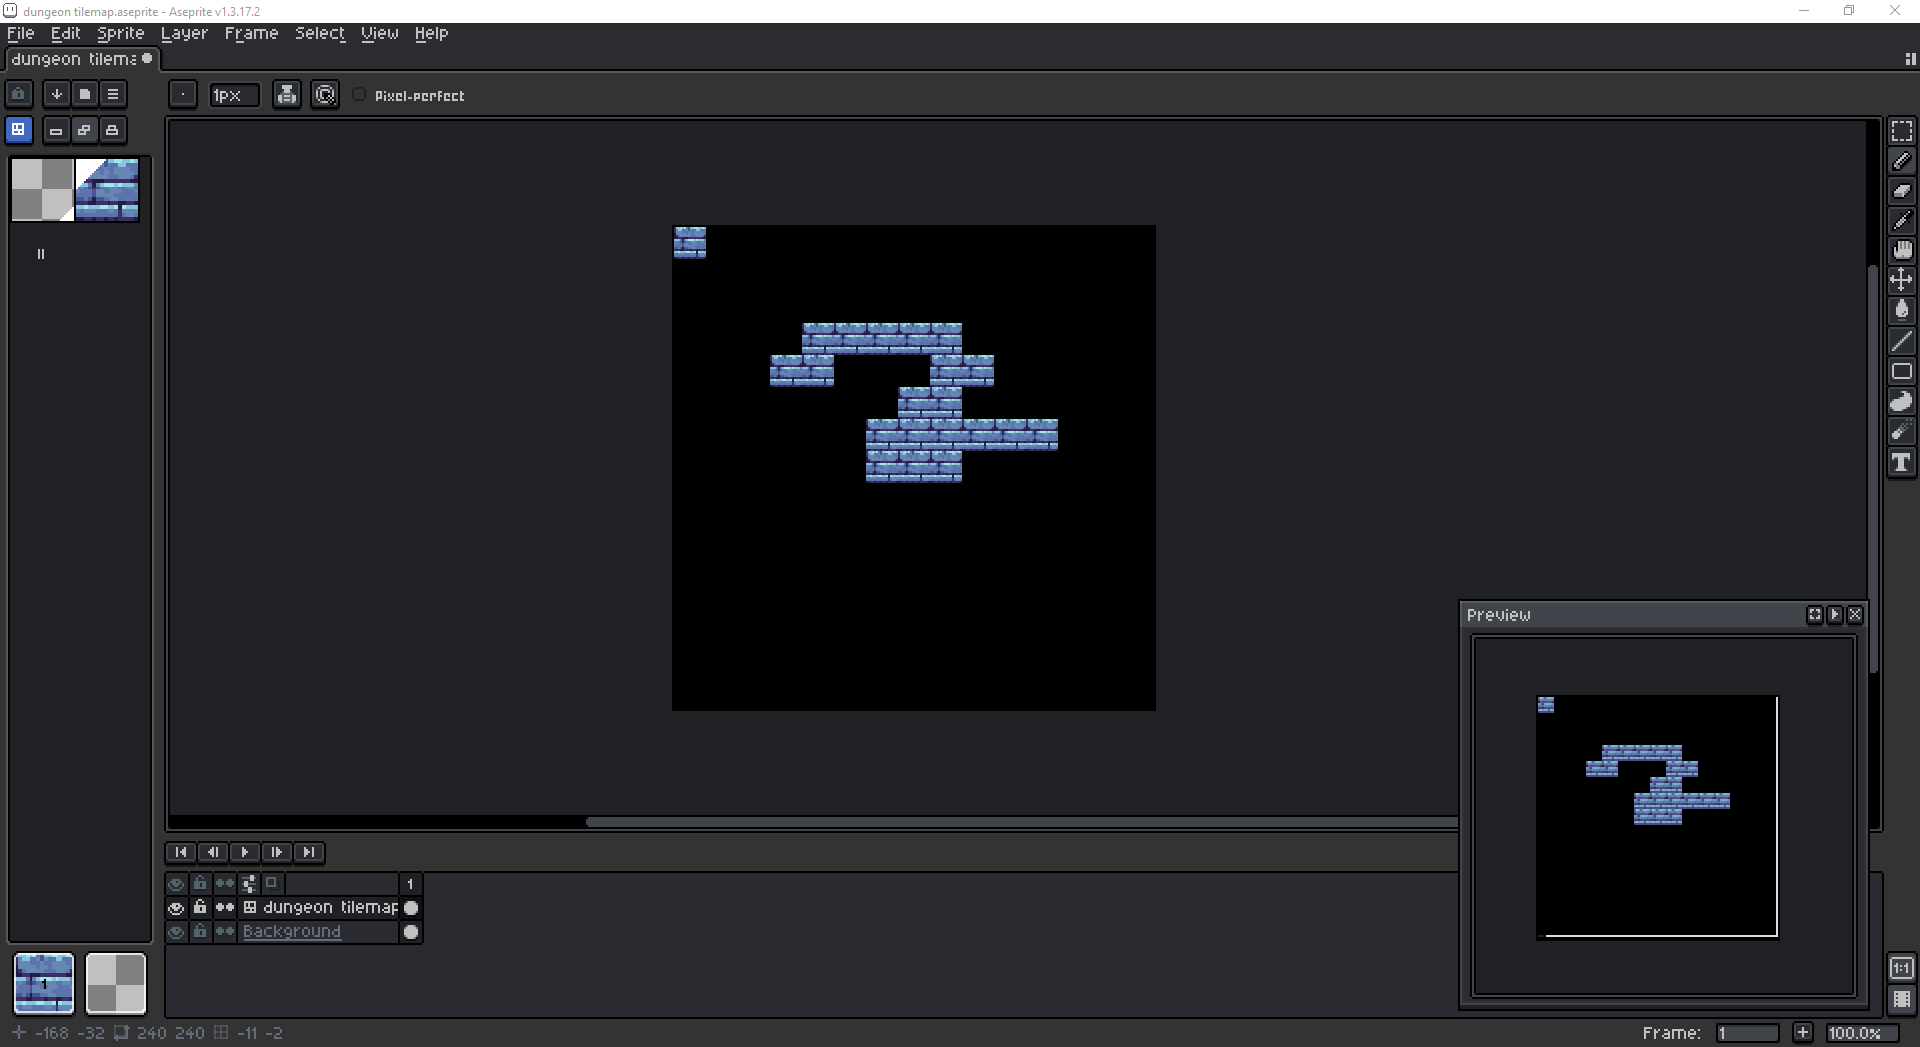
While this button is active, you can click any tile in the panel there then place them around in the canvas with the pencil tool. Also you can use the eyedropper to set any tile that are already placed on your canvas as your active tile-brush. If you want to delete tiles, use the eraser tool.
Creating a New Tile Type
We will create a new tile variant, which is going to be a dungeon floor tile. To create a new tile type, you must select this button:

While this button is active, you can draw into any tile grid square to create a new tile. You should turn your grid visibility on for this. Here I just reuse existing colors from the bricks to create a simple floor tile.
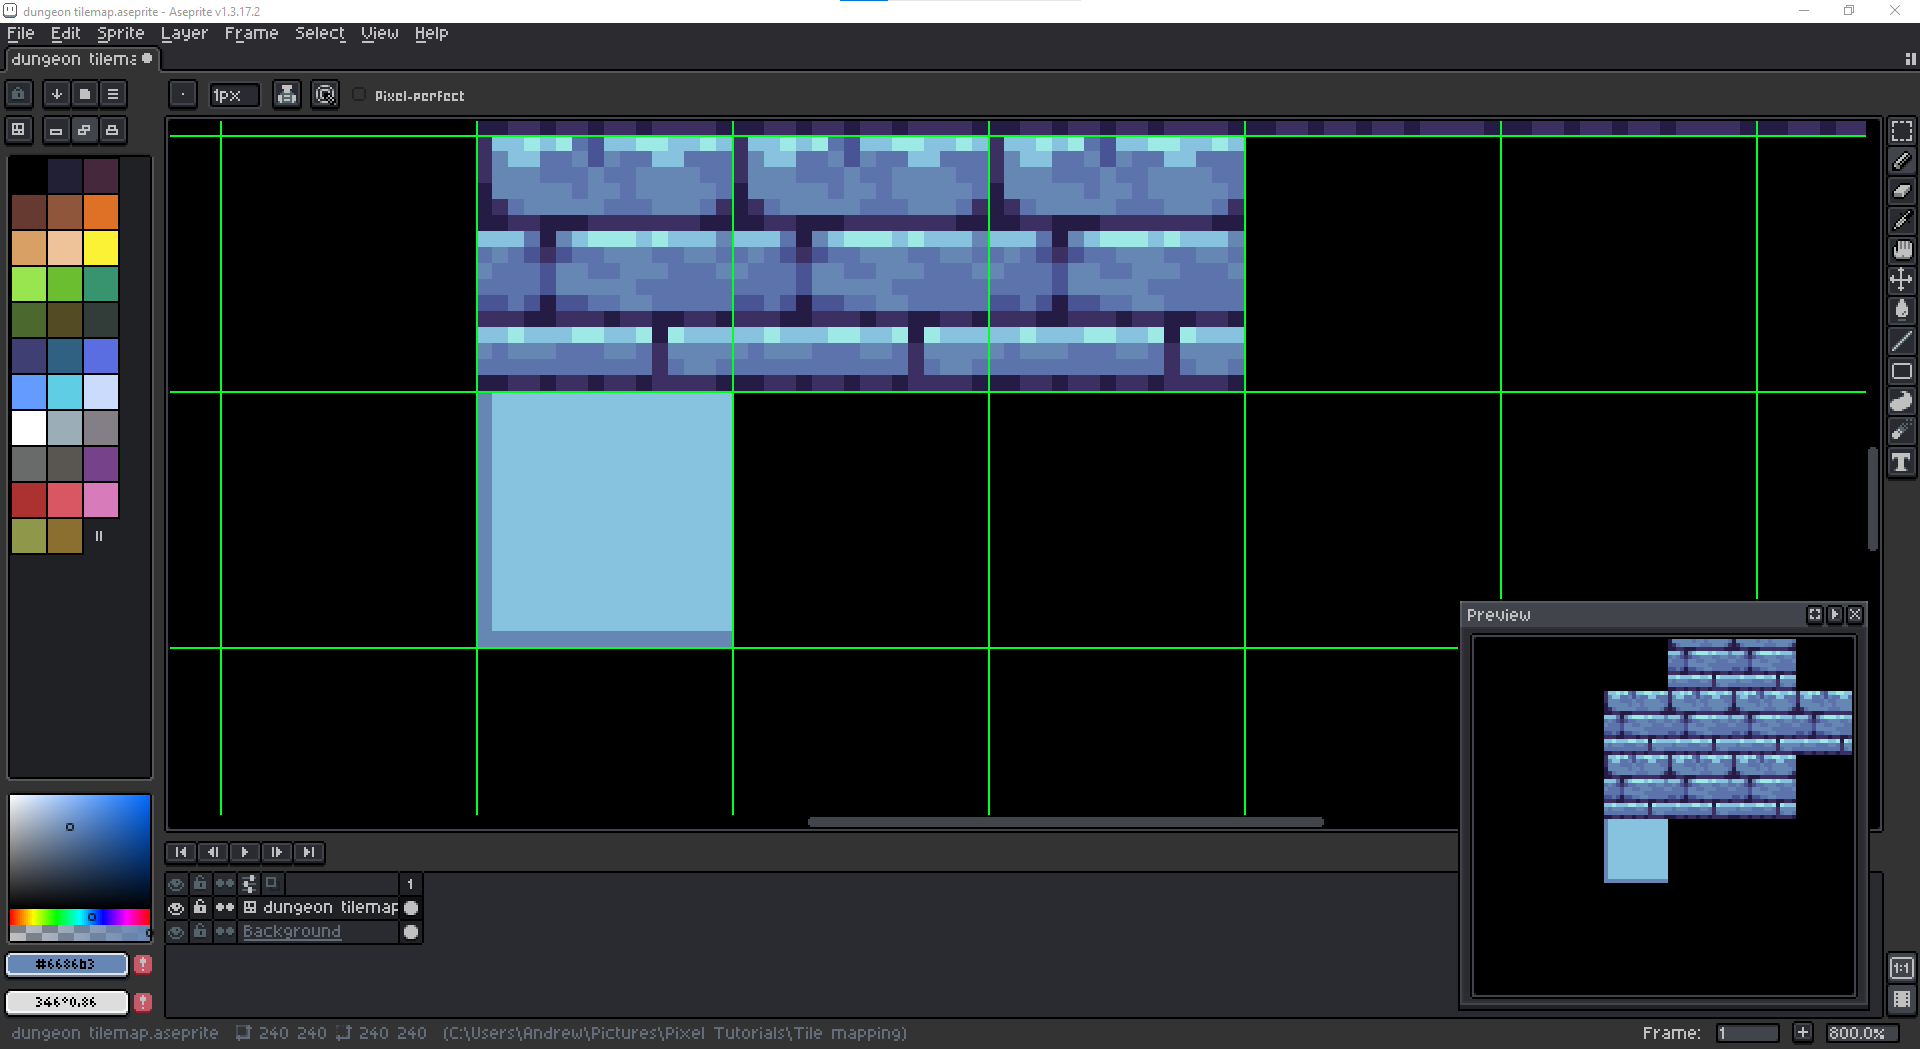
Now that we have a new floor tile, if we click the tileset button again it will be present.
Modifying Existing Tiles
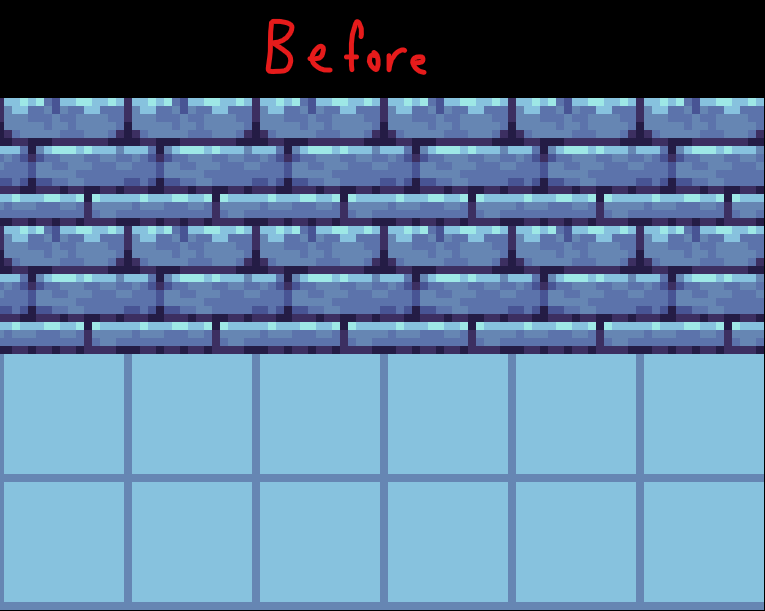
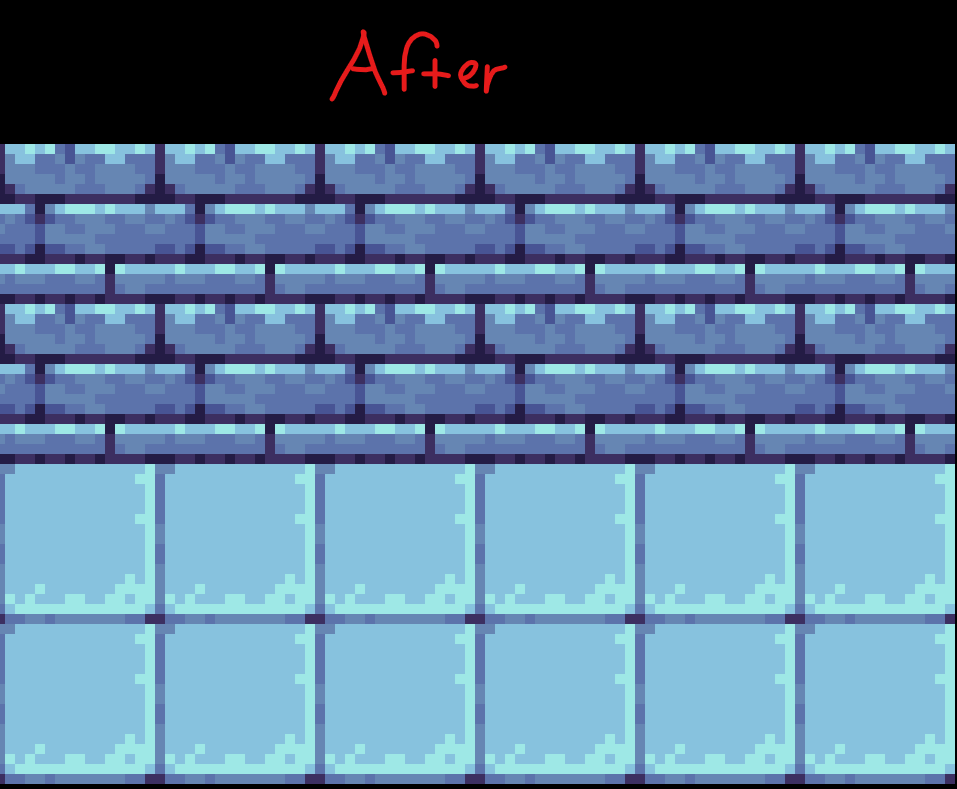
If you only want to edit the appearance of existing tiles without creating new tiles, select this button:

Similar to the previous tutorial, while this button is active and you edit any pixels on a single tile, all of the matching tiles will simultaneously get the updates as well.
Creating a Door Tile
Let's have fun with the Symmetry Options to create an arched dungeon doorway before we close this tutorial. In "View", there are symmetry options which you can turn on or off. Turn it on.
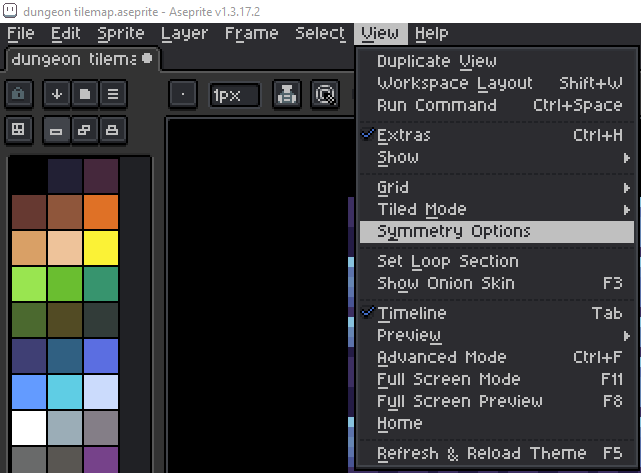
You will see the options presented near the top of Aseprite. Turn on Horizontal Symmetry since the left and right halves of the door will be identical but mirrored.

Then you will see a symmetry line... that matches your grid color, which can be slightly inconvenient at times because it can be hard to distinguish it against your grid lines, but it's not a big deal because you can either turn off the grid or find the 2 white endpoints. Mine is the blue line at the far left.
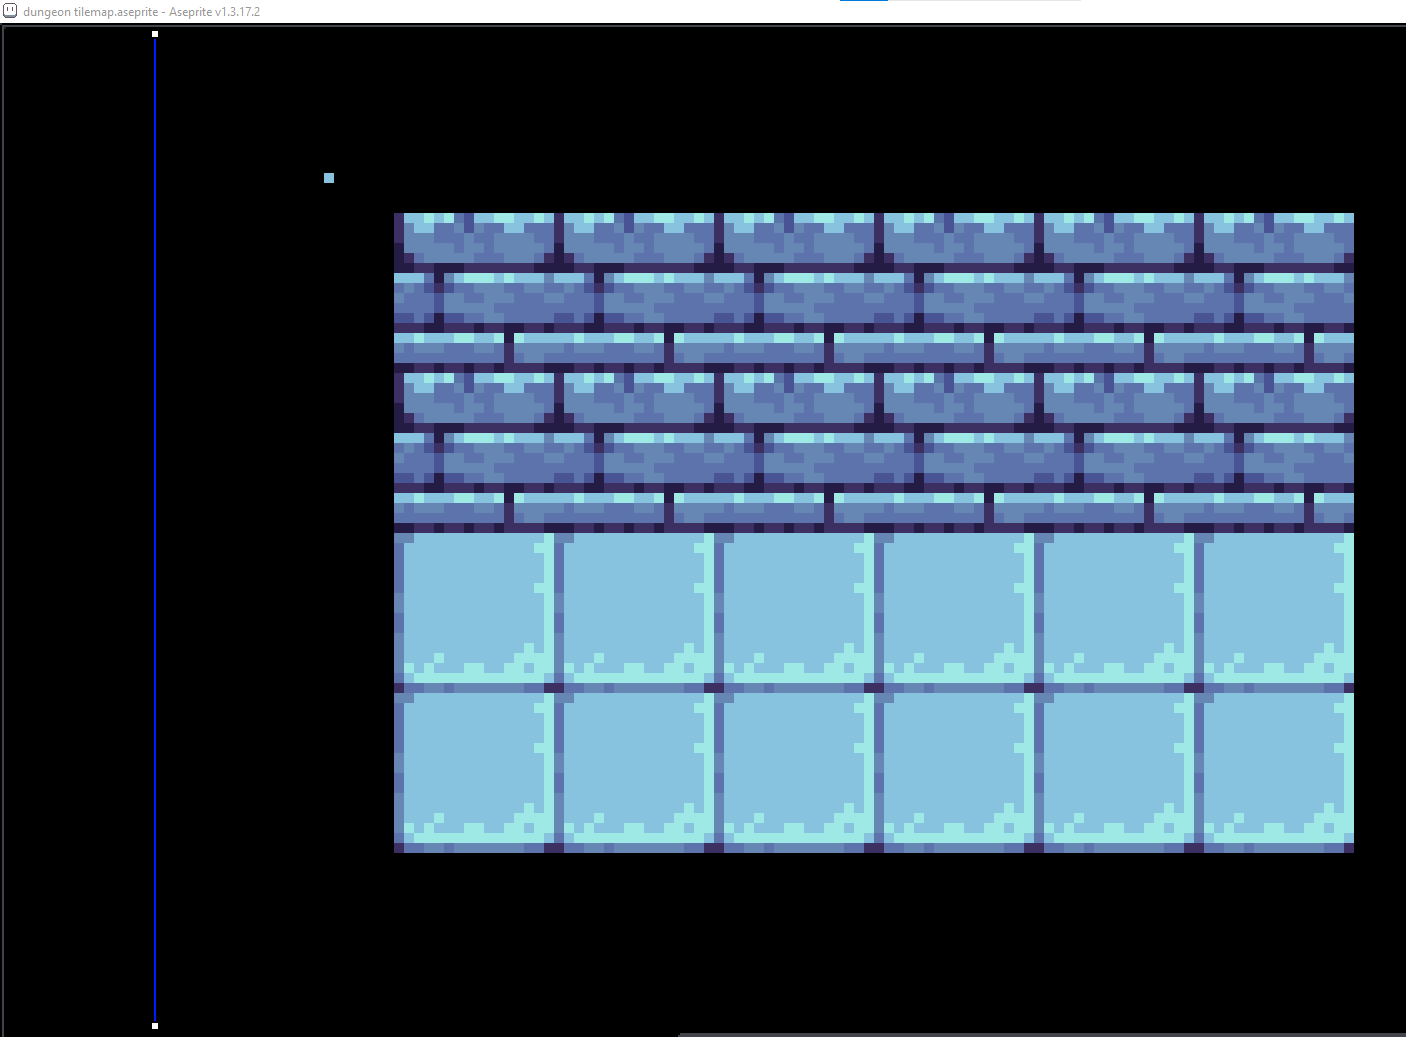
Placing the Symmetry Line
We will actually need the grid however, because we need to know the tile space we have to draw this door. We need to drag the symmetry line to the center of a brick wall tile. You can drag the endpoints. Because I've notice the blue grid/symmetry lines clashing with my tileset colors, I've decided to set the lines to green (grid color option found in Edit - Preferences - Grid)
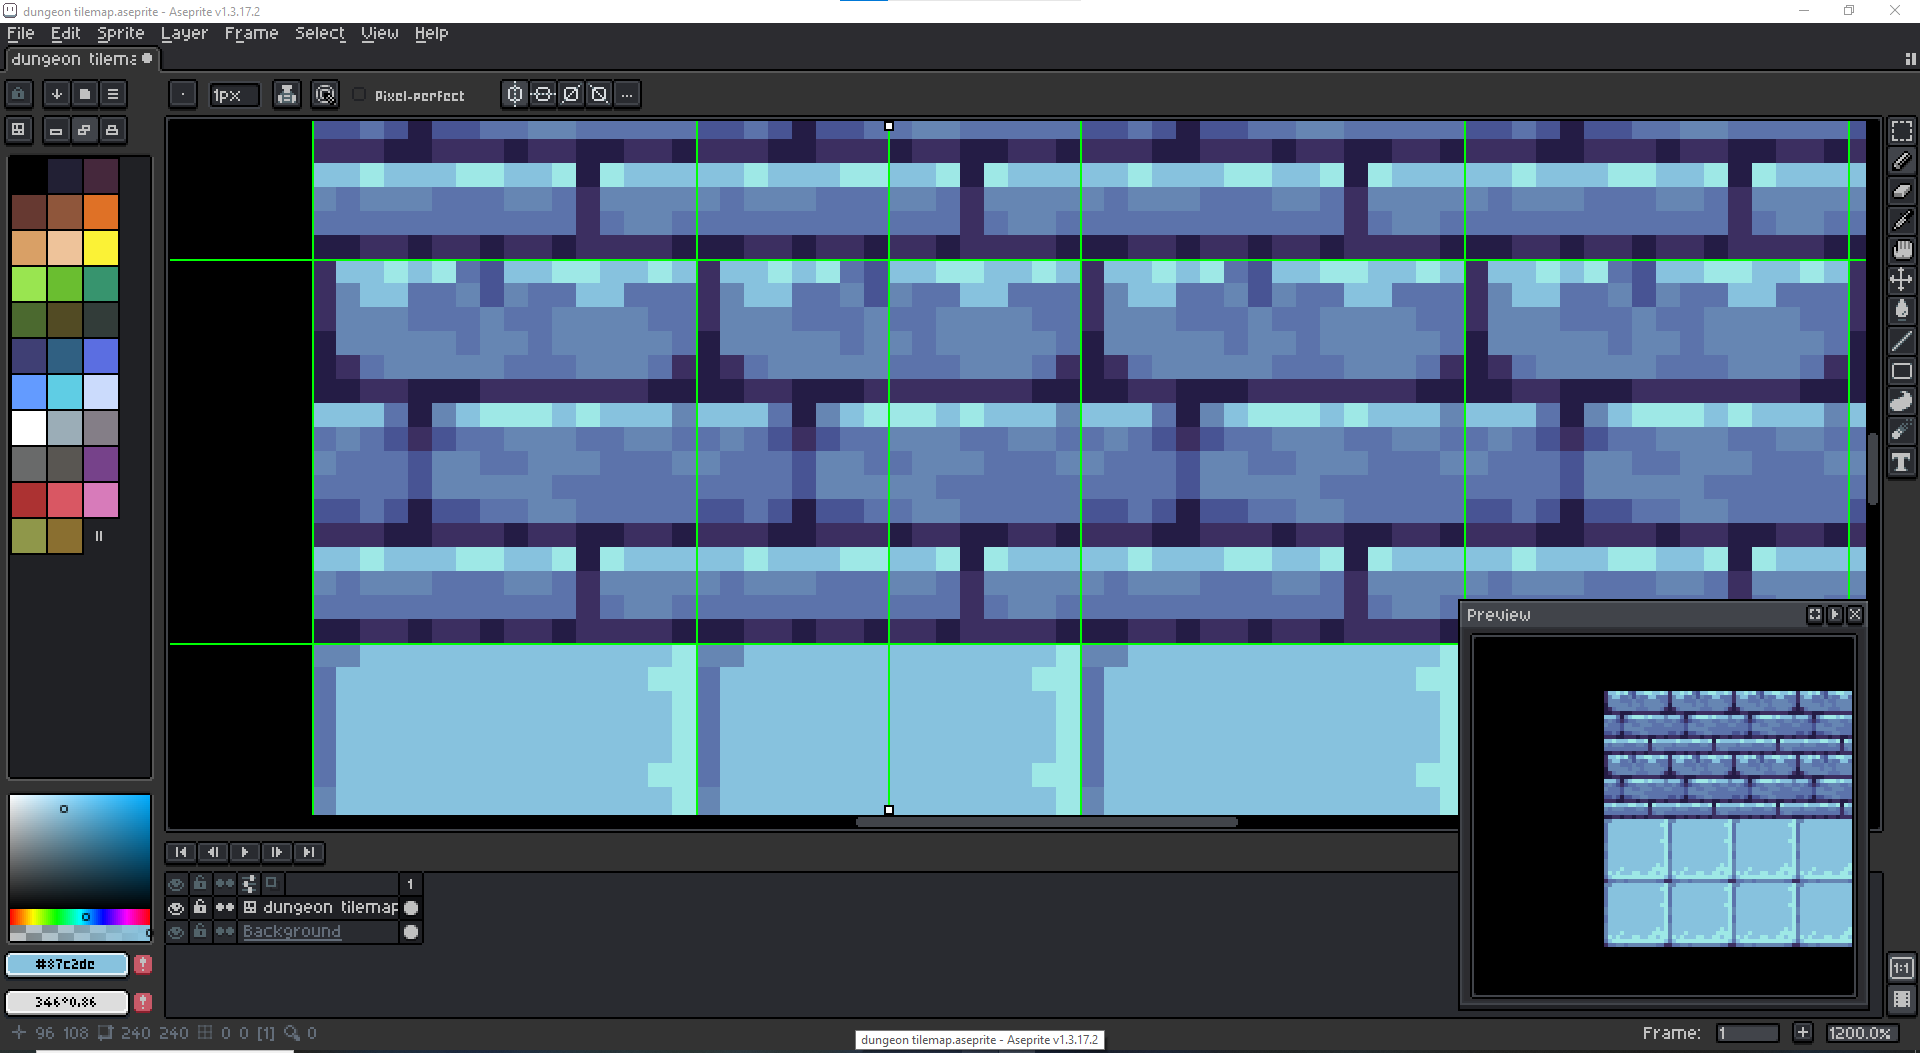
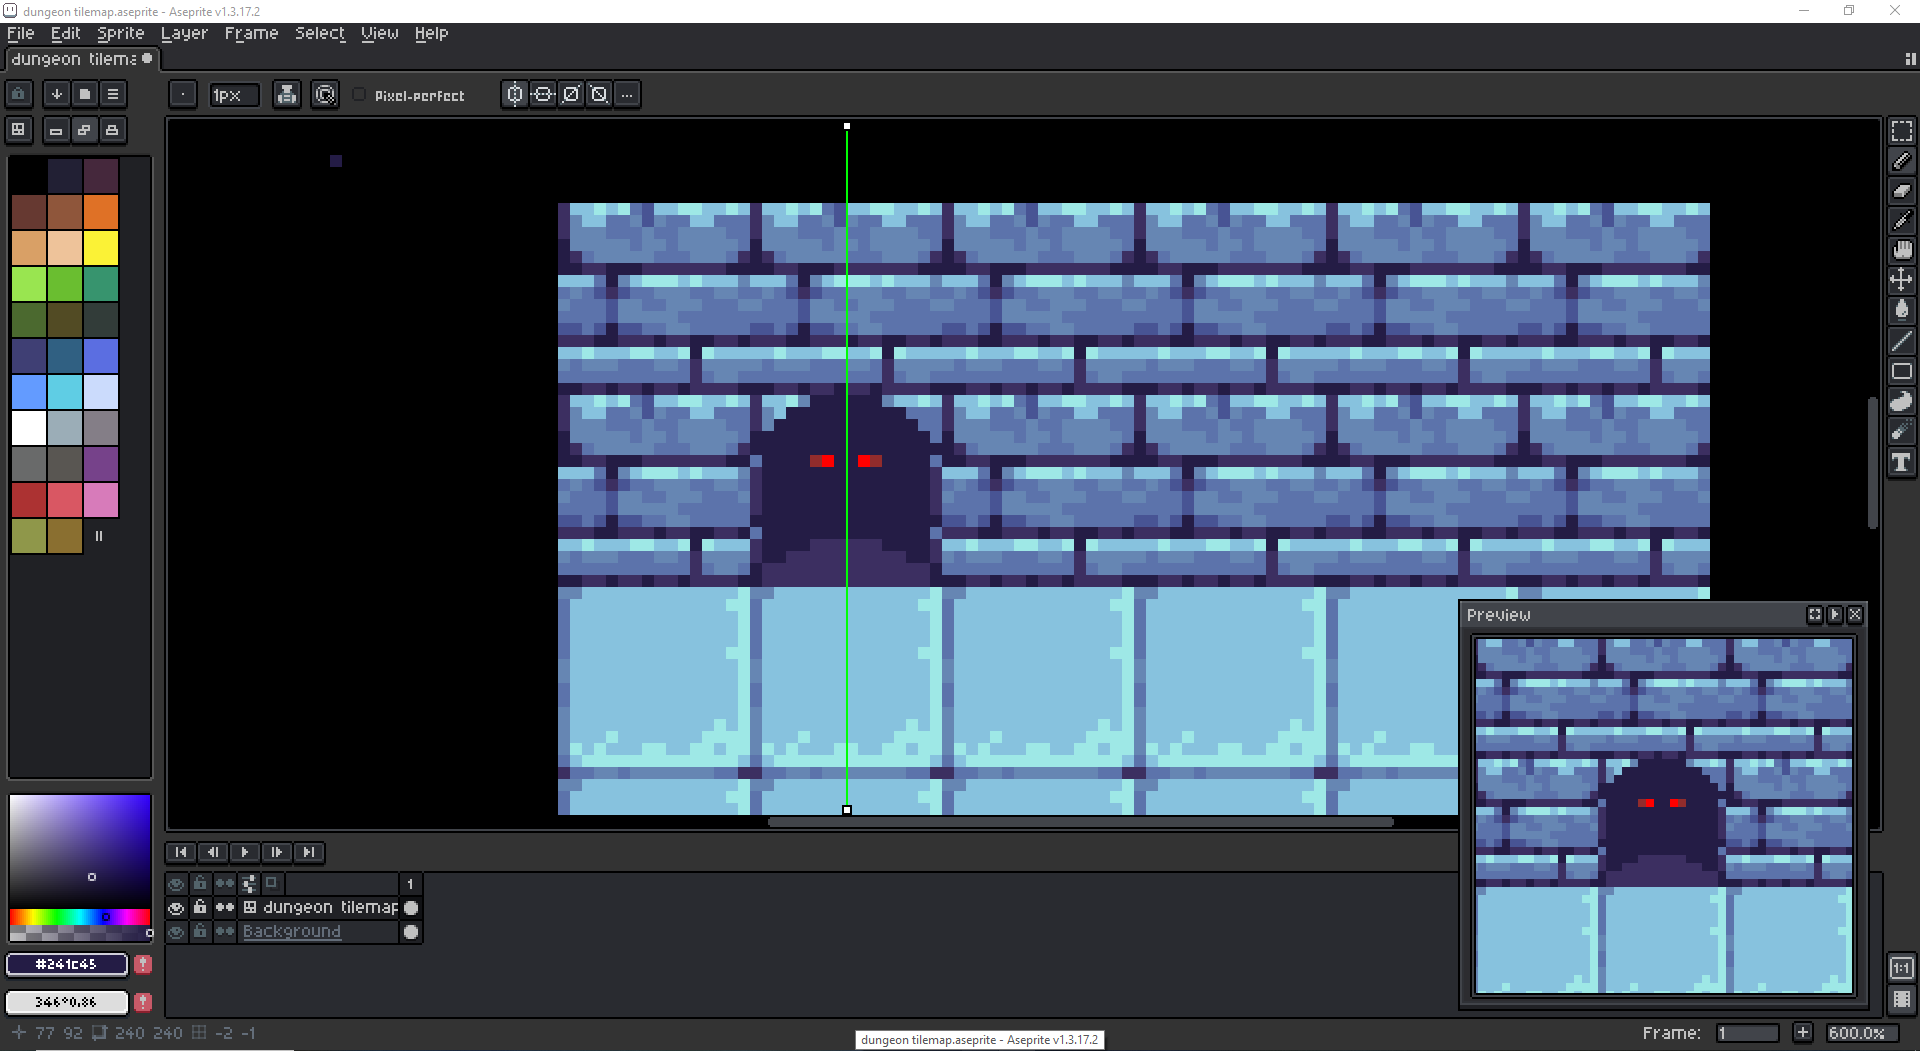
Since we are creating a new tile, select that "new tile" button I mentioned earlier. We will edit a single brick tile, but we don't want all of them to change. Since the door will mostly be a large dark hole, if you need to change your brush size quickly, you can set a shortcut for it. It is listed as a mouse wheel shortcut. I set 'Alt + Mouse Wheel' for this.
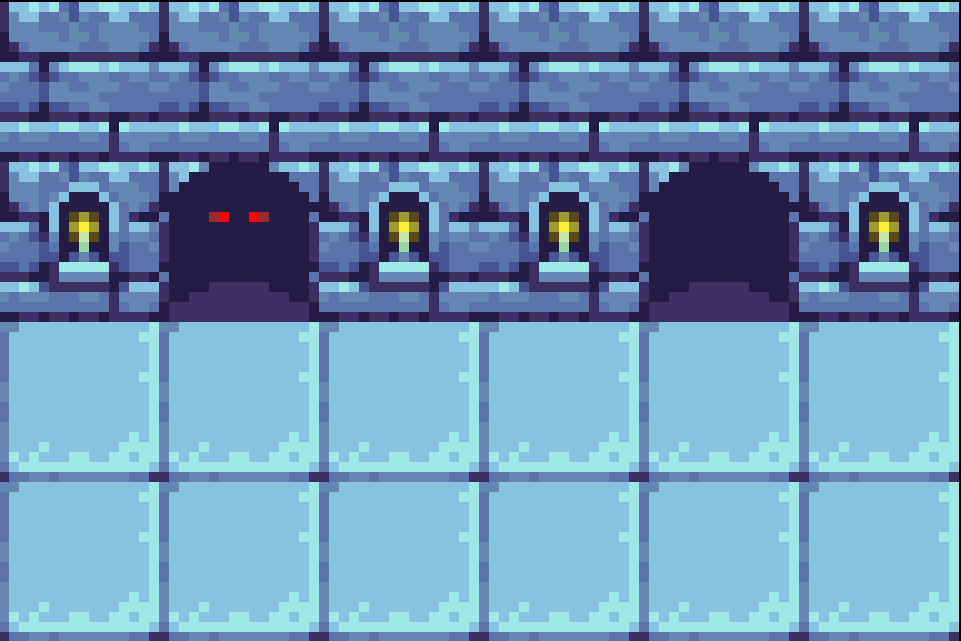
Here I draw an arched door with red monster eyes (just spontaneously), it's also got a bit of a bizarre mixed perspective on the side bricks, but I'd say it passes the sprite test.
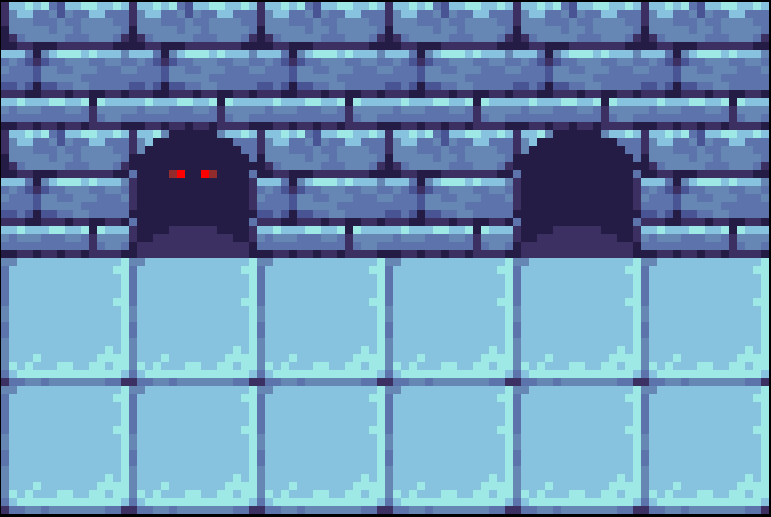
Final Result
I've decided to go with an extra door tile; one with eyes and one without just for some variation.
In the next tutorial we'll probably go over animated tiles such as torches, flames, spikes, maybe even these monster eyes blinking in the door way. We can also have rivers of water, lava, or acid inside the dungeon, so be excited about that hopefully in the near future.
Anyway thanks for reading!
itch.io Community » Creativity & Art » 2D Art · Created a new topic Aseprite Tutorial - Tiled Bricks
Hello and welcome back to another Aseprite tutorial. In the previous tutorial I went over the basics of the Aseprite interface, creating some shortcuts and options if necessary, but in this tutorial we're going to draw our first sprite! You will learn some tools as well as how to tile bricks onto a tilemap (we may even create a full dungeon tileset at some point). Let's start by drawing a seamless brick tile.
Create a 16x16 Canvas
Let's start by creating a small canvas just to focus on exactly one tile for now, but we will have it auto-tile shortly. Set the new canvas to 16x16 pixels and RGBA. Put any background option.
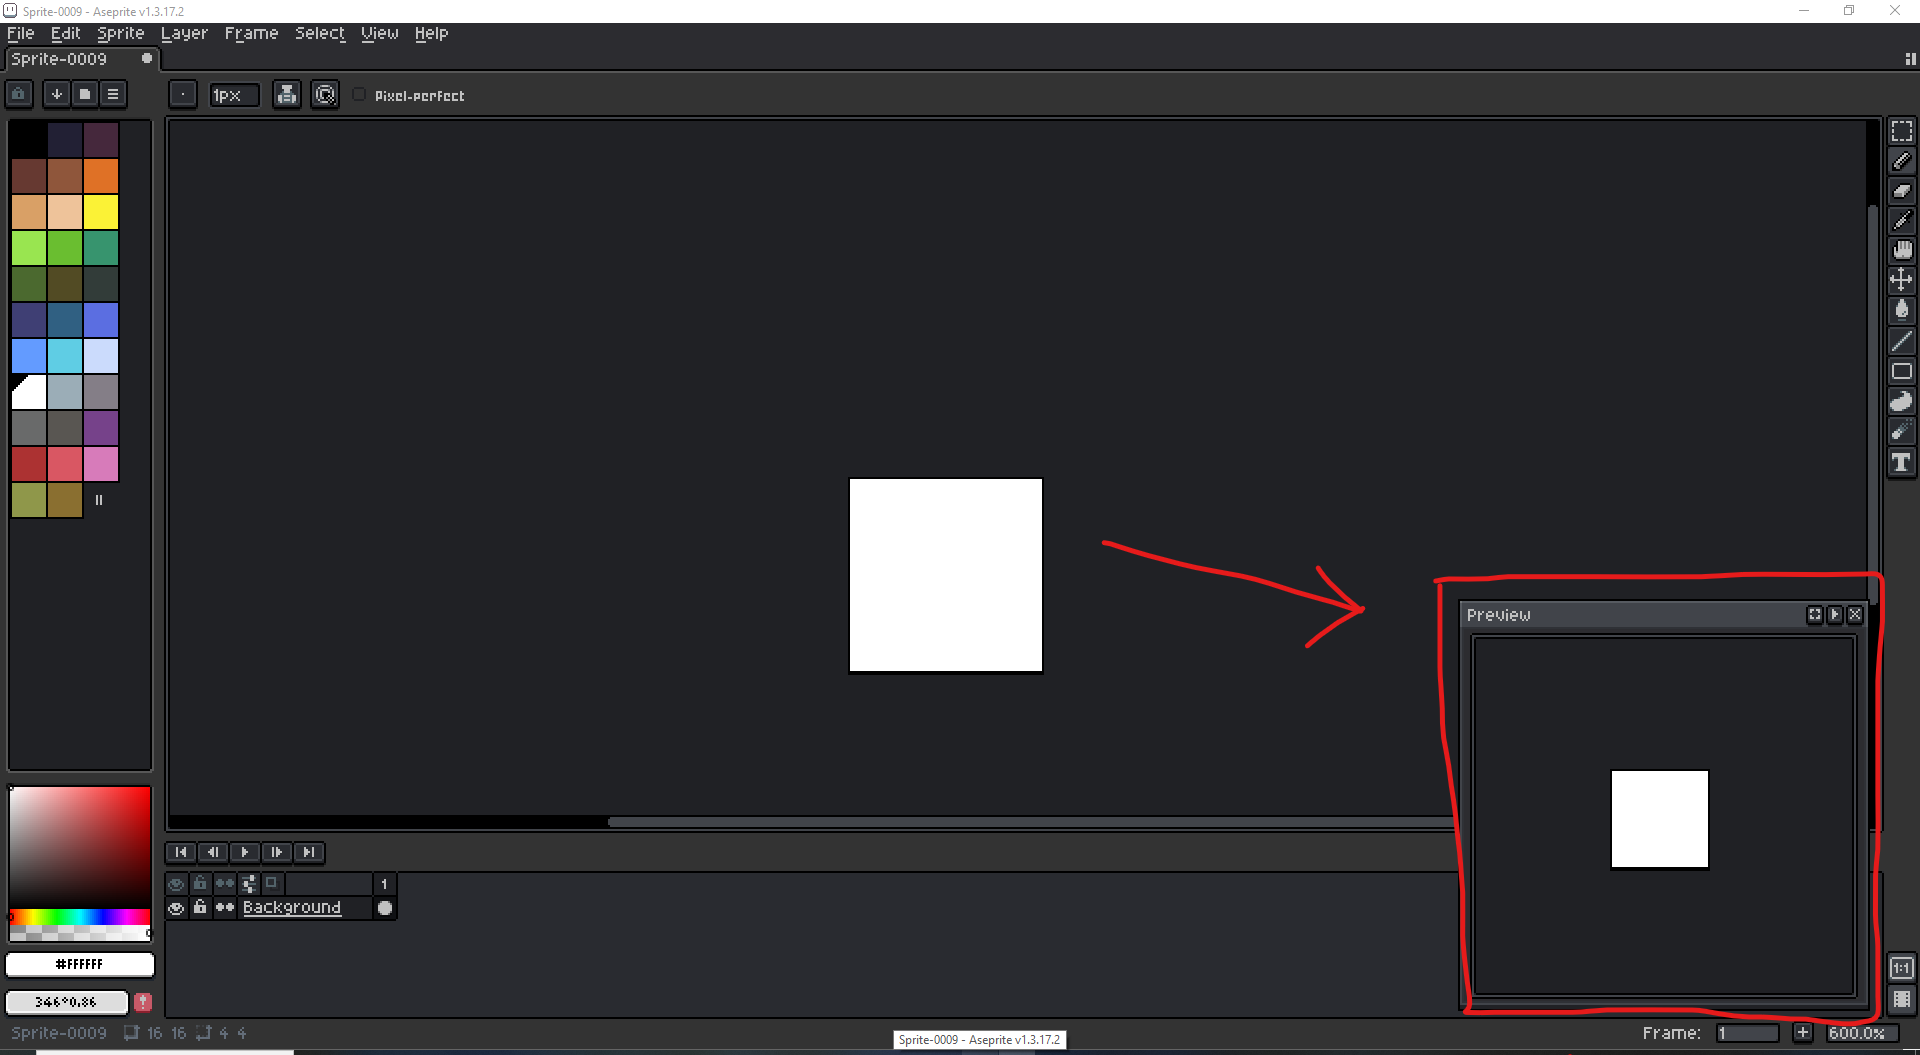
Set Up Preview Window
Open your preview window and set it about this big (not very big) in the bottom right corner of Aseprite. This will allow you to see your work in progress without the camera constantly moving as you work.
Pan and Zoom Controls
In the future, there will be much camera panning and zooming as we're drawing, so we need to know how to do that. At the right of my Aseprite window is the toolbox and these are the Hand Tool and Zoom Tool.
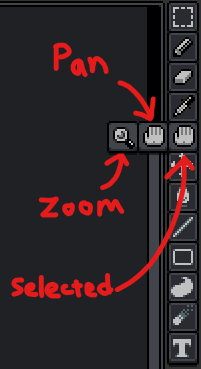
Left click any tool to select it. You can see whatever tool is currently active by seeing a slightly brighter background behind the icon. For example, the Hand Tool here is active rather than the Eyedropper Tool.

With the Hand Tool, you can pan the camera horizontally or vertically by left click dragging the canvas. With the Zoom tool, you can zoom in or out of the canvas; left click zooms in, right click zooms out.
However you'll eventually realize that's tedious. It's better to set up shortcuts for these. I have Hand Tool (quick) set to 'Ctrl' so whenever I hold down Ctrl, I can left click drag to pan the camera. Also I think as a constant default setting, you can hold the middle mouse button and drag to pan the camera as well.
I actually never use the Zoom Tool, however do zoom in and out very often. I have the mouse wheel's default action for zooming, which is also found in the Keyboard Shortcuts. For whatever reason if your mouse wheel shortcut key is empty or glitched, just click "add" and apply a blank set of options there and it should return to "Default Action"
Panning and Zooming the Preview Window
The panning and zooming controls for the preview window are identical, except you can't change them. It's always going to be left click drag to pan and mouse wheel to zoom.
Layer Panel
At the bottom of Aseprite is our Layer panel. We currently have just one layer, either a background layer or normal layer. There is a an eye, a lock, and dot icons displayed near the layer. They serve different purposes:
Eye - Toggle the layer's visibility on the canvas.
Lock - Allow/Restrict drawing on the layer.
Dots - Link/Unify frames (will be discussed in an animation tutorial in the future).
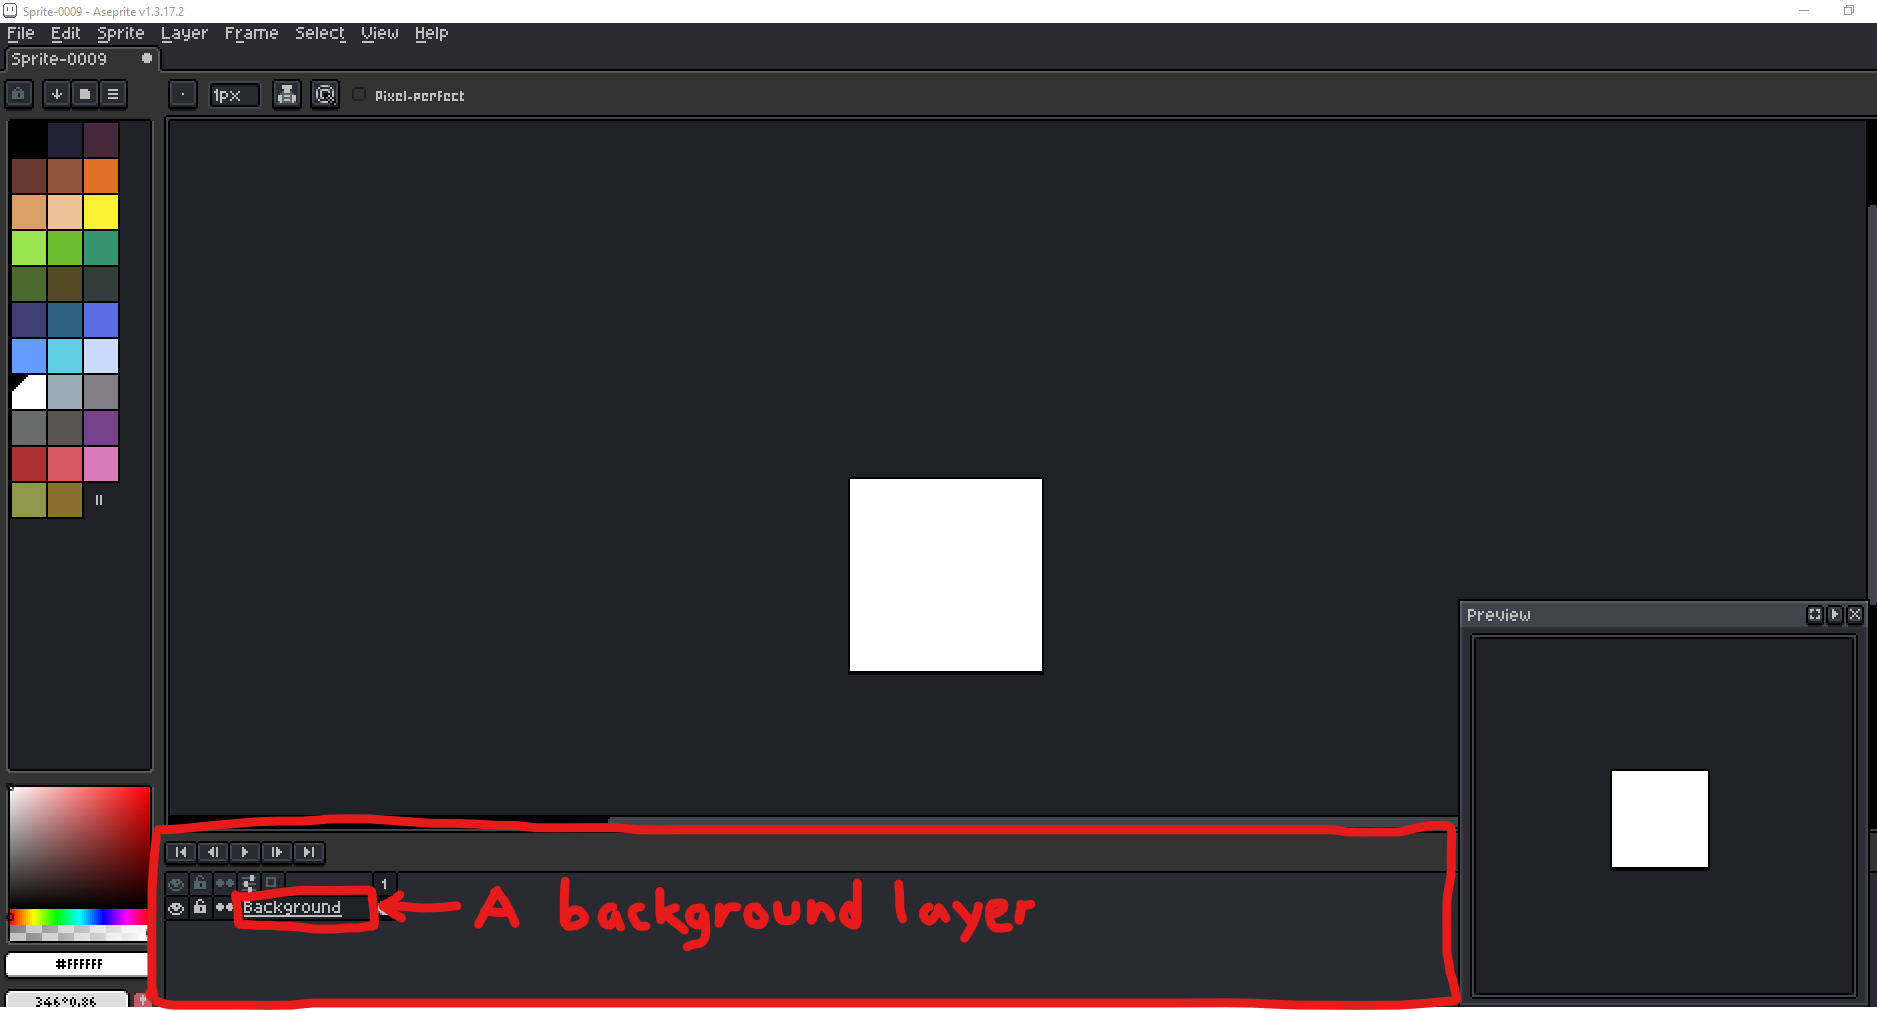
I'm not concerned with the background for now since we will entirely draw a square tile right in front of it.
Creating a Brick Layer
If you haven't modified the shortcut, creating a new layer can be done with 'Shift + N' or you can right click the background layer and select New - New Layer. Rename the new layer to "Brick Tile".
Grid and Auto-Tile Feature
In the menu bar select View. Under View, there are 3 features listed: Grid, Show, and Tiled Mode.
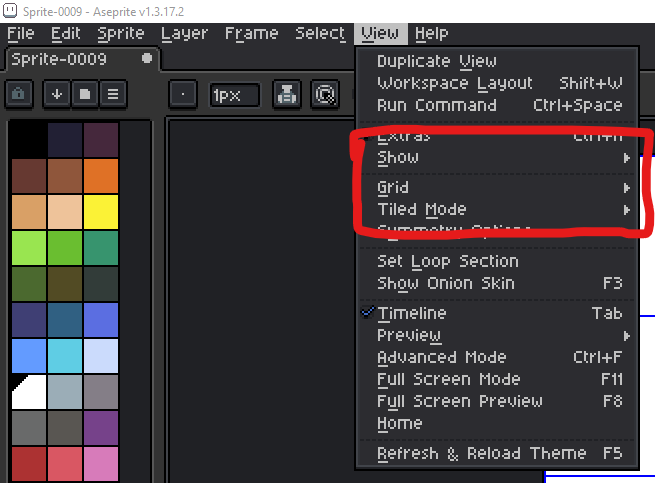
First select Tiled Mode - Tiled in Both Axes.
Set Grid Settings to 16x16 pixels.
Set Show-Grid.
You will then see a 3x3 tile grid.
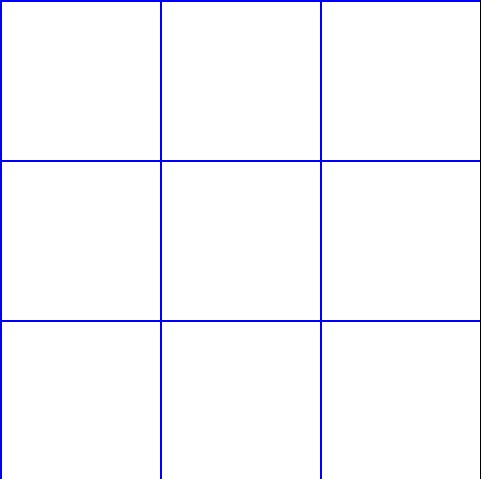
Now as we edit any of these squares, all of these squares will update identically!
Drawing the Brick Tile
To start, we can fill the whole brick layer with a simple color desaturated blue color. First, we need to select all of our original canvas (which is only the center tile, before we turned on Tiled Mode). You can set a shortcut for "select all", but by default I think it's either 'A' or 'Ctrl + A'. After that, congrats, you've just made your first marquee selection. It appears as animated dotted lines around your selection.
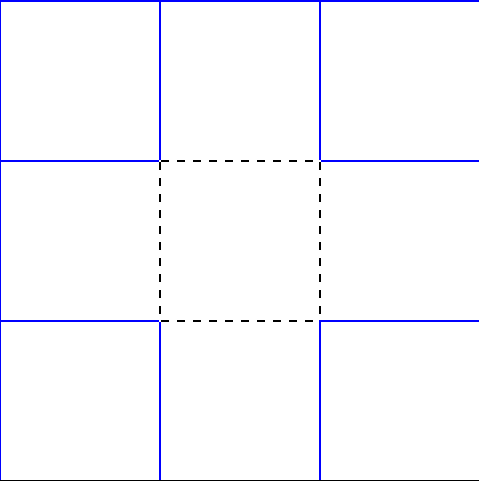
Now, you can fill a color in that center tile space, which in turn will fill all the tiles! But we must first select a color.
Color Picking
In the bottom left of Aseprite is the Color Picker. I call them some things here and they're not official names of these things, but it's a convenient way to remember them. I listed: Free Picker, Hue, Alpha, Active Brush Color, and Toggle Color.
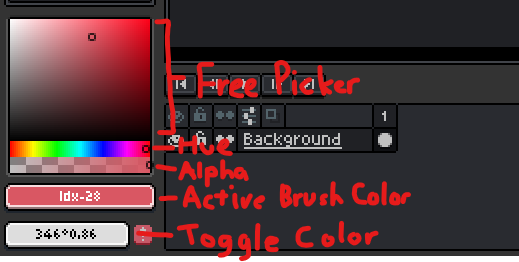
Free Picker - I call it "free" because you get to slide the color cursor both horizontally and vertically, though Hue and Alpha values are listed seperately.
Hue - Think of it as a simple color choice (i.e. red, green, blue, yellow), but no lightness/darkness or transparency values attached to it.
Alpha - How opaque the color is. The color could be completely invisible, half visible, fully visible, etc.
Active Brush Color - The color displayed in the rectangular box is the one currently selected and will be used for drawing, filling, etc.
Toggle Color - An alternative brush color that is inactive, but can be selected with 'X' or whatever keybind is assigned. This also swaps your Active Brush Color in its place.
Color Sliders
You can click your active brush color to pop up some colors sliders, useful for more precision. You can slide the arrows to achieve the exact number values you want. You can also type them in directly.
There are many letters associated with the color sliders and I'll define them below:
R - Red
G - Green
B - Blue
H - Hue
S - Saturation
V - Value
L - Lightness
A - Alpha
# - Color ID
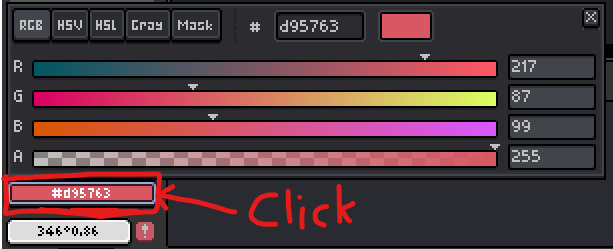
Note: One thing that's a bit tedious is that by default the slider window auto-closes if you move your mouse away. To prevent this, drag the window out and away from its original location, though you can place it back afterwards. For example, arrange it like this:
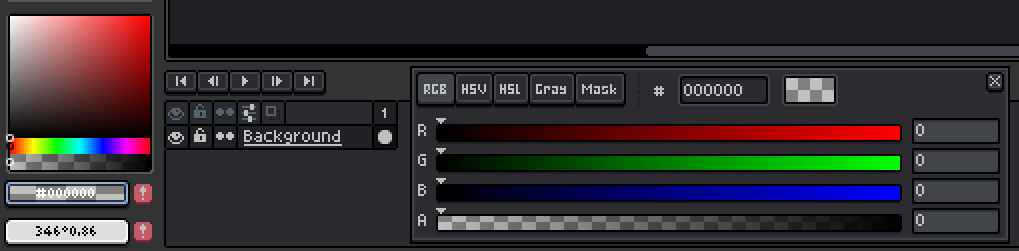
My favorite sliders and my way of picking colors is nearly always the HSV sliders. I use this to achieve Hue Shifting which is a popular topic that I'll introduce for the brick tile.
Filling the Brick Tile Midtone
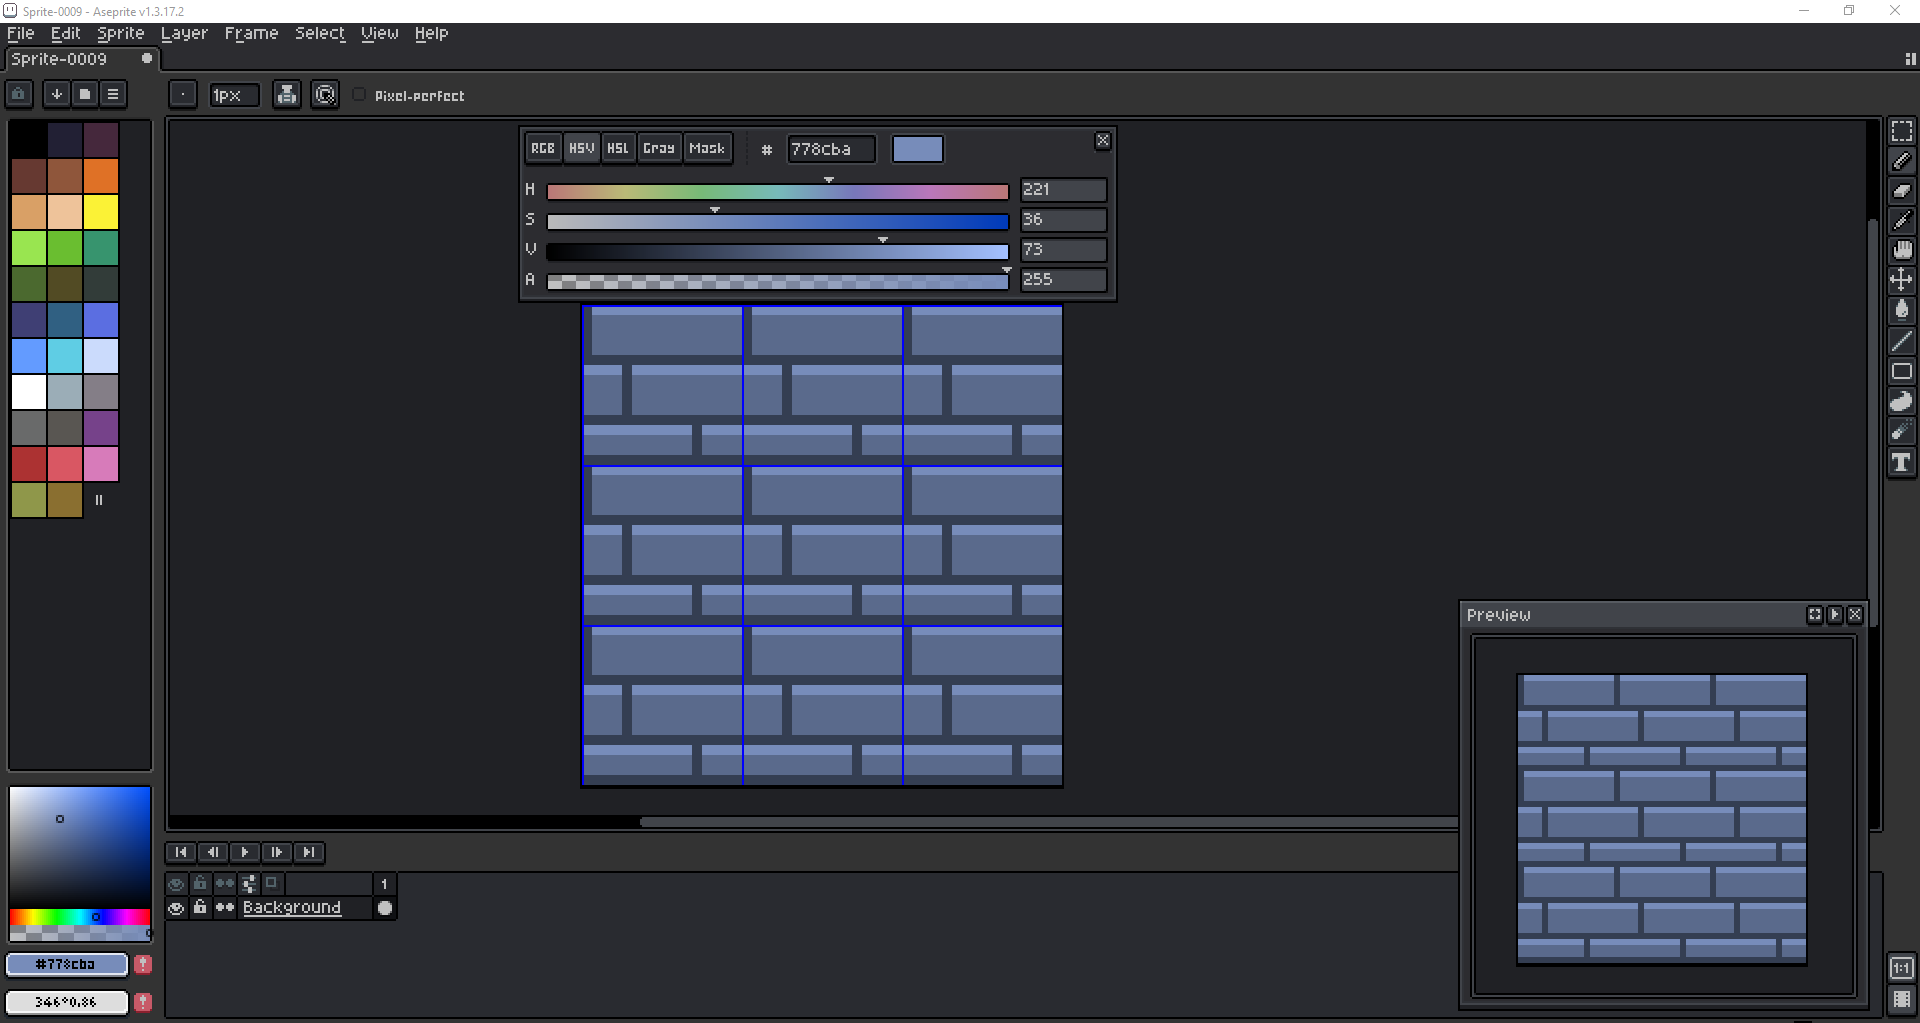
Ok, select a slightly bluish gray color such as the one I have selected. It will serve as the midtone for the brick tile. Then select Fill from Edit or use the shortcut. You should see a result like this.
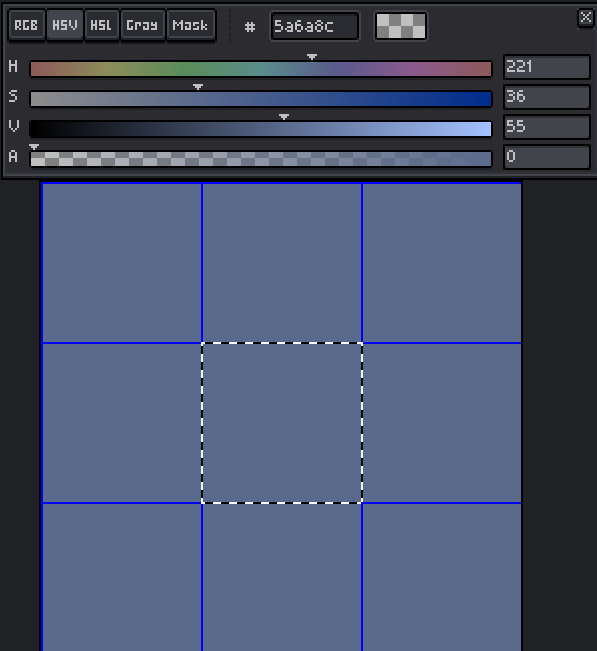
You can deselect the marquee selection now, which is also found in "Select".
Drawing with the Pencil
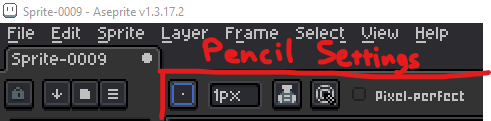
I will explain hue shifting shortly, by for now let's keep things simple and create some dark brick lines. Slide the value of the current color down, but keep every other slider amount the same. Select the pencil tool. While the pencil is selected, you can access the settings near the menu bar. There are different brush shape options there that you can mess around with. There is the brush size which we'll just set to 1px. The Ink is a bit more confusing but just select Copy Alpha + Color. Completely ignore "Dynamics". Pixel Perfect determines if your lines will appear as jaggy staircase lines or simple lines.
With the pencil tool, you can "free draw" with left click, or even draw straight lines! To draw straight lines, you must first click a start point on your canvas, then hold 'Shift' and click an end point. You can also hold 'Ctrl' to snap the angle of the lines to ~30 degree increments. Draw some brick lines like this until you get a nice seamless pattern.
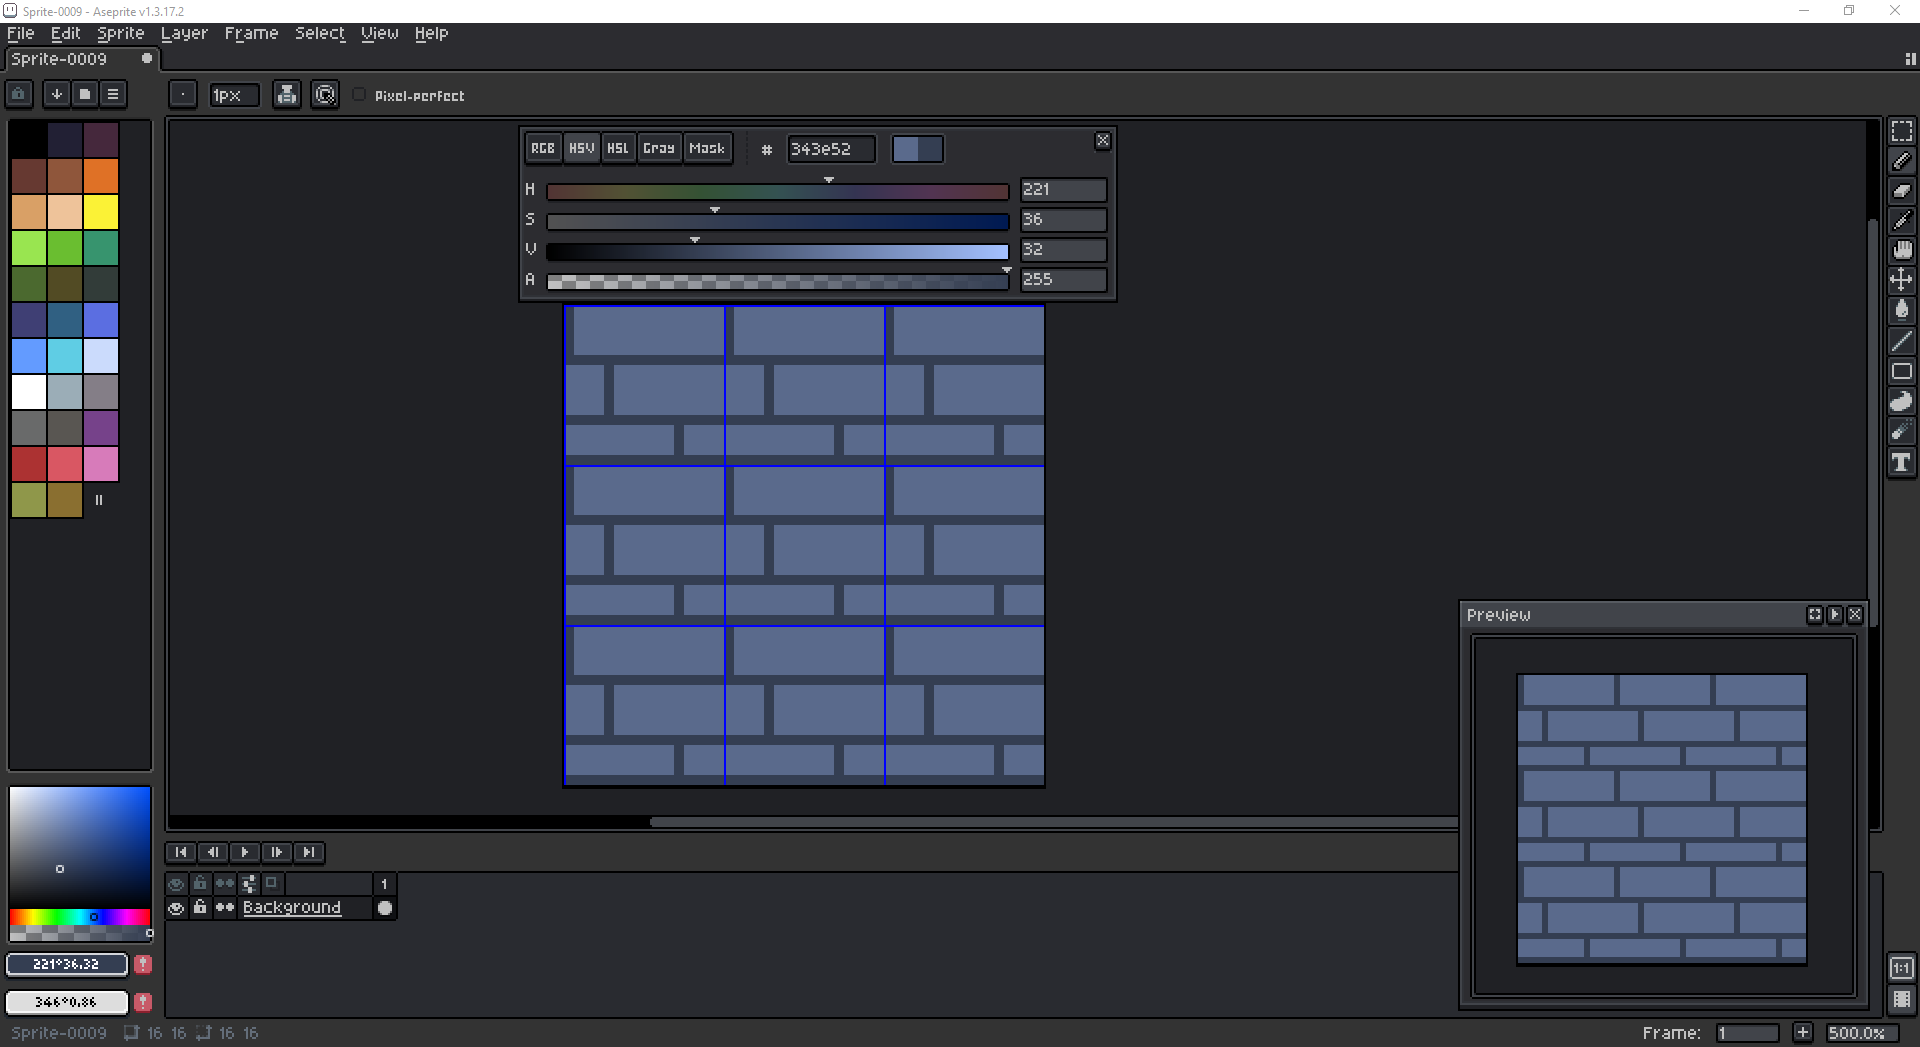
Now go brighter, slide the brush color value greater than the original brick color we added. This will be our highlight color for our bricks. Add some highlights to the top of the bricks.
Eyedropper Tool
Now that we have a few nice colors on our canvas to work with, you can reselect them with the Eyedropper Tool.
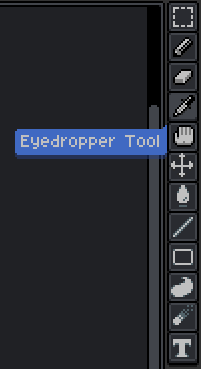
With it selected, you can left click any color on your canvas to reselect it as your active brush color, though you may have to modify the its settings found near the menu bar.

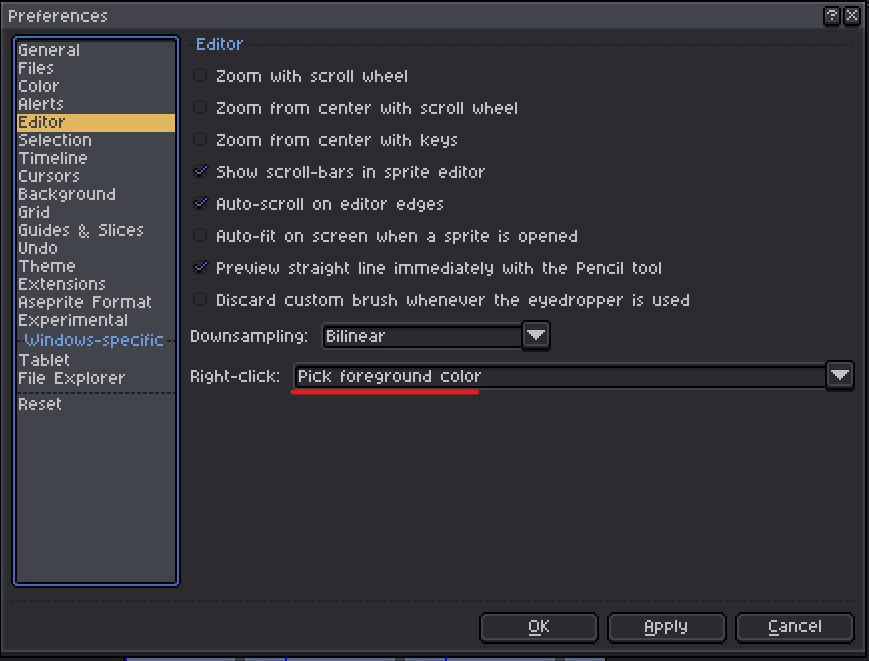
However as mentioned in the previous tutorial post, you can set right click as a shortcut for this exact feature so you never have to select the eyedropper tool manually. This option is found in Preferences from Edit.
Hue-Shifting
Now lets apply some hue shifting to our tile sprite. The general 1st rule for hue shifting is that highlights should appear warmer in color (i.e yellow or orange) and the shadows should appear colder/cooler (i.e. blue or purple). The 2nd rule is that warmer colors become less saturated and cooler colors become more saturated.
Replacing Colors
In "Edit", there is a feature to replace colors on your canvas. You must eyedrop the color first. Then you can modify the original color (From) to the new color (To). Tolerance determines if similar colors to the color in "From" will also be replaced, but generally it's best to keep it at 0. Make sure "Preview" is check-boxed to see the replacement in real-time.
Now I have updated all the colors of the brick tile.
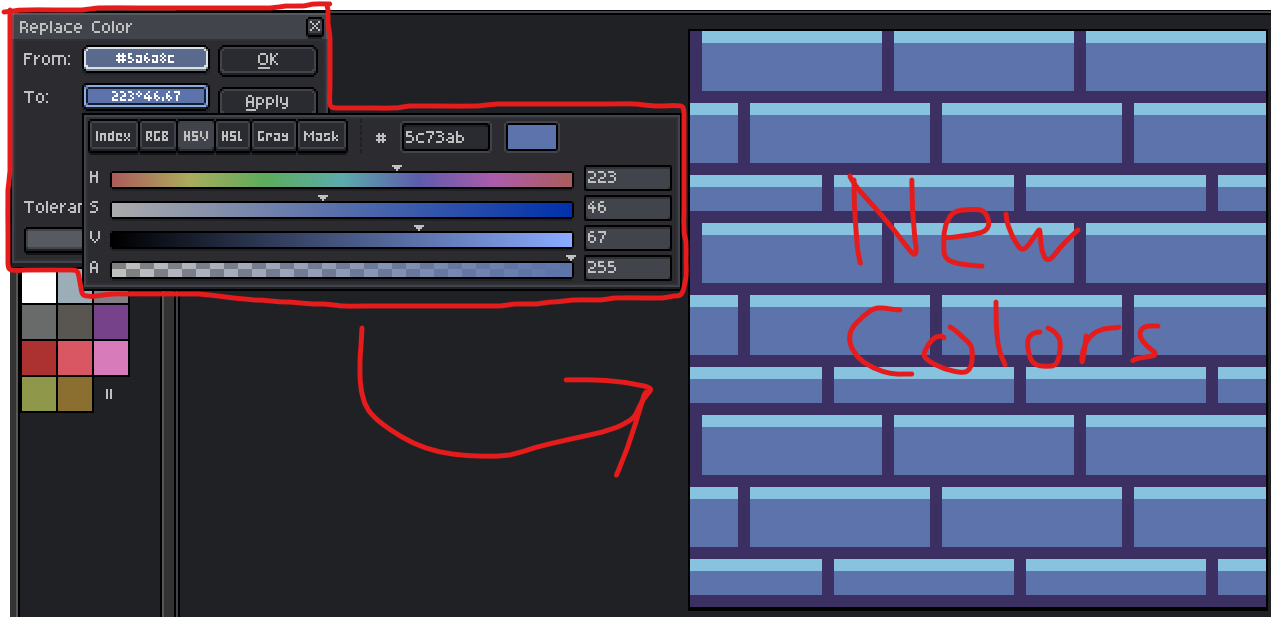
This new tile pops, compared to before. The colors are much stronger and contrasting along with the subtle hue shift. Without hue shifting, it's very common for sprites to look desaturated and basic.
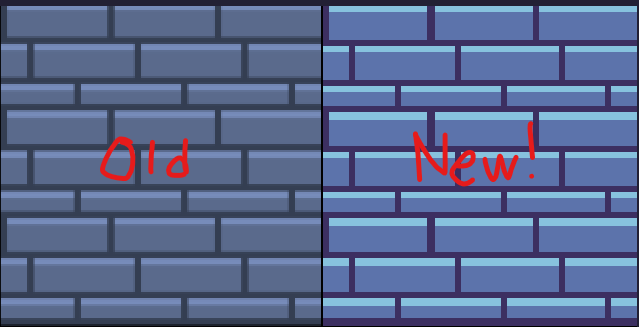
Polish
The final stage of spriting anything is the Polish stage; basically just making things look good and ready to publish. We can give our brick tile more texture, reusing our existing color with the eyedropper function or even adding more colors if you wish. I want to do that and show the true power of hueshifting before we close this tutorial.
I usually create a new "polish" layer over my original layer to make these edits, then merge them down after I'm done. The background layer can basically be ignored for now, or even deleted because it's irrelevant at the moment.
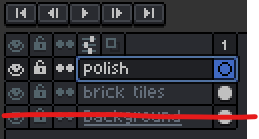
Here I basically add more roughness and cracks to the bricks, using more colors and hue shifting techniques.
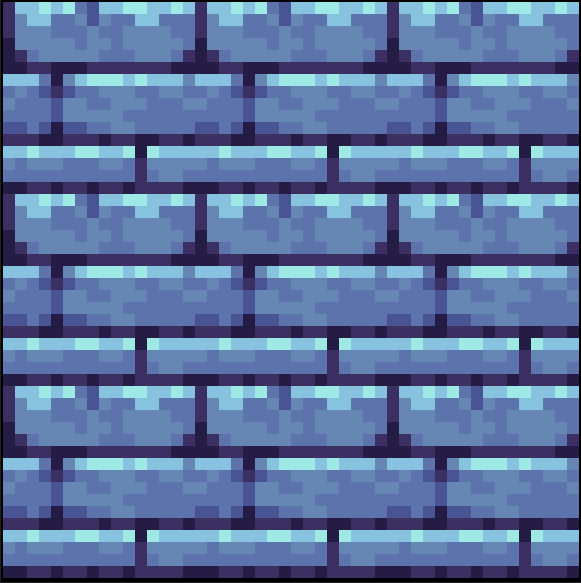
That's it for the brick tile for now, but we will discuss more dungeon tile-mapping and in the next tutorial. Thanks for reading!
itch.io Community » Game Development » Help Wanted or Offered · Created a new topic Pixel Artist [LFP] [PAID]
itch.io Community » Game Development » Help Wanted or Offered · Posted in [Art][Paid]– Seeking Pixel Art Artist for Dungeon-Crawler Game
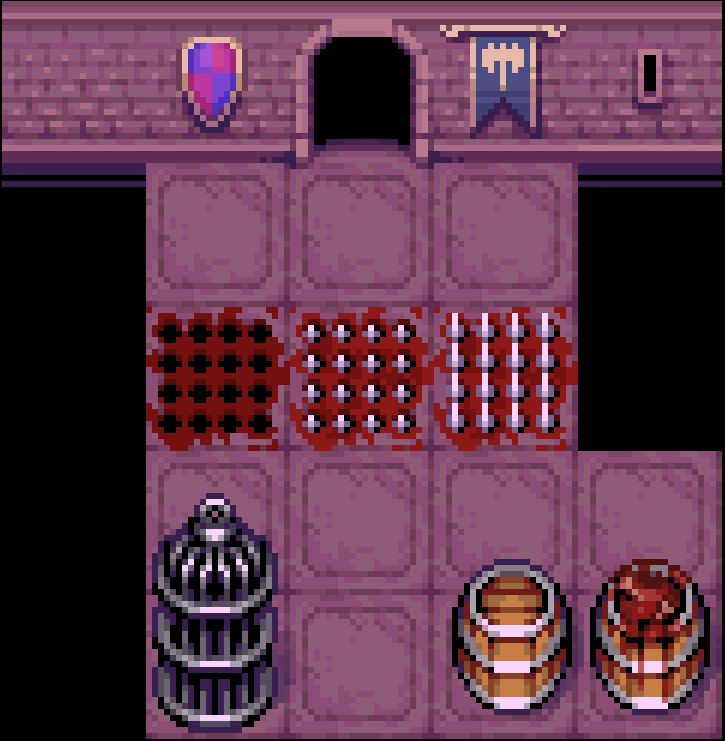
Hello. Did you find anyone to work with yet? Here's my portfolio. I have played Dungeons of Dreadrock 1 & 2 and was actually trying to make a dungeon puzzle game based on that genre, so I have a tileset if you're curious what that looks like. This stuff never got finished unfortunately, but I might get back to it at some point.
itch.io Community » Creativity & Art » 2D Art · Replied to Chimerick in Pixel Tutorial - Simple Goblin
itch.io Community » Game Development » Help Wanted or Offered · Posted in [Paid] [Art] [LFS] Looking for pixel art for a platformer
Can you read my "looking for work" post please? It's got my portfolio and I ask for $20/hr, but here are some highlights from my portfolio.
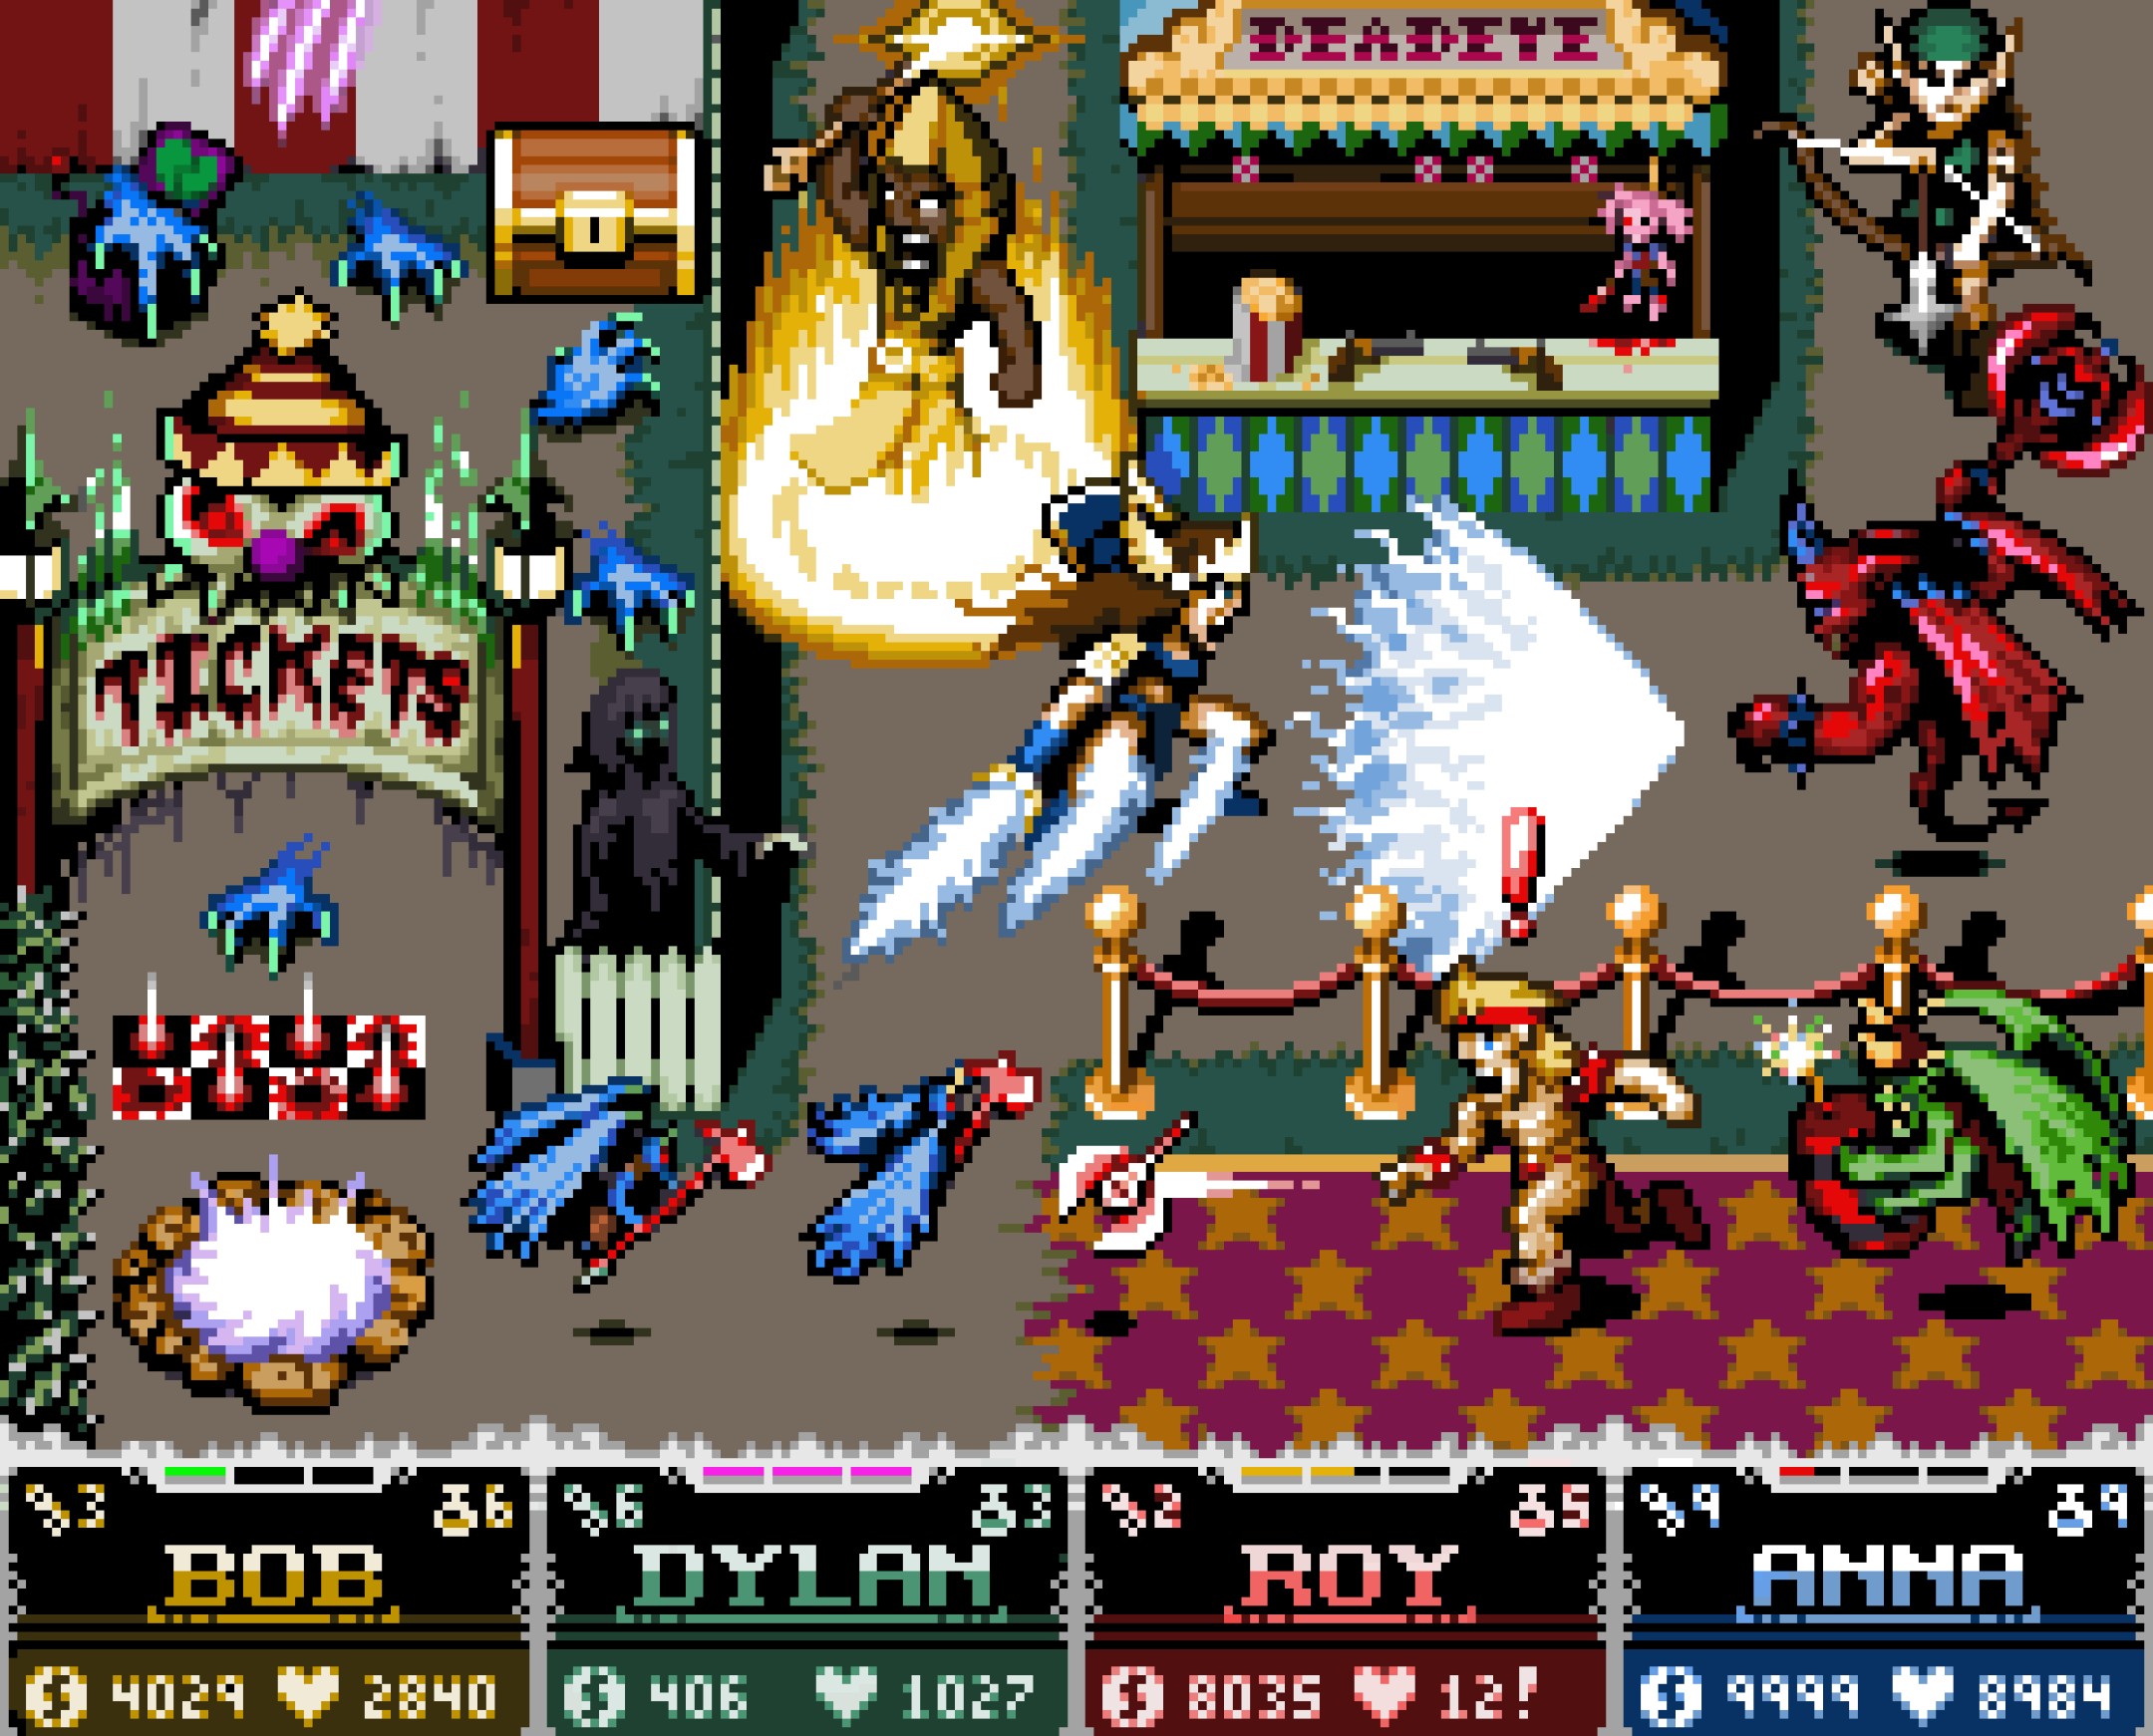
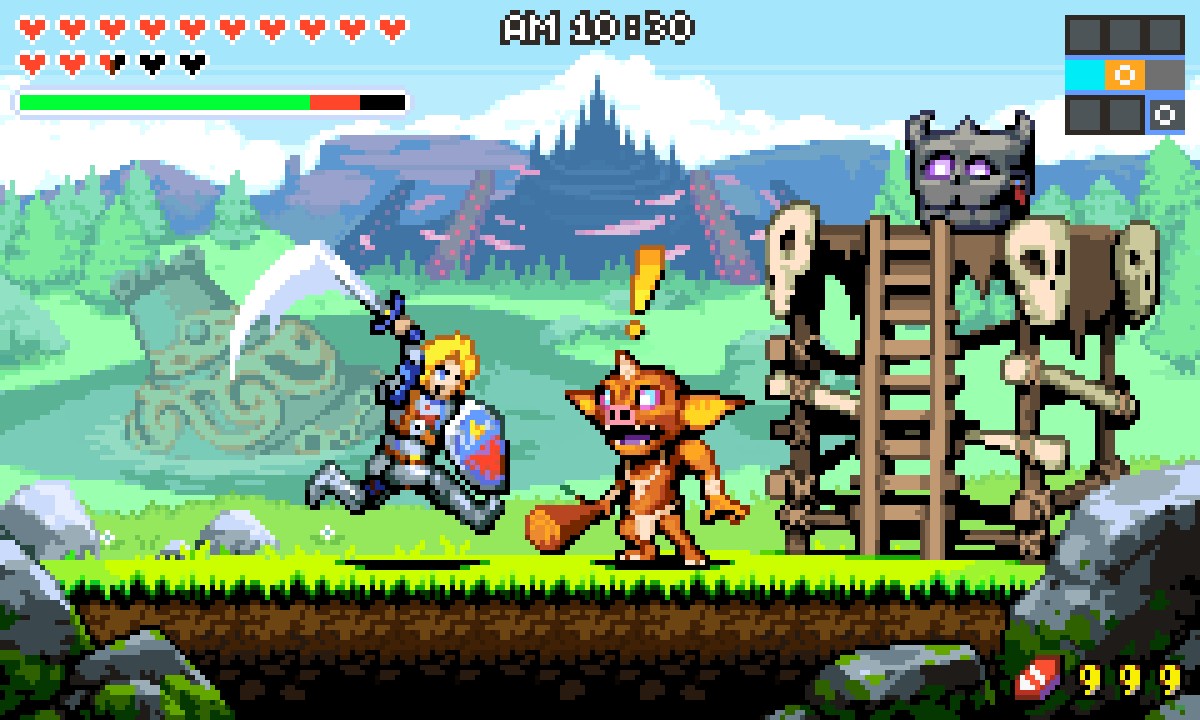
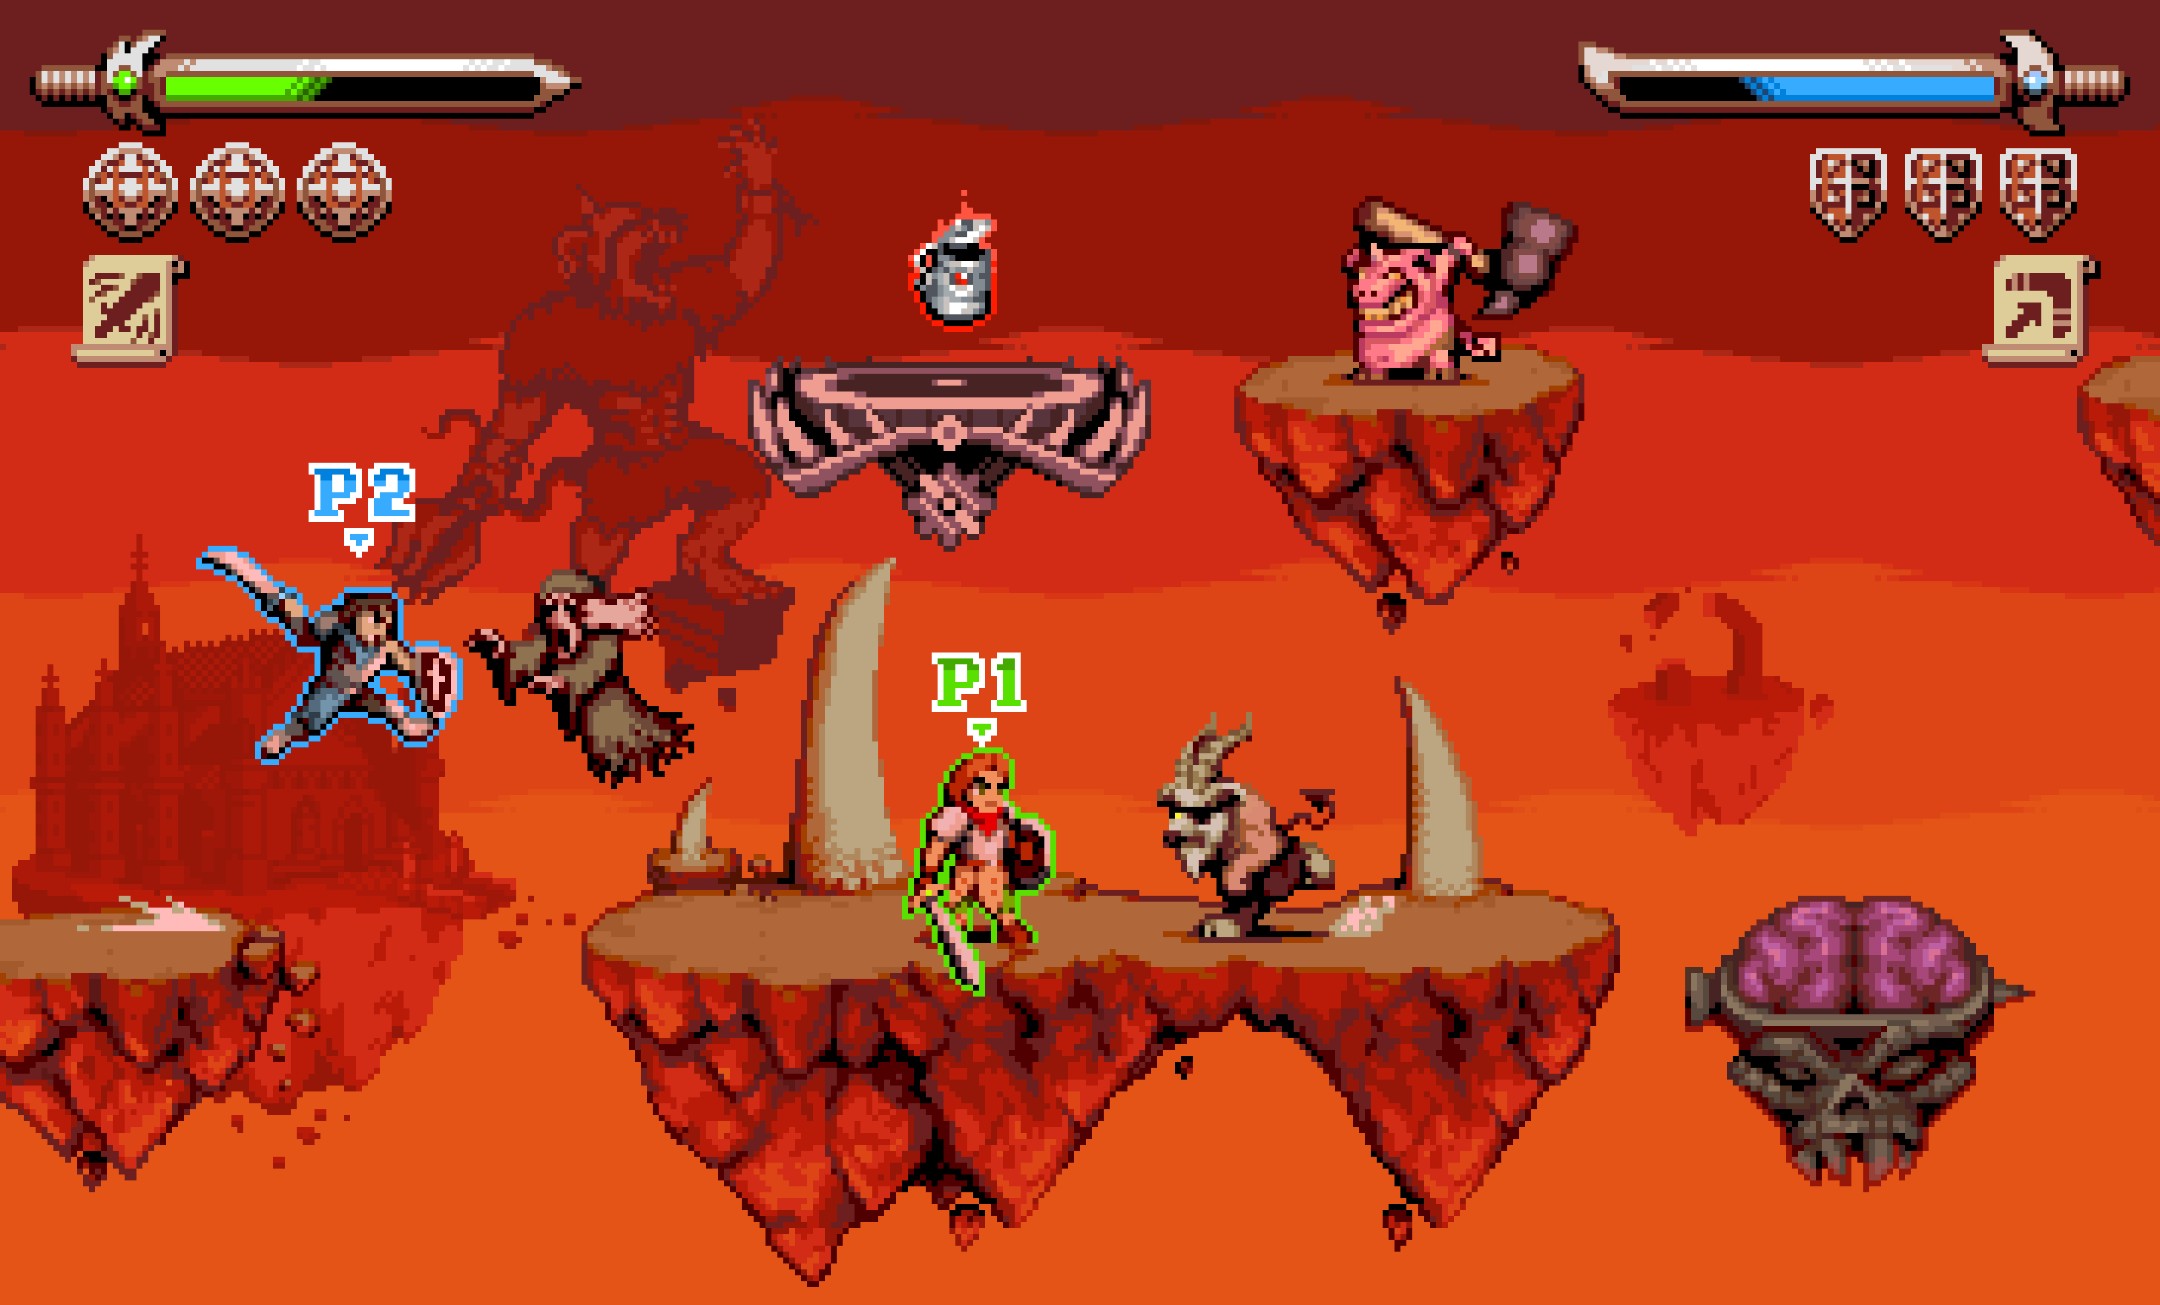
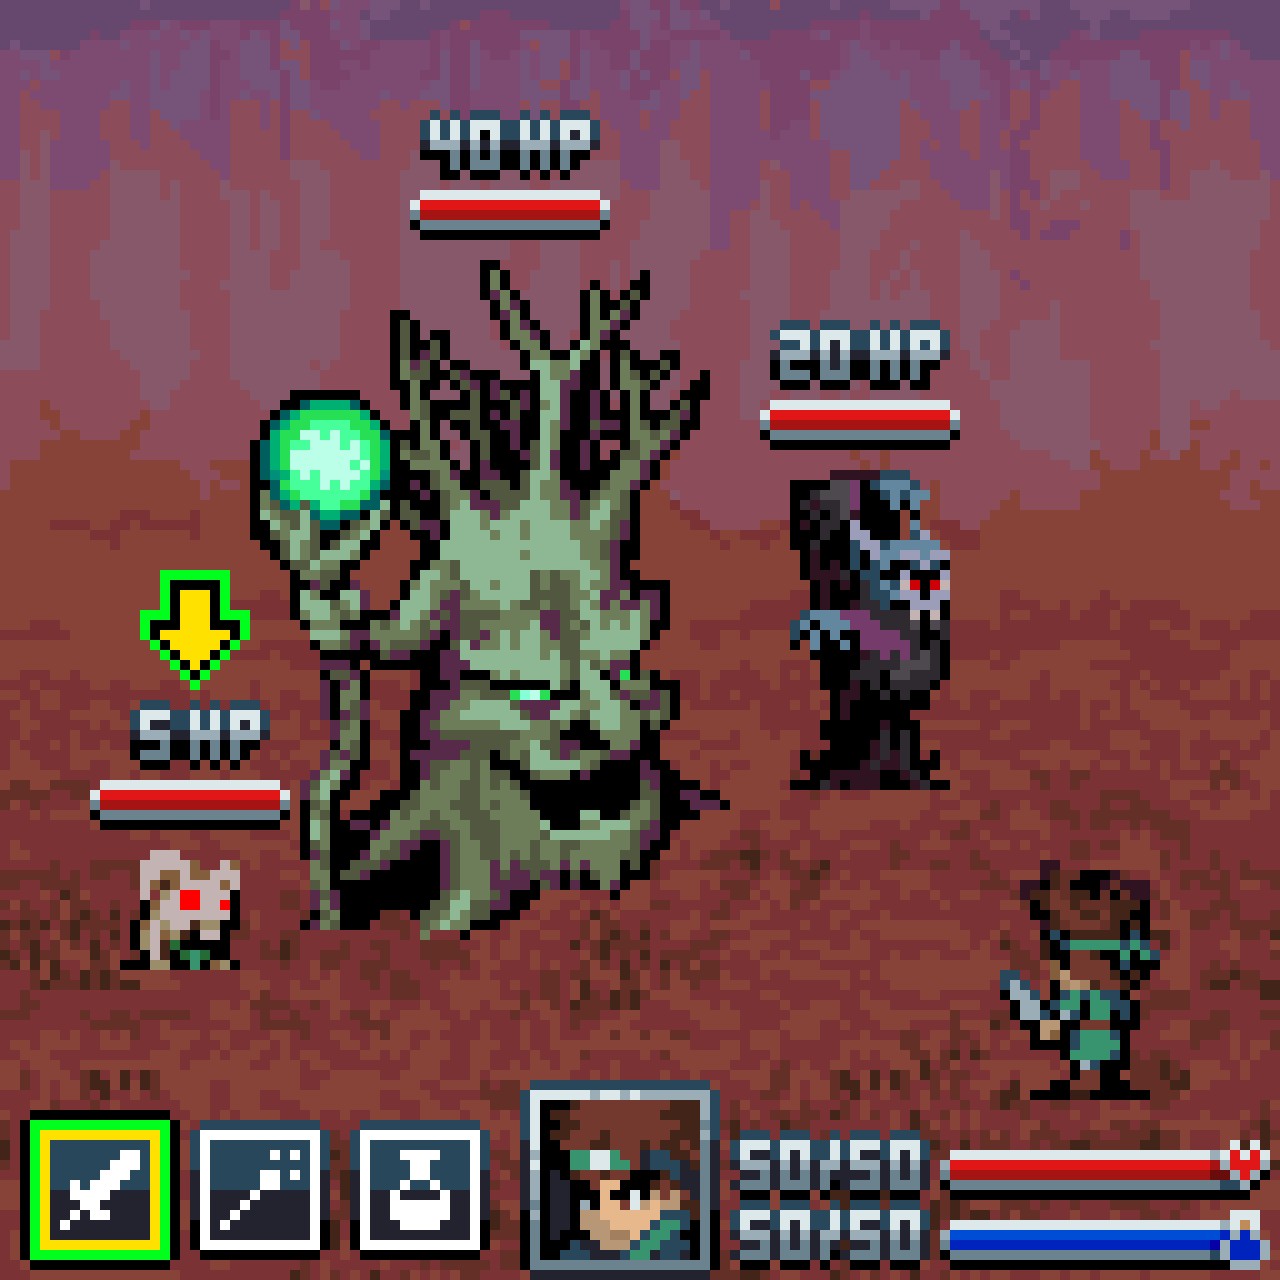
I technically have "Dark Souls" mockups too 😅 but since that's not what you want I'm just not going to showcase it.
itch.io Community » Game Development » Help Wanted or Offered · Posted in [Art][Paid]Looking for 2D platformer tileset artist
I've made a post about looking for work just yesterday. Can you please read it? All the information is there. My portfolio, my contact info, etc. My rate is $20 per hour. I also think 48x48 pixels is the sweet spot for sprites for being detailed enough but not too much expensive work.
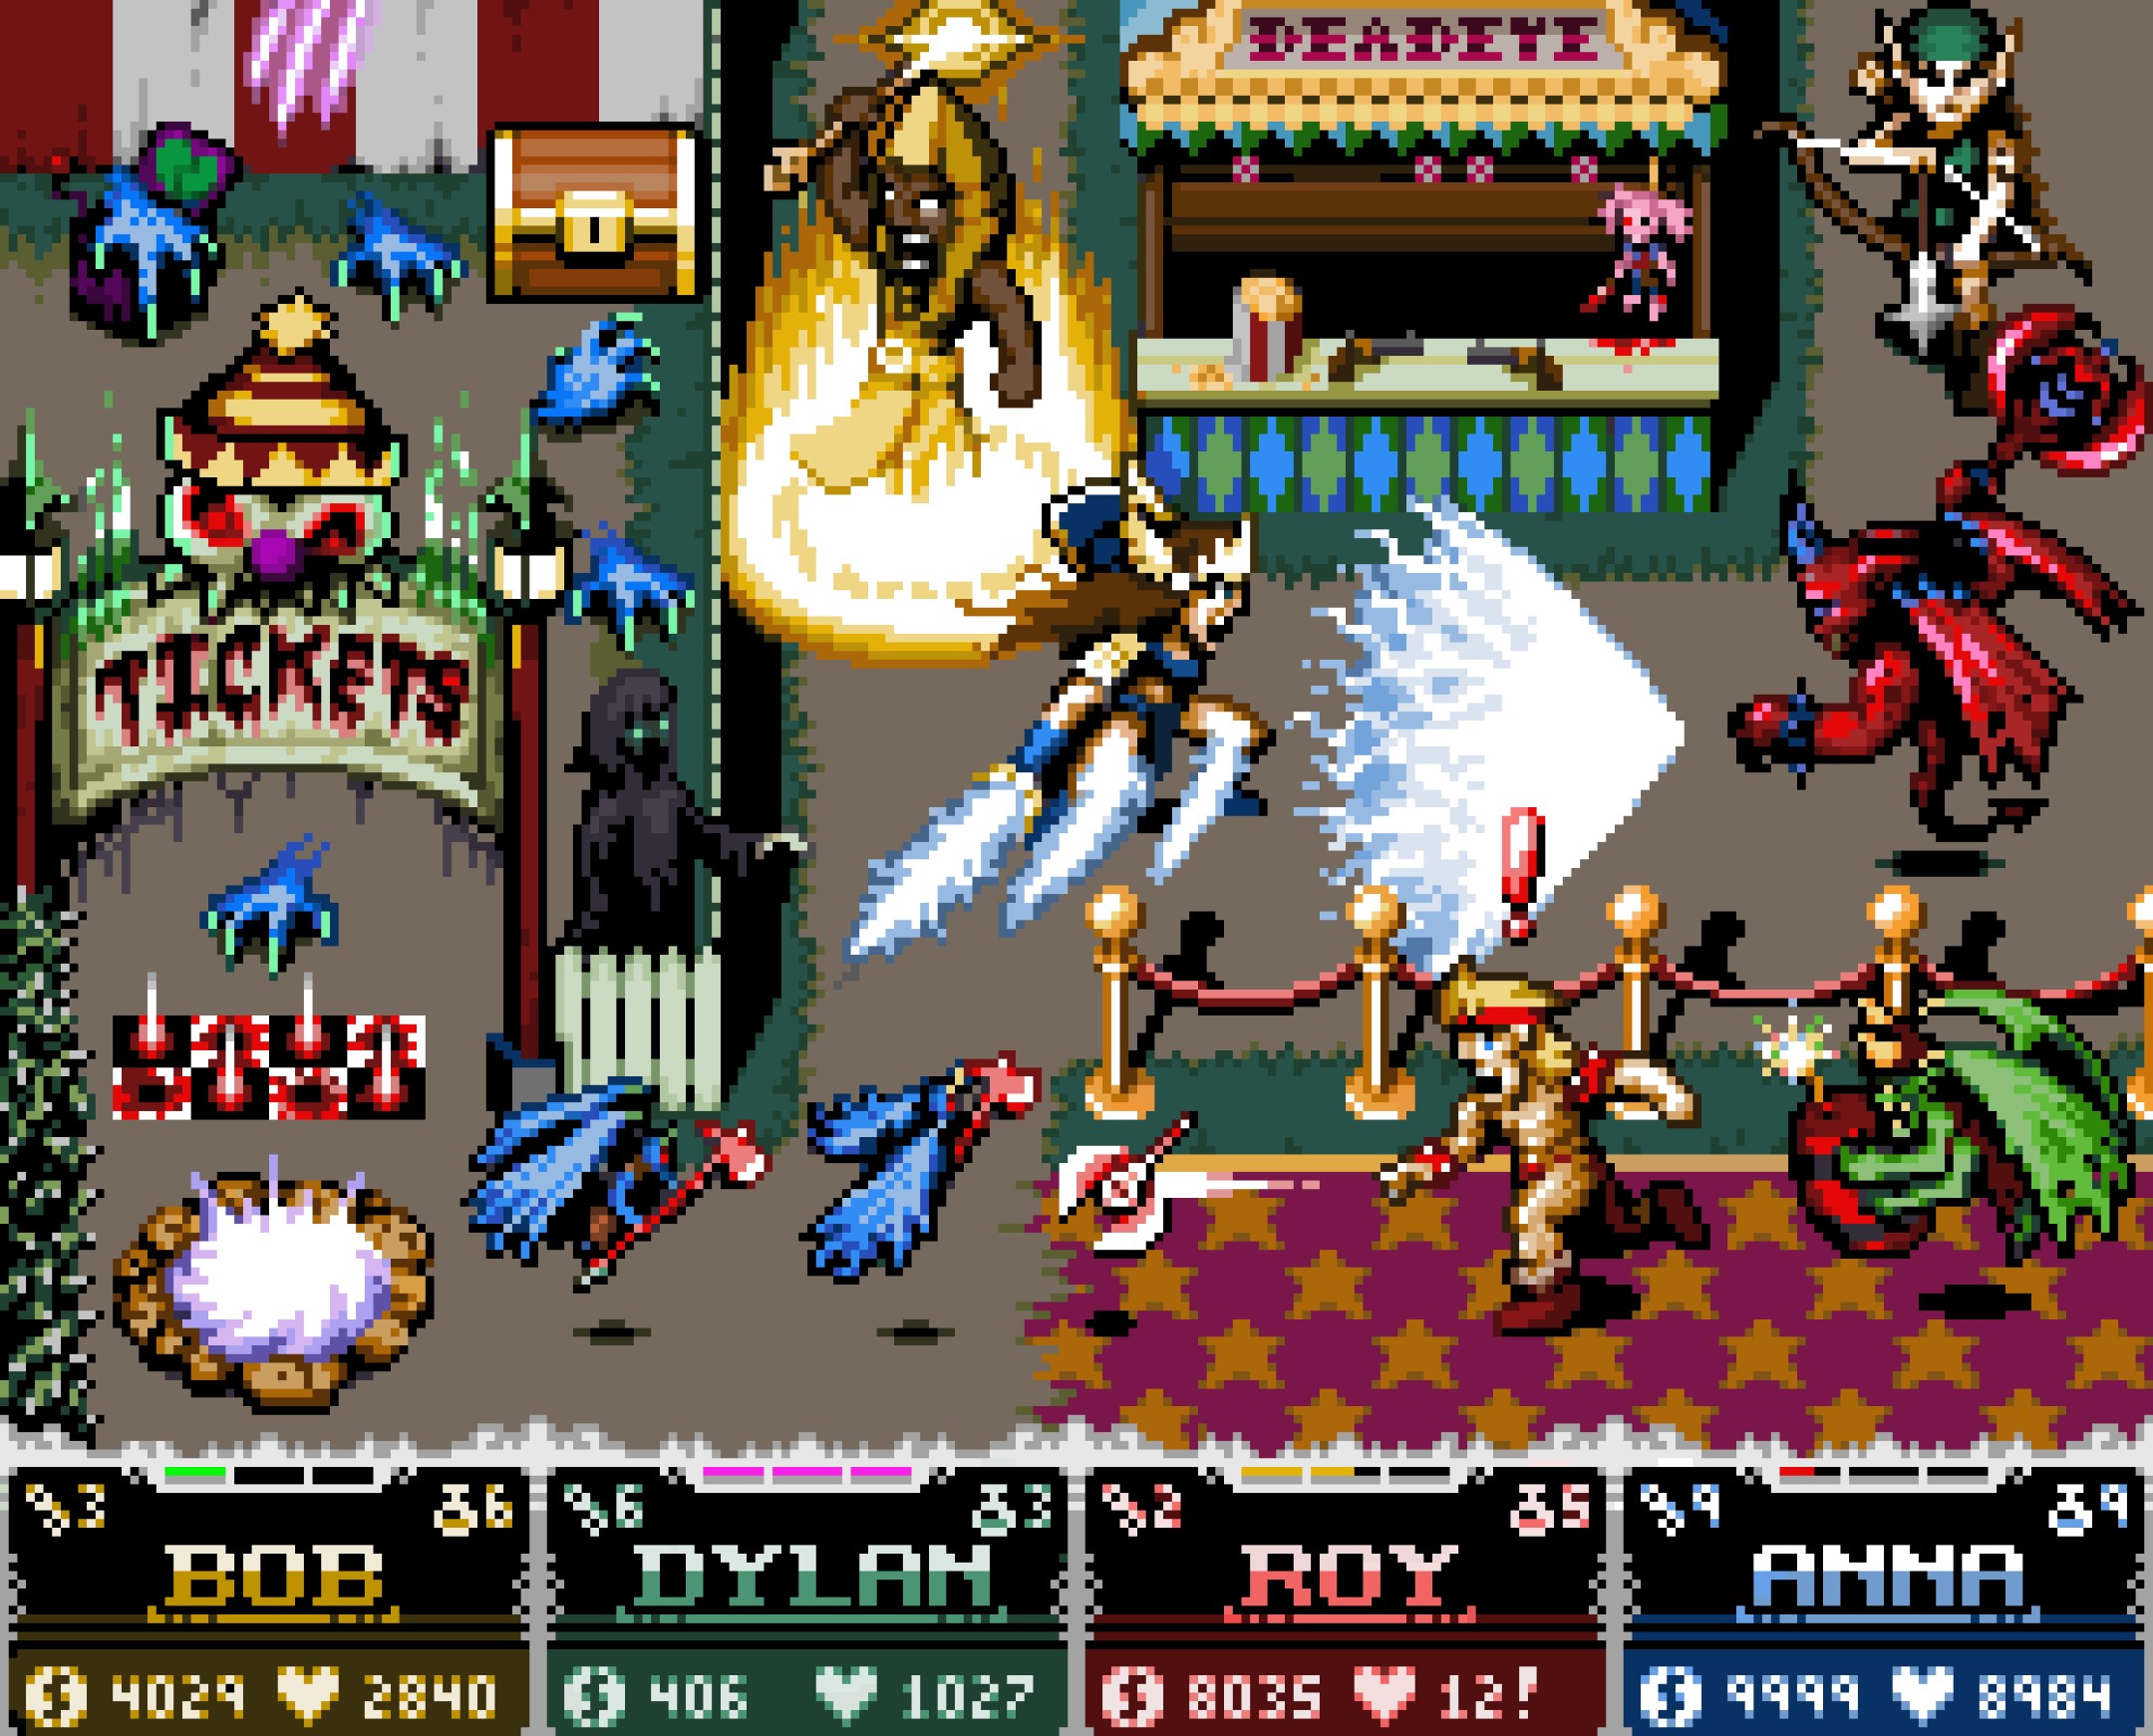
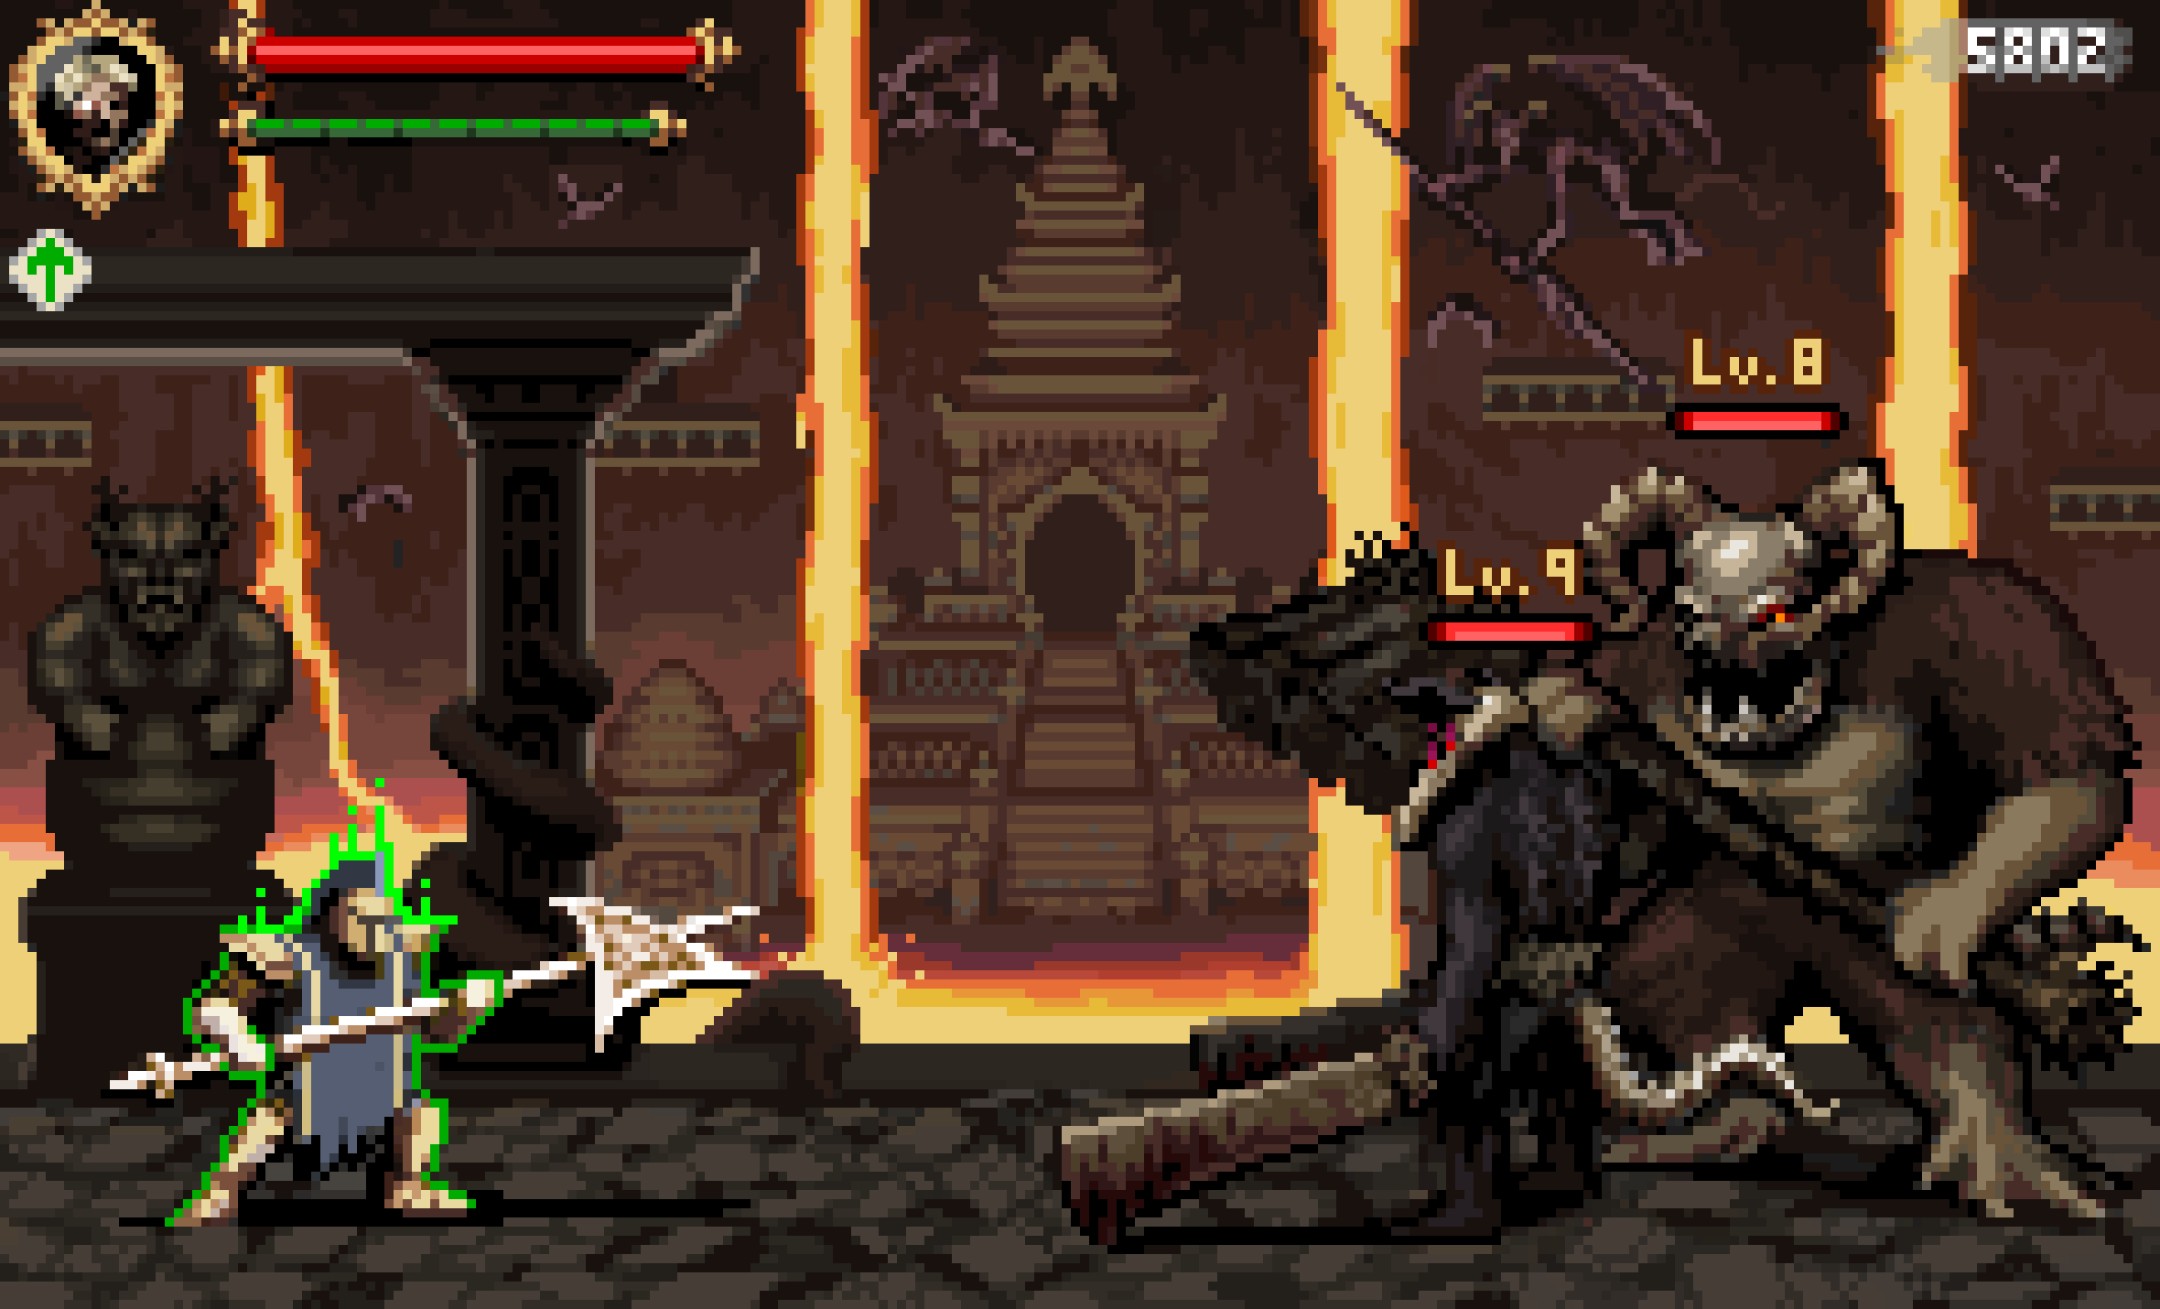
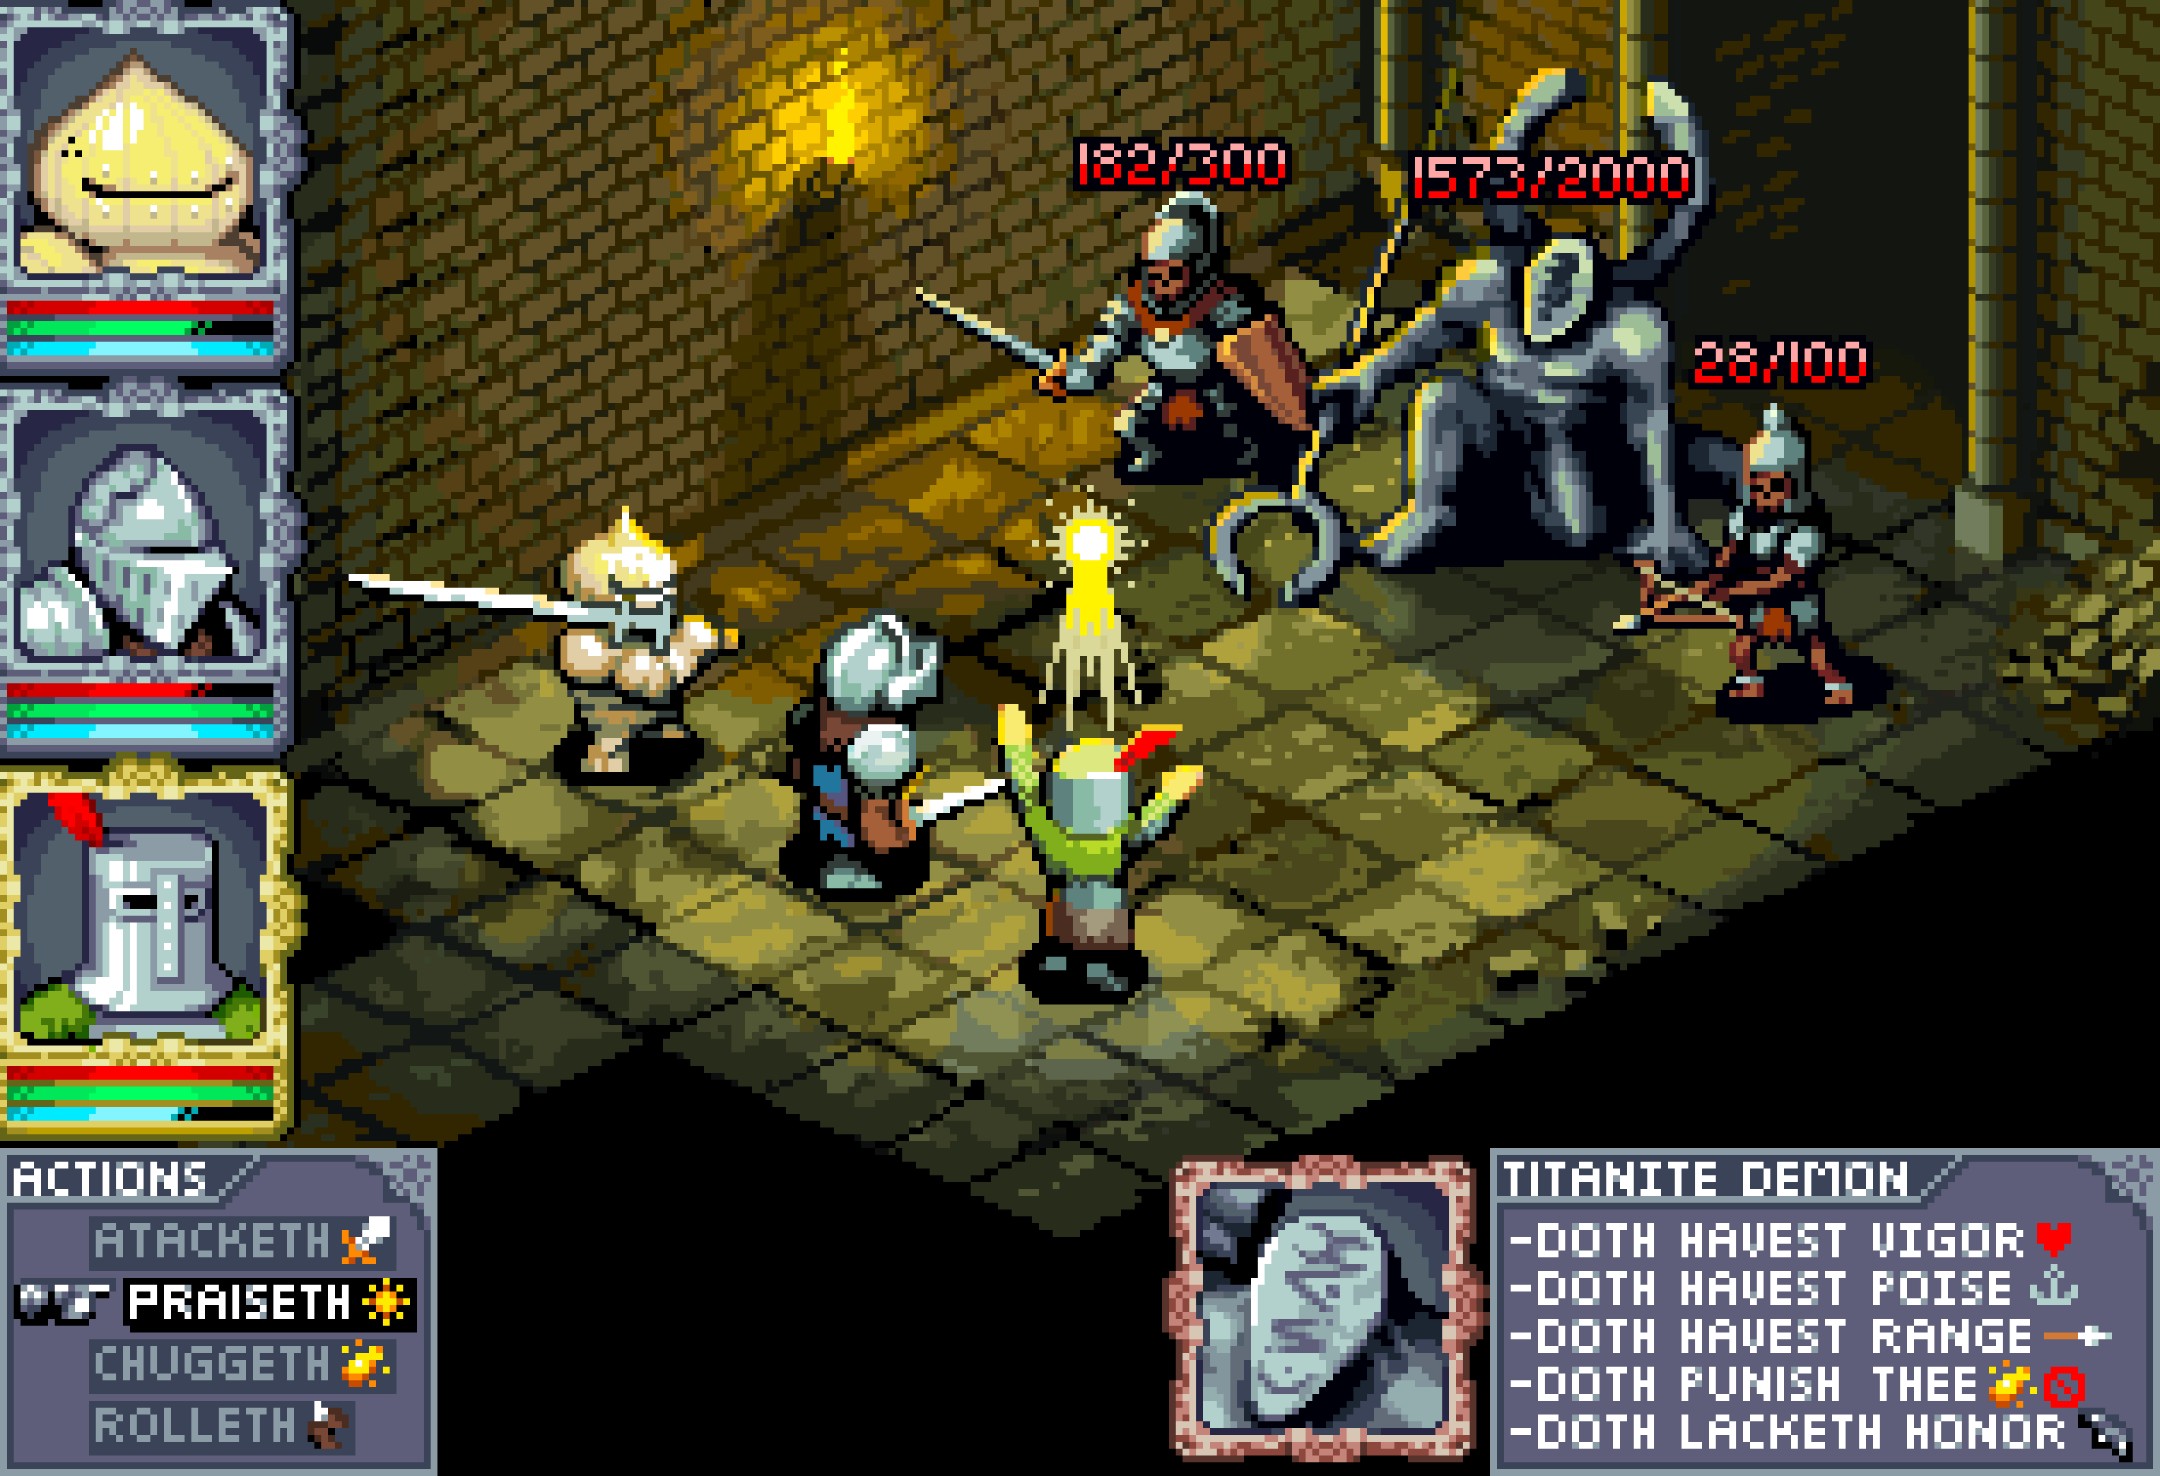
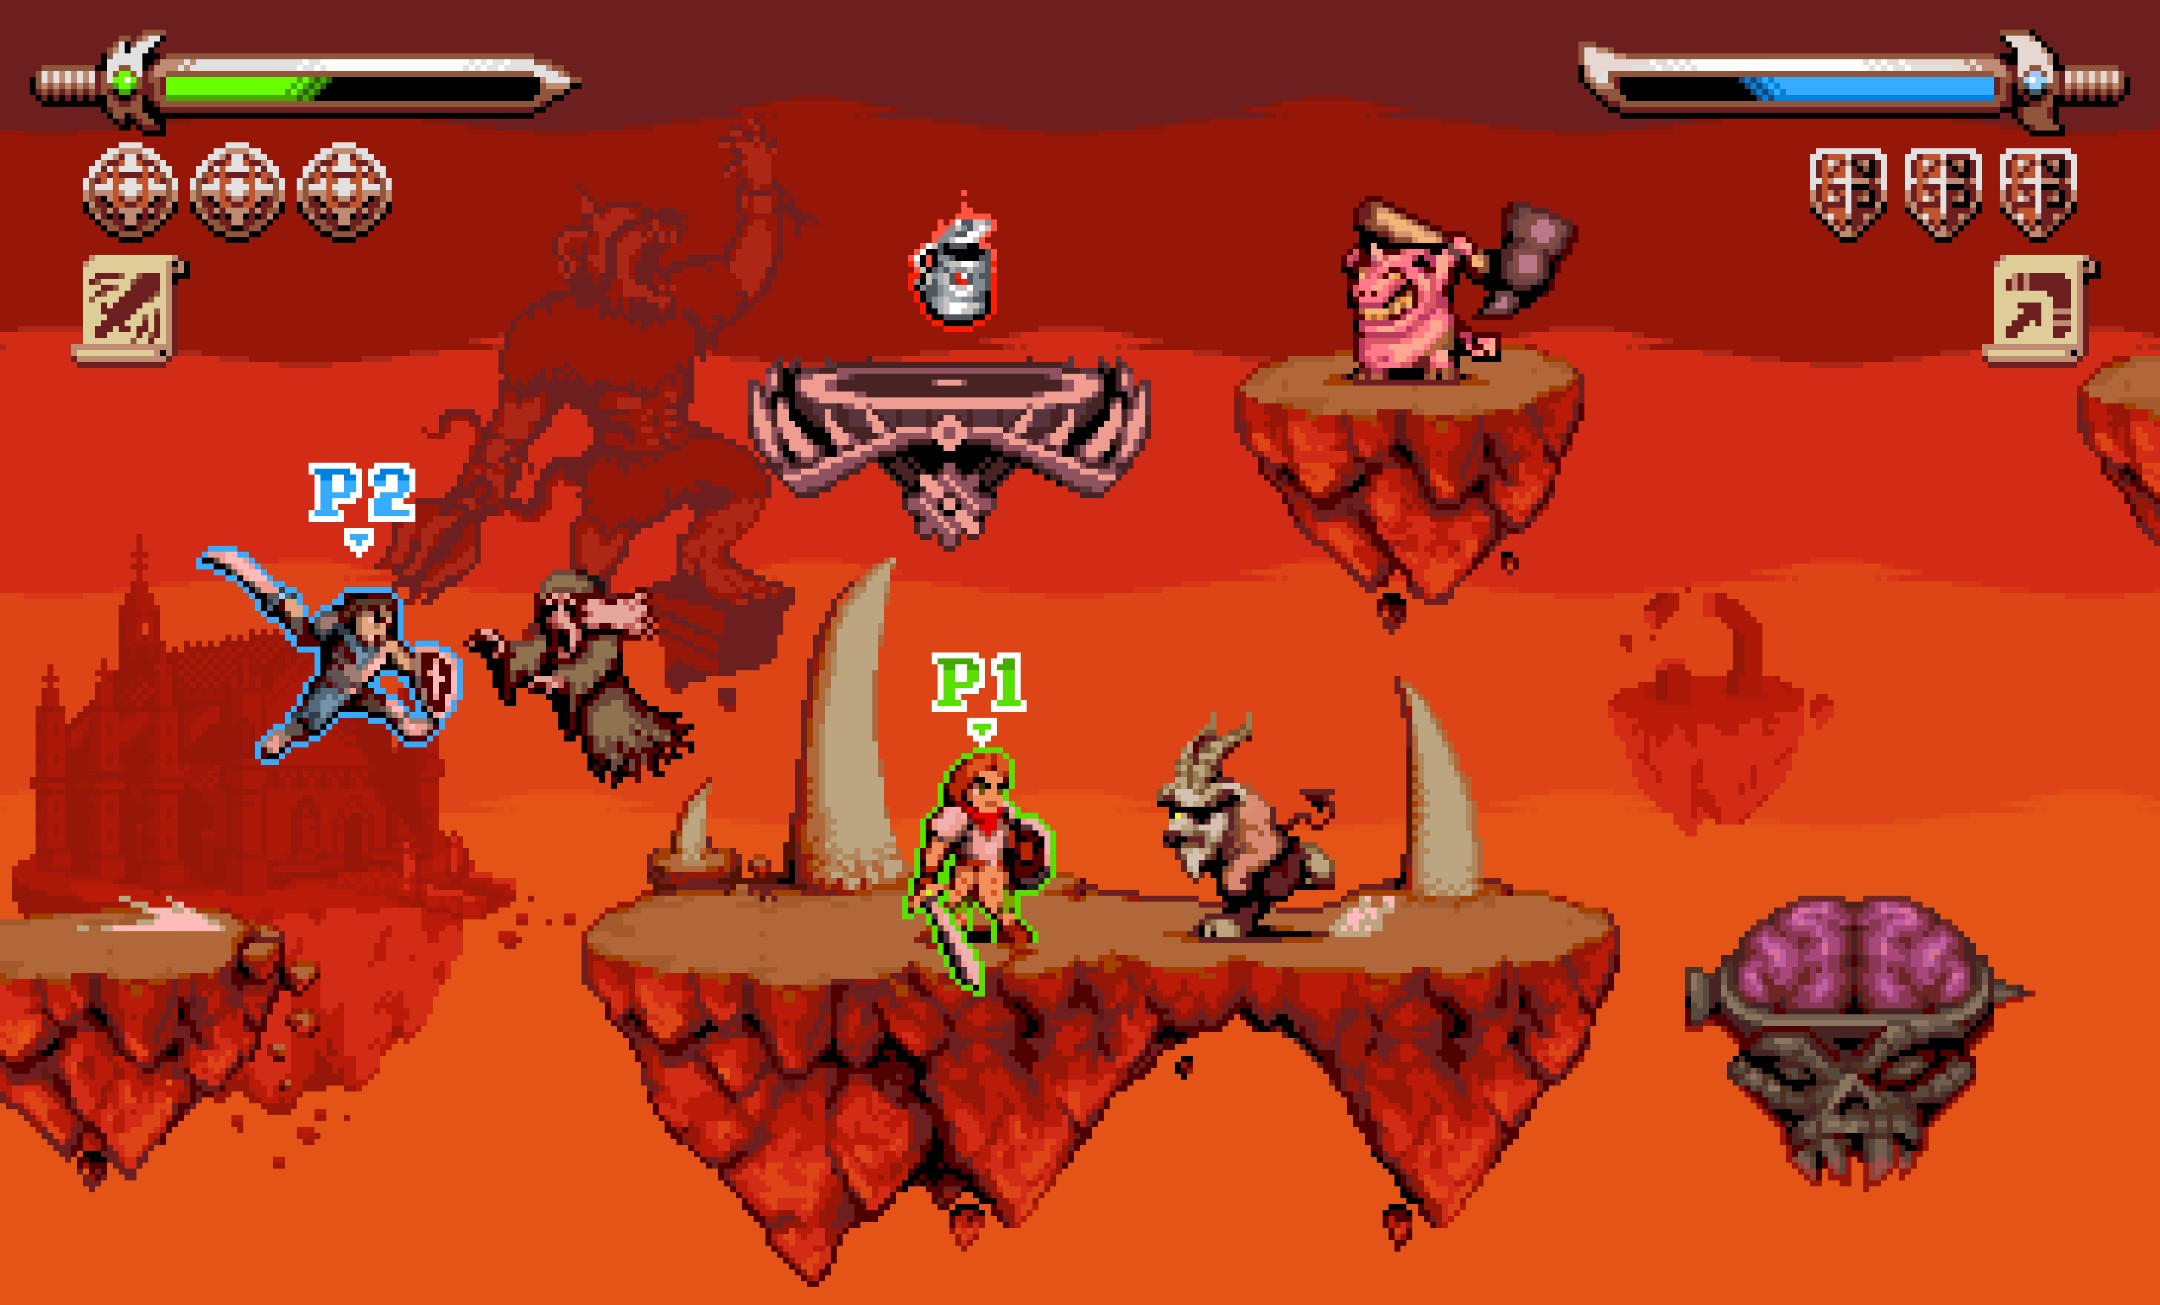
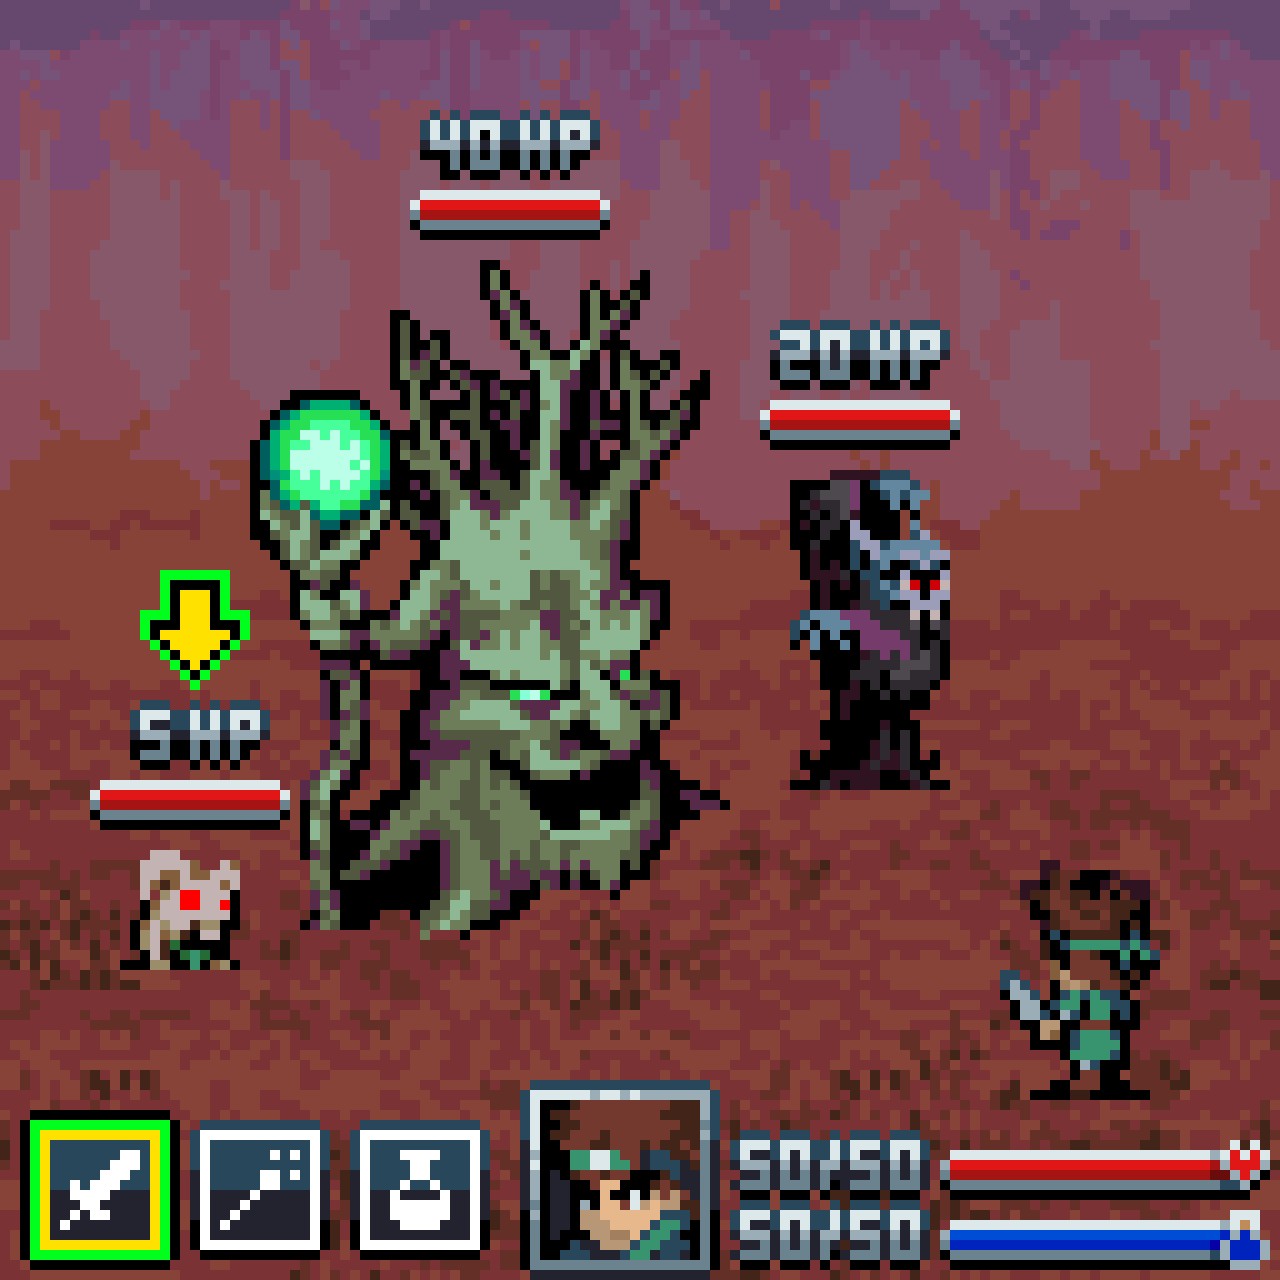
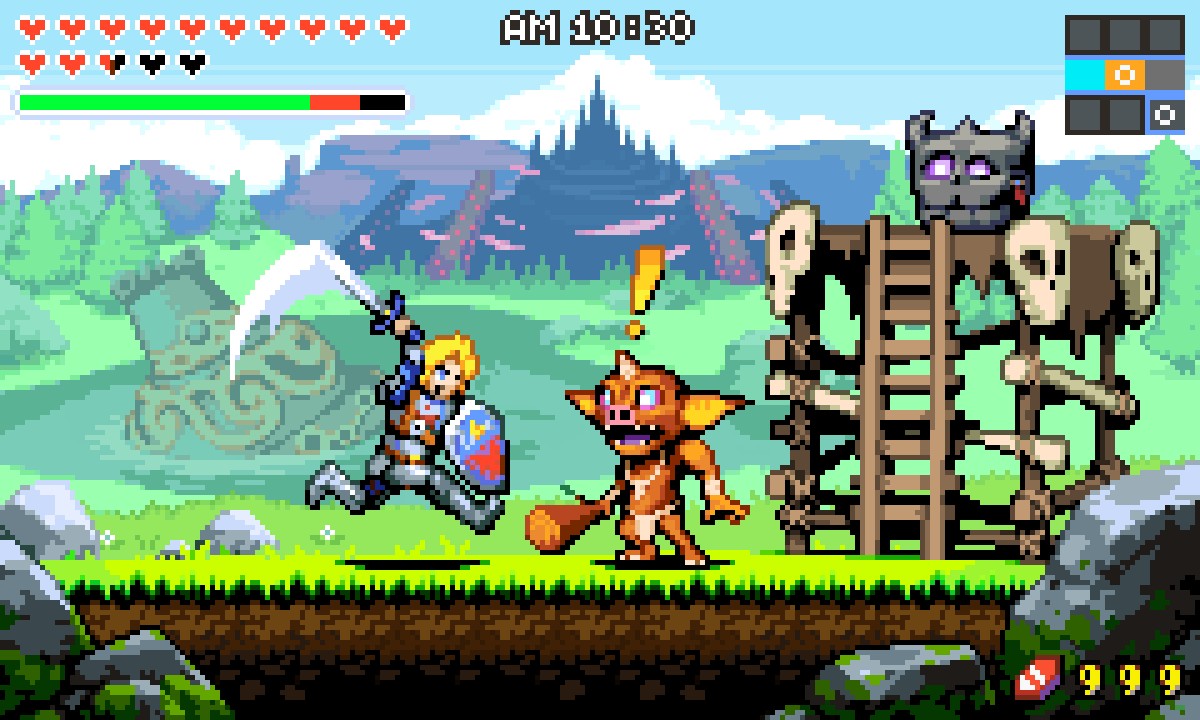
These are some of my highlights.
itch.io Community » Game Development » Help Wanted or Offered · Posted in [Pixel Art] [Zelda-like/Puzzles] [1-2 week jam]