Indie game storeFree gamesFun gamesHorror games
Game developmentAssetsComics
SalesBundles
Jobs
TagsGame Engines

Topic to post tutorial! Sticky

A topic by WoditorTrans2000 created 63 days ago Views: 82 Replies: 5
Viewing posts 1 to 8
Host (5 edits)

Post your tutorial here!

That way, others peoples can learn more about the Woditor and some tricks!

Please include a title in your post so I can edit it later and add it here.

Current tutorial posted.

  • Creating a new Data folder
  • Turning off the menu (Base RPG System)
  • Playing an animation with Auto-Pattern Switch 
  • Base RPG System: A Brief Introduction
  • Special Character (Shortcut)

Tips: Having difficulty to find the post? Try using the Web browser's search function! (Ctrl+F) 
Host unlisted this topic
Host (2 edits)

Creating a new Data folder

In Woditor version 3, it's possible to create a new data folder.


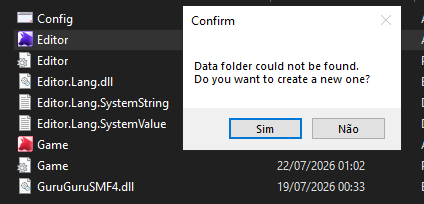
When running the Editor without the Data folder on the same location. A popup will appears asking if you like to create a new one.

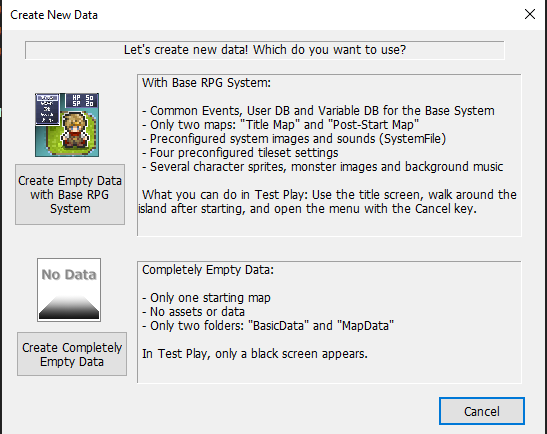
Clicking in the yes option will popup another window.

Here you can choose either both option.

Choose Empty Data with Base RPG System for a system already made, meaning it includes Menu (Skill, equipment, item and others), battle system, xp system and others.

Choose Completely Empty Data to have more creative freedom. However! All the stuffs mentioned previously in Base RPG System, it will not be included, meaning that you have to create from scratch. (And it's not easy!)

Host (1 edit)

Turning off the Menu (Base RPG System)

You ever wish to make you own menu, while still using the Base RPG System?

You can actually do it and it's very simple.

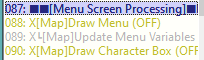
On the Common Events and look for the following:

All you need to do is write something, like I did here! Do it in common 88 and 90.

Now! When you press esc to open the menu. The game will freeze, but nothing will appears on the screen! 

Perfect, if you don't want to modify the common event and have a chance to break it.

Should notice through that the sound still play.


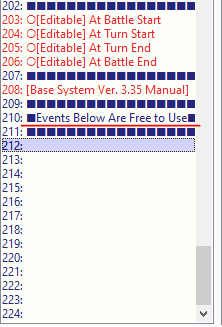
Lastly, if you going to create your own menu, please do it here:

These empty events can be used freely! Just like 210, it says.
Host (6 edits)

Playing an animation with Auto-Pattern Switch

How to play an animation? You perhaps used the character sprites and by changing the direction sprites with route command, you made a very simple animation. (or not)

It works! Downside... very limited frames.

There's however another way, it allow more frames to be played.

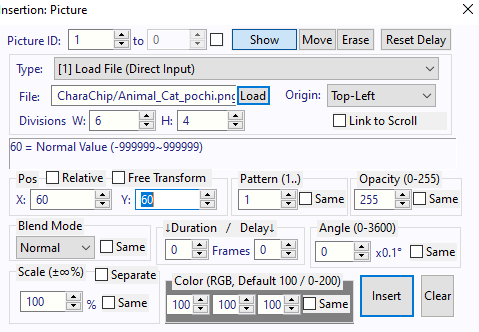
First, let show a random sprites (with 8 directional pattern) on the screen, with the picture command.

Make sure everything it exactly has showed above!

Now, when you test it, a cat or other sprites will appear in the upper corner.

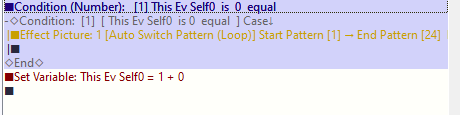
Insert a condition (number) command, it can been any self variable.

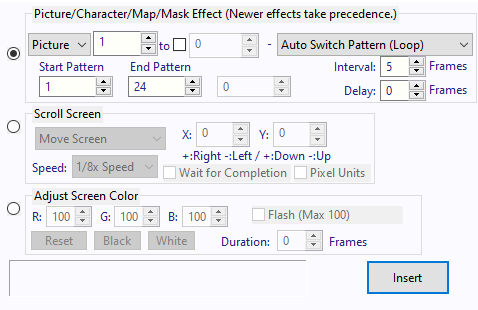
In the condition branch, we put an effect command.


Once again, make sure everything is exactly as showed above. 

Then add a set variable at the end, it should look like this;

After this, when you test it. The sprites will be played.

But how?

Did you notice on the Picture command, when set the division as W:6 and H:4?

It essentially divided the sprites images in 6x4. Why? Because the Sprites sheet is 6x4!

And the Auto Switch Pattern allow to switch the "frame" of the sprites! Notice that it switch to left to right! (You can also change on the "Pattern (1..)" in the Picture command.)

If you know how to make a Sprites sheet, then you can play any animation you want! By to way, The Sample Game use it for attack and effects.

*The animation count is done by left to right, meaning the first sprite sheet on the upper-left corner is number 1!

Host relisted this topic
Host

Base RPG System: A Brief Introduction

What's the Base RPG System?

The Base RPG System is a ready-to-use system with features found in a typical 2D RPG!

Features include: Menu (items, skills, equipment, and more), Battle System, Shop System, Leveling System, and more.

The system consists of commons events and databases. The system's “code” consists of various commands.

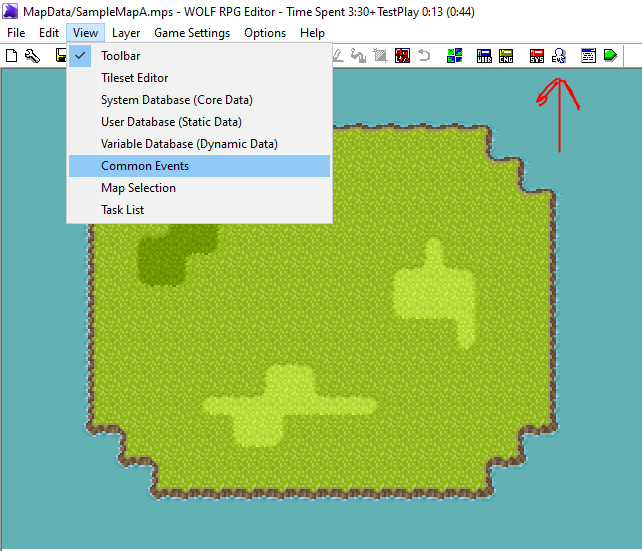
If you want to check how it works internally, do the following:

When you click, a window will appear where you can see the code. If you're a beginner, you don't need to do anything! And don't even think about in adding or removing something!

Now let's learn how to use it, as an example: 

Giving a item

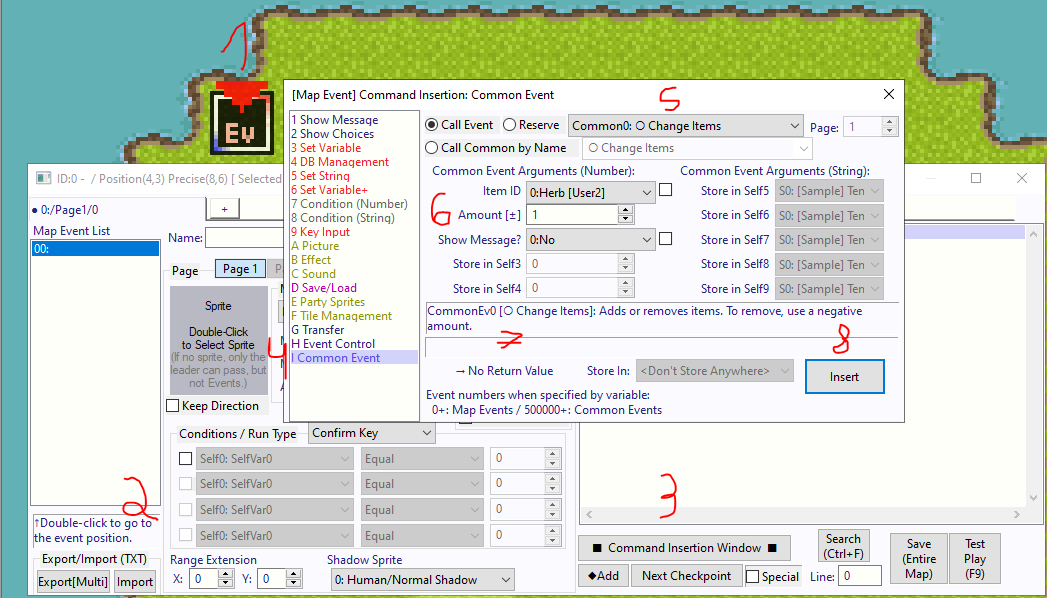
  1. With the events layer selected (press 4), double-click an empty space to create an event, or right-click and then create a new event.
  2. Now, double-click the event; this will open a window where you can set the sprite, the conditions, and, most importantly, the code
  3.  Click the Command insertion window button.
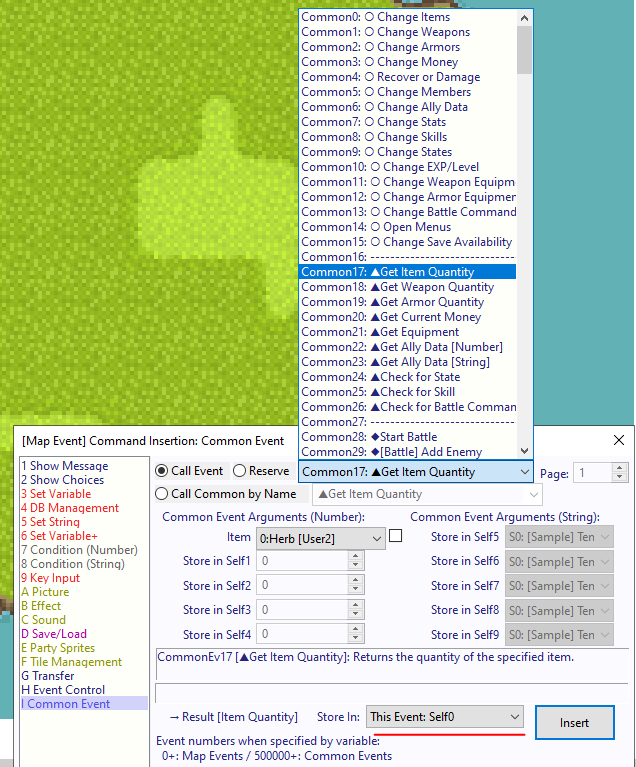
  4. When you do this, you'll see a list of commands on the left. Look for the “Common Event” command (the last one on the list).
  5. Do you see the option with an arrow on the right? That's where you choose other commons. But we want to give an item, so choose “Common 0: O Change Items.
  6. The other options below the arguments are parameters that define what will happen when the code is executed.

Item ID = Which item will be added or subtracted.

Amount +- = Value of the addition or subtraction.

Show message = Whether a message will appear.

   7. Each common will have a note; please read it so you can understand them!

   8. When you done, click insert!

Now set the condition to the Confirm Enter, add a sprite, and test it (F9)!

When interact with the event, you will get a item!

In some commons, you'll need to choose which variable the result will be stored in. So don't forget to look for it!


Warning! The Commons 0 through 43 are the ones for which you want to make a call event; the rest are system codes!

OK! Now let's move on to another important point!

Database

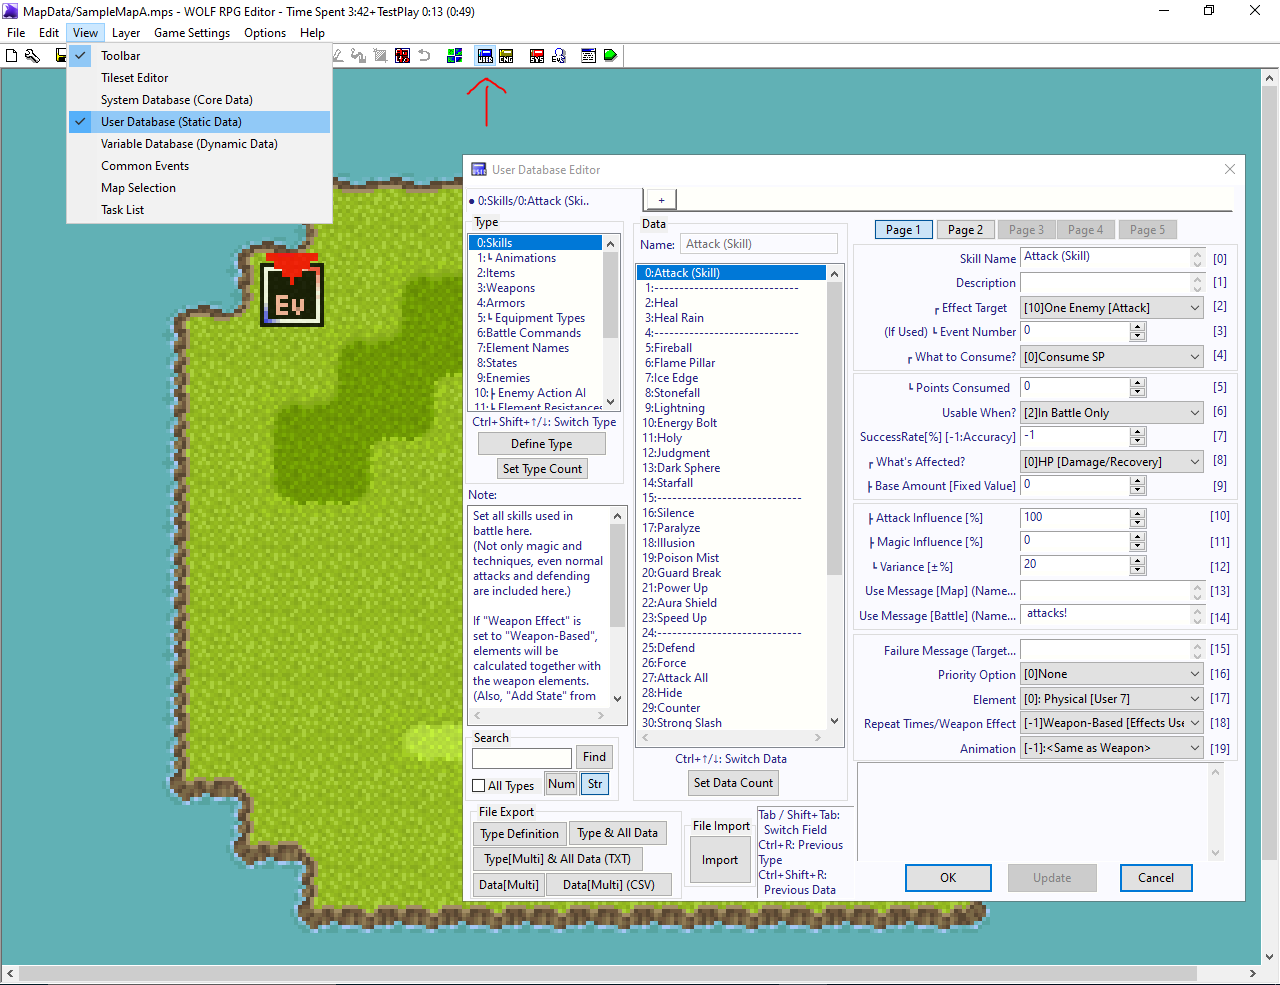
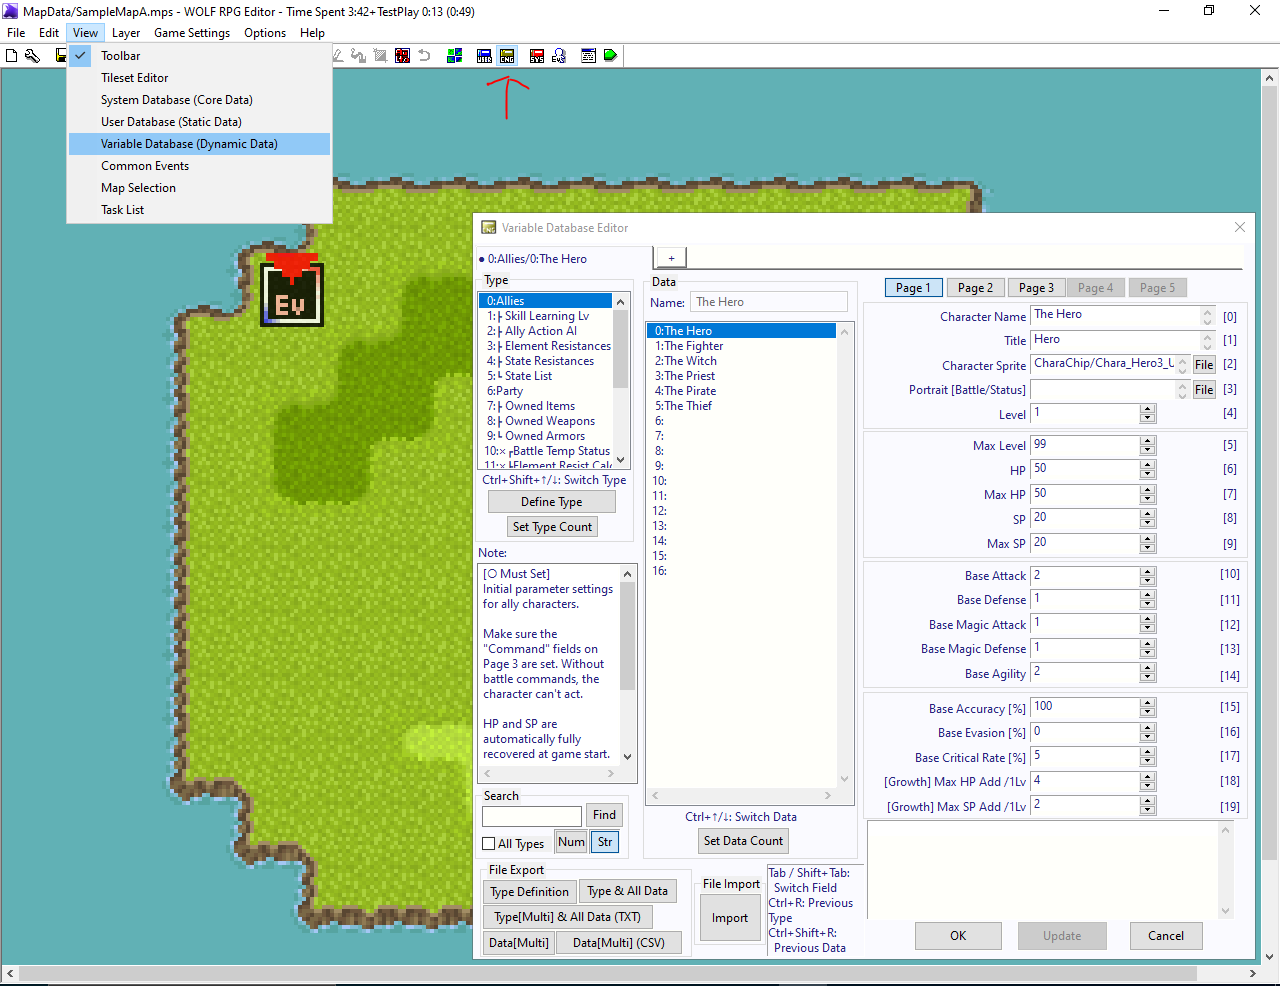
If you want to create an item or a skill, disable a command, or set a character's sprite, you'll need to do so in the database.

UserDatabase ( To set item , skill, weapons, armors and others)

To create a new item, click the “Set Data Count” button (below the data list). Then, set the attributes on the right.

VarDatabase (To set Character sprite, title and name)


This database also stores information about HP, SP, states, owned items, and more.

There is a note for each type (below the list of types); please read it!

Oh, right, that's it! I hope this helps you understand the system, even if just briefly.

Host (1 edit)

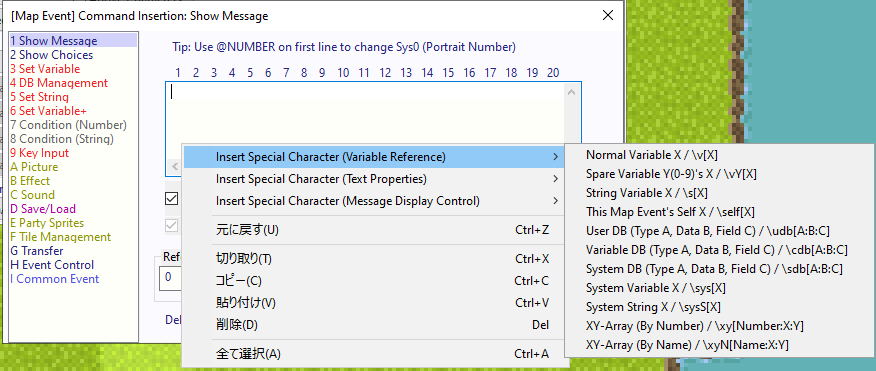
Special Character (Shortcut)

Special character allow you to read specific variables, or change text proprieties.

If you used the Woditor version 2, then you probably remember that you could open a window showing a list of all Special Character. However since the version 3, you can't do it anymore.

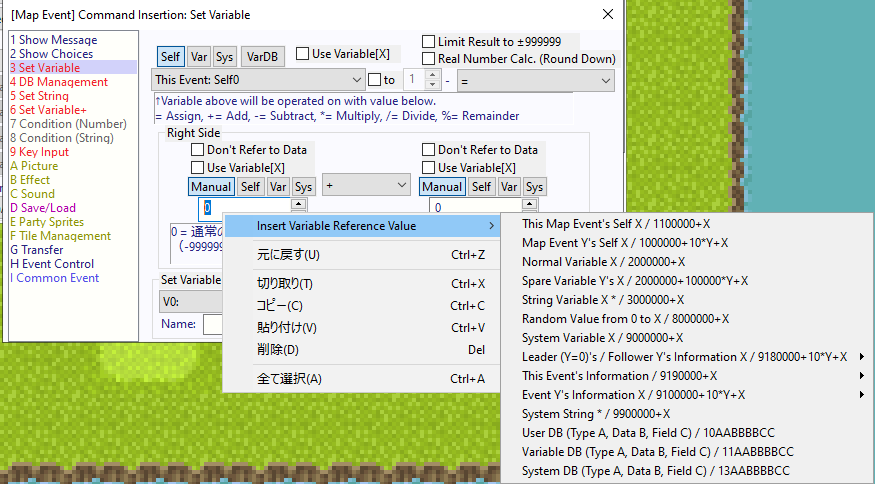
You now need to right-click on the field where you insert number or string.

In field where you put a string (Show text, Show Choices, Set String).

In field where you put a number.